Knit Norwegian pattern - Instructions for simple Norwegian pattern

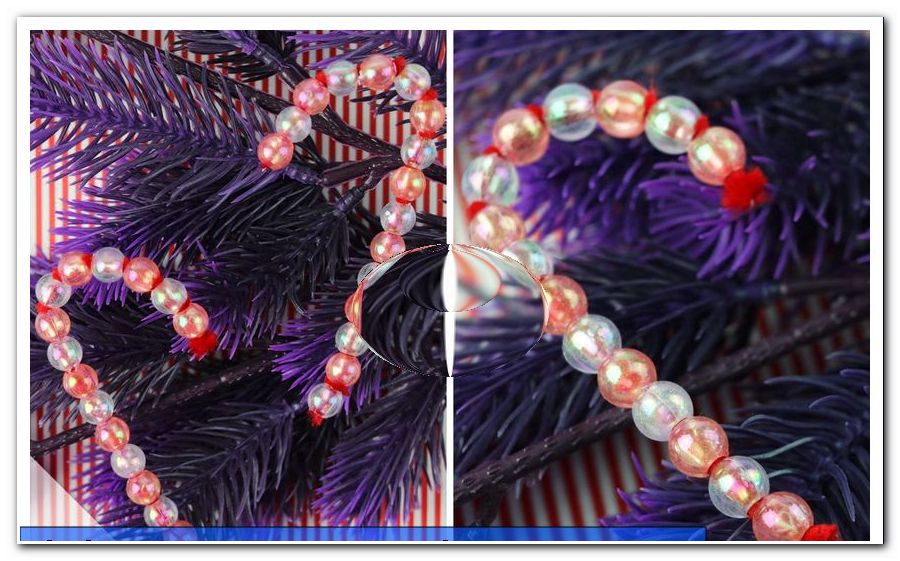
Have you ever admired the pretty, multicolored patterns on Norwegian sweaters ">
Have you never dared to try a multicolored Norwegian pattern? In our knitting instructions we show you step by step how the colorful shapes are created. You do not need any previous knowledge as right and left stitches. Finally, we will explain how you can design a Norwegian pattern yourself. The graphic patterns can not only decorate sweaters, but also look great on hats, gloves, pillow cases and Co.
content
- Material and preparation
- Knit Norwegian Patterns manual
- casting on
- Knit row
- color change
- knitting chart
- Norwegian patterns knit in the round
- Ideas for variations
- Design the Norwegian pattern yourself
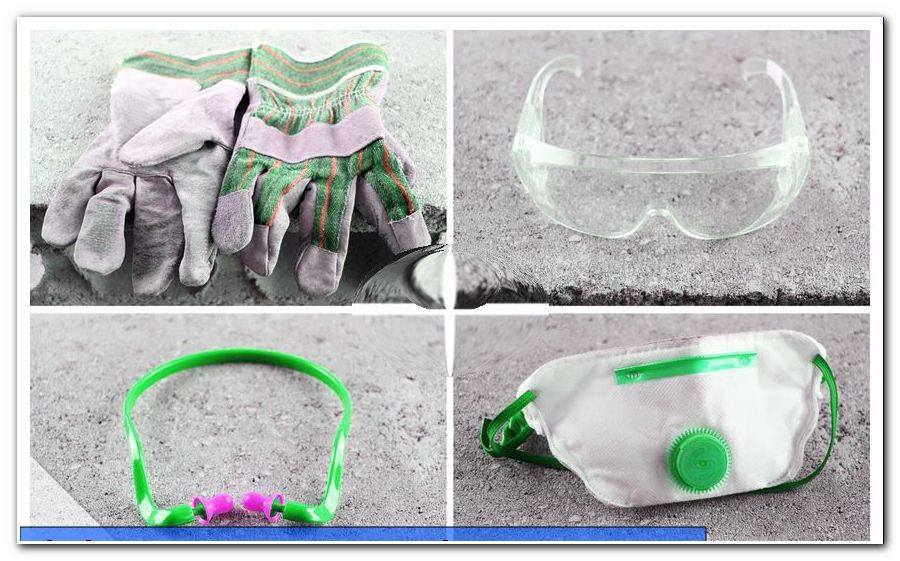
Material and preparation
Use a smooth yarn with no effects for the Norwegian pattern, i.e. no fleece wool or the like. A medium thickness is ideal for practice, suitable for needle sizes four or five. You will usually find this information on the banderole of your yarn. As soon as you are a little more experienced and want to knit more delicate Norwegian patterns, you should use a thinner thread and appropriate needles.
In any case, make sure that all yarns used have approximately the same length so that you can knit them together well. It is ideal if you use the same yarn in different colors.
You need to knit the Norwegian pattern:
- smooth, medium-strong yarn in two colors
- matching knitting needles

Knit Norwegian Patterns manual
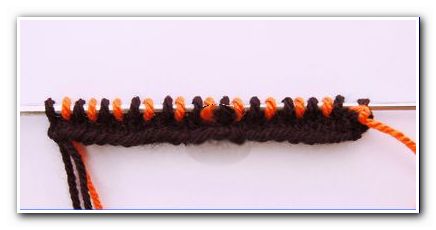
casting on
Cast on a stitch size in color A that is divisible by four. Color A is the background color (black for us) and color B is the color of the motifs (here orange). You can cast on two edge stitches for clean edges. For example, knit the warp edge . To do this, slide the first stitch in each row onto the right needle without knitting it. Put the thread before work. Knit the last stitch in the row in color A on the right.
Knit row
Knit a row of left stitches in color A before starting the pattern. You can either work the pattern according to the knitting instructions in text form or according to the knitting script recorded below. In both cases, knit in rows with an odd number (= back rows) on the right and in even rows (= back rows) on the left. This makes the front appear smooth on the right.
color change
Before the first row, tie the thread in color B to the one in color A. When knitting, carry both threads with you and work each stitch with the color specified in the knitting instructions . The thread that is not required skips one or more stitches. Be careful not to over tighten it to keep the knitted fabric elastic.
In rows you run the threads behind the work, in back rows in front. As a result, all threads are hidden on the back of the finished pattern. In the rows where you don't need color B, let this thread hang down on the side. If you would like to follow the written instructions, repeat the instructions in each row until all stitches have been knitted.
Tip: Keep a tally list so that you don't lose track of which row you knitted last.
1st row: 1 stitch in color A, 1 stitch in color B
2nd row: 1 stitch in color B, 1 stitch in color A

3rd row: completely in color A.
4th row: complete in color A.

5th row: 1 stitch in color B, 3 stitches in color A

6th row: 1 stitch in color B, 1 stitch in color A, 2 stitches in color B.

7th row: 1 stitch in color A, 3 stitches in color B

8th row: 1 stitch in color A, 1 stitch in color B, 2 stitches in color A.

9th row: 2 stitches in color A, 1 stitch in color B, 1 stitch in color A

10th row: 3 stitches in color B, 1 stitch in color A

11th row: 2 stitches in color B, 1 stitch in color A, 1 stitch in color B

12th row: 3 stitches in color A, 1 stitch in color B

13th row: completely in color A.
14th row: completely in color A.

15th row: 2 stitches in color A, 1 stitch in color B, 1 stitch in color A

16th row: 3 stitches in color B, 1 stitch in color A

17th row: 1 stitch in color A, 3 stitches in color B

18th row: 1 stitch in color A, 1 stitch in color B, 2 stitches in color A.

19th row: completely in color A.
20th row: completely in color A.

21st row: 1 stitch in color A, 1 stitch in color B

22nd row: 1 stitch in color A, 1 stitch in color B

23rd row: 1 stitch in color A, 1 stitch in color B

24th row: 1 stitch in color A, 1 stitch in color B

25th row: complete in color A.
26th row: completely in color A.

27th row: 1 stitch in color B, 1 stitch in color A

28th row: 1 stitch in color A, 1 stitch in color B

Repeat the 28 rows continuously. Before chaining off, knit a row from the right and wrong side in color A so that the pattern ends as it started.

This is how the finished pattern looks after one pass.

knitting chart
The empty boxes correspond to color A and the crosses to color B. Read the knitting text from bottom to top. Work in rows from right to left and back rows from left to right. Otherwise, proceed as described above.
Free download counting pattern | Knit Norwegian pattern

Norwegian patterns knit in the round
If you want to knit the pattern in rounds (with a circular needle or double pointed needles), read the complete knitting font from right to left. If you want to follow the knitting instructions, work through the back rows starting from the back. In both cases, only knit right stitches and carry the threads behind the work. You do not need edge stitches.
Ideas for variations
1. Knit the Norwegian pattern with three or more colors using different yarns for color B. The pattern described in these knitting instructions is divided into several motif groups, which are separated by rows in color A. You can see this clearly in the drawn knitting font . For a colorful pattern, knit each motif group in a different color.
2. You can achieve an interesting effect if you use color gradient yarn for color B.
3. For larger areas, for example on a sweater or a cushion cover, the Norwegian pattern works well as part of a stripe pattern. Knit stripes in different colors and work in between a piece of Norwegian pattern. You can also use only a part of the pattern described here, for example the diamonds that extend from row five to twelve.
4. You can also find instructions for a knitted snowflake from us.
Learn to knit Norwegian patterns - technique and instructions
5. In these knitting instructions we show you how to knit socks in Norwegian pattern.
Knitted Socks: Knit Norwegian Patterns Free knitting instructions
Design the Norwegian pattern yourself
Draw a knitting font like the one shown above and then work as described. If you want, you can use more than two colors per row. Experienced knitters work Norwegian patterns with up to six colors. However, the more balls of wool you use, the stricter you have to make sure that the threads do not get tangled. Let your imagination run wild and combine shapes and motifs as you wish.
However, you should note the following when designing:
1. If you want to knit the pattern in rows, you should or should not use each color over an even number of rows. This means that the threads that are not being used always hang down on the side where you will need them later. The entire pattern should also have an even number of rows so that you can easily repeat it after the first pass.
2. You can make the pattern as wide as you want. However, make sure that the beginning and end are seamlessly aligned so that you can repeat it several times in each row. Count the number of stitches in your pattern and cast on a number of stitches that can be divided by this number.