Tinker Birthday Party Invitations - 7 ideas

- 1. The age as a map
- 2nd puzzle invitation
- 3. Simple instructions
- 4. Balloon invitation
- 5. Invitations to theme parties
- 6. Butterfly invitation
- 7. Invitation to the Pirate Party
What is more beautiful for a child than a child's birthday? Already weeks before the excitement is great and is planned and organized, provided that the child is old enough. A nice invitation card is part of the preparation. Of course there are dozens of pre-printed cards on the market, many of them very nice, but there's nothing like a tinkered invitation. Since not every mother or even larger siblings have unlimited time, you can keep the matter simple or shorten it. A great help is, for example, when the text is created once on the computer and then printed many times. This simplifies the invitation and anyone can read it without having to decipher hieroglyphs.
In addition to the design of an invitation card for children's birthday, of course, the is enormously important.
It consists of several components:
- Short introductory text to the reason of the invitation
- Date of the event, day, prehistoric times, even end / due to collection or delivery)
- place
- Possibly. the motto of the party
- Possibly. dress code
- Possibly. what to bring
- Note until when a response is expected
- Last sentence, how ... I'm looking forward to seeing you "
- Name or signature
- It is also always favorable to indicate whether the children should be brought or brought by the parents, or whether they are chauffeured by the family of the birthday child.
1. The age as a map
It can not always be assumed that all children and their parents exactly know the age of the birthday child. A card in the form of the number is therefore a good idea. You do not need much, just plain printing paper, a color box, scissors, some stickers, decals, a motif punch and some ribbon to tie.
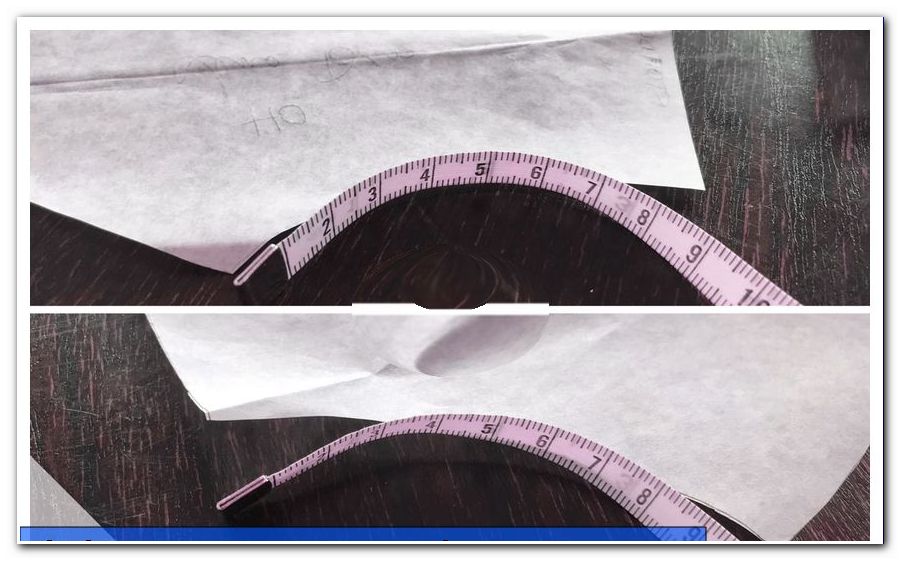
 Step 1: Paint the number on paper. Since hardly anyone can paint a fairly large number of hands without them becoming uneven, one can simplify the work. Simply select the number in a beautiful font on the computer, in Word or another writing program and paste it into a blank document. Then increase the number as large as the invitation card should be. Now mirror the number and put both numbers so close together that they touch each other at the edges.
Anyone who has difficulties with mirroring can continue working with one number. The manual also describes the steps with only one number, for those who are not so familiar with the computer.
Step 2: Print out the number and cut it out. It is best to use a slightly firmer paper for printing so that it is easier to frame.
 Step 3: Transfer the number to color box, twice so that both numbers touch, at the extreme points where the card is then folded. Now you could easily stick the printed numbers on the card. If you have a good color printer, you can make them colorful.
Step 4: Fold in the middle, in map form. In principle, the card is now finished and is only embellished.
Step 5: Label the card inside, with everything that goes into an invitation card. If you do not have a nice font, you can also write, print and paste the text on the computer.
 Step 6: Glue small stickers and pictures inside and out for embellishment. If the party has a motto, select it appropriately.
Step 7: Make two holes in the folded invitation with the motif punch, outside so that it can be tied together. Do not punch in the scriptures!
Step 8: Tie the card together with raffia, string or ribbon. She does not need an envelope.
2nd puzzle invitation
It's easy to make a puzzle invitation. You just cut a corresponding invitation card, which was previously filled or labeled. The parts should be unevenly sized and shaped. They are put in an envelope, which is taped so that no part can be lost. The guest has to put together the puzzle at home to be able to read at all, when and where he should be and what the occasion is. If you prefer something more stable, you can also buy a finished puzzle, one with only a few parts, for toddlers. This can also be labeled on the back.

3. Simple instructions
It does not always have to be a bit complicated, even a simple invitation fulfills its purpose. Something self-designed is always nicer than just using a pre-printed invitation. It is enough a sheet of colored construction paper, which is folded in the middle, so half, so that a folding card is created. On the inside comes the text. The front can be decorated with various pictures, stickers, glittering stones, pearls and small bows. A self-painted picture is usually also very good. Also inside can be installed ornaments. At the end, the invitation can be rolled up and looped or put in an envelope.
4. Balloon invitation
Here you can design two variants.

- The balloon is inflated and described. The entire text of the invitation is transferred to the balloon. You can also paint pictures on it. It is important to use a pen that does not blur and go off. Release the air and either put the balloon in an envelope or in a small box. To read the invitation, the guest must re-inflate the balloon.
- Write the invitation on a piece of paper, which can also be beautifully designed. The paper must be thin and the sheet not too big. The sheet is rolled up at the end and put in the balloon. This is inflated and tied together and handed over to the guest. On the balloon you can still write invitation and paint it.
5. Invitations to theme parties

Children like to celebrate theme parties. The invitation must make this clear, not only in writing, but also best from the design. For example, a crown belongs to an invitation to a princess party, a castle to a knight party, a sausage in a roll to a barbecue, a football to a football party. Motifs can be easily found on the Word Wide Web. You can print them in color or just bordered, to paint yourself. The motif is simply glued to the front of the invitation card. The text comes inside. That's all it takes.
1 of 4


Or you use one of our craft templates. Simply download the desired motif and print it out. This template must then only be cut out and transferred with a pen on construction paper.
Click here: Download the crown template
Click here to download the horror house
Click here: To download the horse template
Click here: To download superhero templates
6. Butterfly invitation
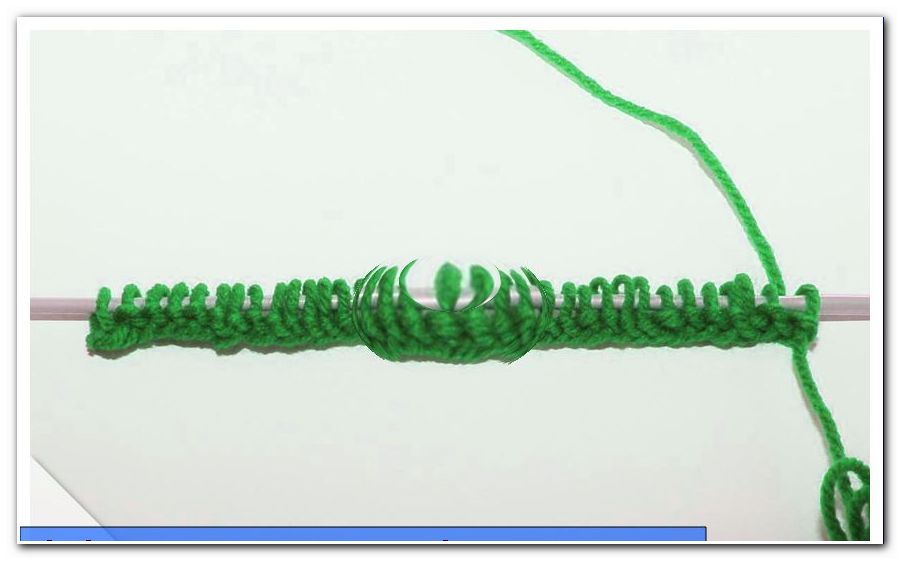
The butterfly invitation will again use colored card stock, construction paper or similar paper. Nice are different colors, it does not have to be consistent.
Step 1: The butterfly motifs are pre-painted or printed. Here you will find our butterfly template:
Click here to download the butterfly template
Step 2: Cut out butterfly
Step 3: Then add some patterns to the wings. Depending on the age this can be done by the child.
Step 4: The invitation text comes on a separate sheet of paper, if possible in the color matching the butterfly. You can write everything by hand or create the text on the computer and simply print it several times.
Step 5: The text is rolled up and tied with a delicate bow.

Step 6: Attach the roll to the center of the butterfly, as a body, so to speak. To do this, place four small holes next to the roll with the punch, two on each side and thread the same ribbon from the binding through. Over the roll is tied together.
7. Invitation to the Pirate Party
If you want to go away from the map and are looking for something special, then the ships are recommended for a pirate party. This requires dark paper, construction paper or cardboard, a wooden skewer, paper for the invitation text, pens and self-adhesive tapes.
Step 1: Fold a small ship:
 Step 2: Paint the boat, glue it, shape it
Step 3: Poke the kebab skewer through the middle, the tip of the boat.
Step 4: Write or print the invitation text on a sheet of paper that fits the size of the boat (it is best to fold one A4 sheet two to three times) and attach it to the mast as a sail. To do this, pierce the leaf twice, in the middle, once at the top and once at the bottom. This works best with the tip of the rod.
Step 5: Fix the rod to the boat from below with glue.
Step 6: Attach a small flag or a colorful pennant to the top of the mast, simply paint and cut it and glue it to the mast.
There are countless ways to make an invitation to a children's birthday itself. Larger children like to take care of themselves, smaller ones need help or can not do much. Such invitations can be simple or elaborate. One has to keep in mind that an elaborate card is also expected to be accompanied by a party. So you should not lean too far out of the window. Motive parties are popular. Of course, the invitation must also be suitable for these. Although the design is important, but also the . From this it must be clear who is giving the party, when and where it takes place, how to organize the transport and what to bring.