Lay shingles yourself - roof with bitumen shingles
- Prepare the roof
- Prepare the bitumen shingles
- Install the roof shingles
- Cover steep roofs
- Cover the roof ridge
- Correctly attach eaves moldings
- Attach end plates
Covering the roof with bitumen shingles is a cost-effective solution and especially popular with garden sheds and Co. It is even without much practice and craftsmanship easily possible, roof shingles to lay yourself - if the following instructions are consulted.
A leak on the roof and a small budget make many resort to bitumen shingles. But even if the tool shed is simply to be covered, the thin roof shingles prove to be an ideal solution and economical alternative to the professional roofer. But as easy as the laying itself is, things can go awry without the right tools and procedures. In the following, interested parties will learn what they should pay particular attention to in order to obtain a convincing and dense result.
Necessary material and tools
- underlay
- roofing hammer
- nails
- Asphalt shingle adhesive
- chalk
- Cuttermesser
- Meterstab
- Possibly. Traufleisten and connecting plates, cordless screwdriver
Prepare the roof
Before the roof can be covered with the bitumen shingles, it must be prepared accordingly. For this purpose, a so-called Vordeckbahn is attached.
The aim of this measure is to create a level and safe surface for the roof shingles. In addition, the Vordeckbahn is an additional protection against rain and wind and facilitates the subsequent laying.
Of course, in order to provide an optimal basis for the following roofing, a few points must also be taken into account when fixing them. The following instructions tell you what is important:
- Align the pre-lay track, starting at the lower edges of the roof, so that it covers about five centimeters of the track. At the roof ridge, a supernatant of ten centimeters should prevail.
- Fix the Vordeckbahn with a few nails at long intervals. The nail heads must just finish with the plates and be turned perpendicular to the roof.
- Laying is done from the lower edge of the roof up to the gable.
- During work, it should be checked again and again whether the web is straight and even. If it already has anomalies or irregularities, these mistakes can hardly be remedied with the bitumen shingles later on.
Prepare the bitumen shingles
So that the roof of the roof with bitumen shingles can be carried out smoothly and without problems, in addition to the Vordeckbahn and the shingles themselves must be prepared accordingly. First and foremost, this is about tailoring them to the appropriate size.
The procedure is as follows:
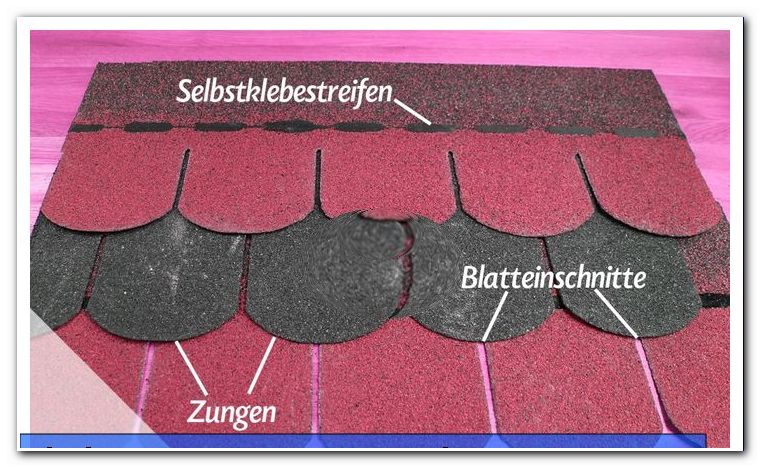
- In the shingles for the first, lowest track the shingle fences are cut to the existing incision. In addition, the length of one of these shingles is shortened by half a shingle tongue. This blank is the basic series which later becomes the underlay for the first visible shingle track.
- The first visible track, which will later complete with the eaves bar, remains unabridged.
- The second visible and each other row of bitumen shingles, each shortened by a further half shingled tongue in length. In this way, the offset blankets come later and the abutting edges do not meet.
- Cuttings can of course be used for the second half of the roof, so they are not waste.
- Finally, the roof shingles are cut for the ridge. For this purpose, individual pieces are made of rectangular bitumen shingles, which can overlap evenly on both sides. In addition, they should be cut on one edge so that they run slightly wedge-shaped. This makes them more visually appealing.
This preparatory work can be done with a craft knife.
1 of 2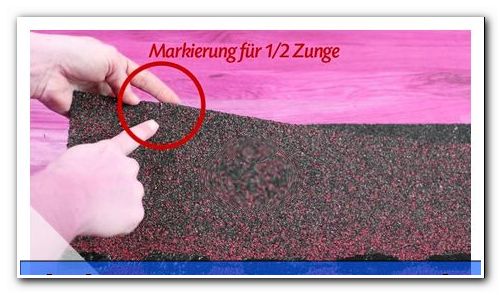
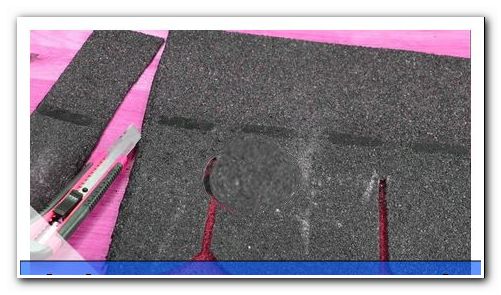
Tip: Especially with the wedge-shaped bitumen shingles for the roof ridge, making a template is ideal and saves effort. In addition, the respective stack should be provided for all rows on the back with the appropriate number to avoid confusion.
Install the roof shingles
As with the fixing of the Vordeckbahn and the roof shingles are to be laid from bottom to top, so in the direction of ridge. In addition, the base without shingled furrows is mounted so that it extends slightly beyond the Vordeckbahn. It should not be more than an inch of supernatant.
1 of 4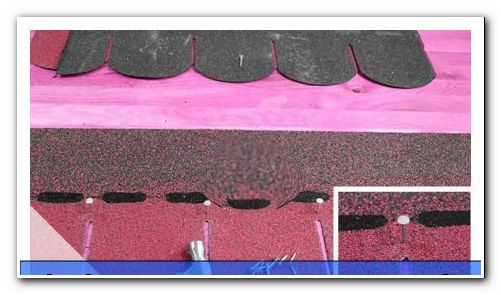
Thereafter, the roof is covered in rows as follows:
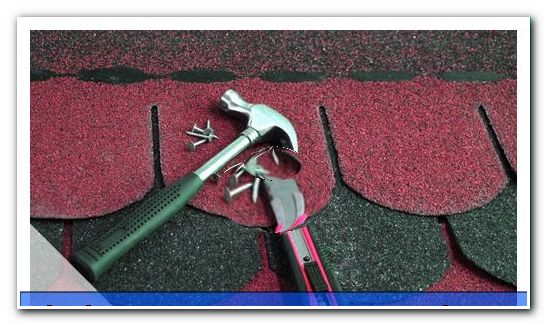
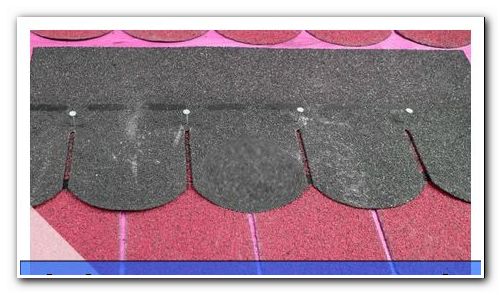
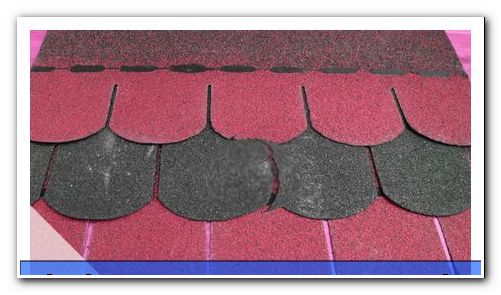
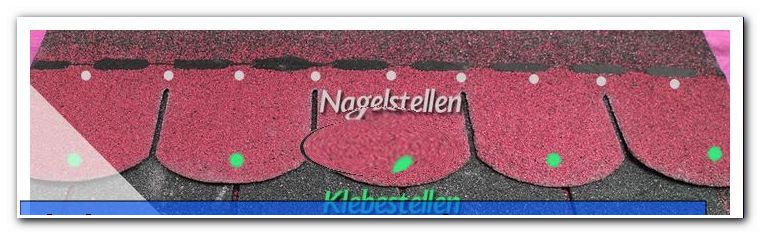
- The first visible row is finally aligned at the lateral and lower edge of the roof. It is fastened with nails, which are hammered in about two finger widths over the leaf incisions.
- The second row, which has already been shortened by half a tongue, will in turn be aligned at the lateral edge. In addition, she should protrude so far over the first row, that the tongue ends are approximately at a level with the leaf incisions.
- This process is carried out with each row and offset by a half tongue to the ridge.
- Afterwards, steps 1 to 3 are repeated on the second half of the roof.
Cover steep roofs
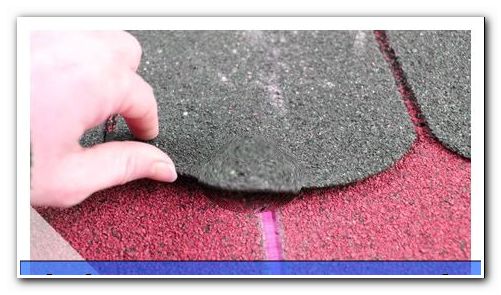
When laying steep roofs which have a slope of 60 degrees and more, the procedure for laying the shingles does not differ fundamentally. However, about twice as many nails should be used here. Instead of merely hammering a nail over each incision, a nail is inserted at the same height in the middle of the tongue.
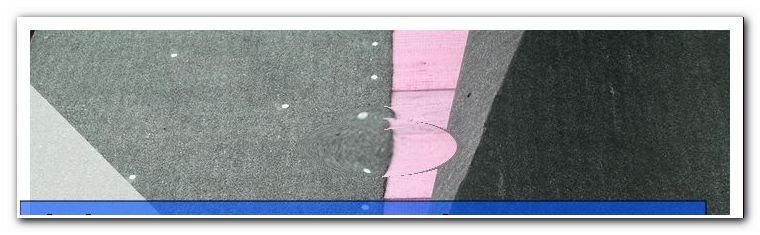
In addition, bitumen adhesive should be used, which should be applied to the back of the shingles. Since correct alignment becomes more difficult in this case, it makes sense to mark the course beforehand with chalk on the pre-lay track. This is also advisable, because errors are very difficult to compensate for and require relatively much effort.
Cover the roof ridge
The last step in laying roof shingles is, of course, to cover the ridge. Here are the already cut and wedge-shaped pieces are used at one end.
- With the wide end of the first shingle is finally aligned on the edge and fixed on both sides with two nails at the shorter end.
- The second and each following bitumen shingle is laid on the previous one and fastened so that it covers about half. This will continue until the middle of the ridge.
- In order to obtain a visually appealing result, proceed as in steps 1 and 2 at the other end of the ridge.
- As a central conclusion a rectangular shingle is nailed.
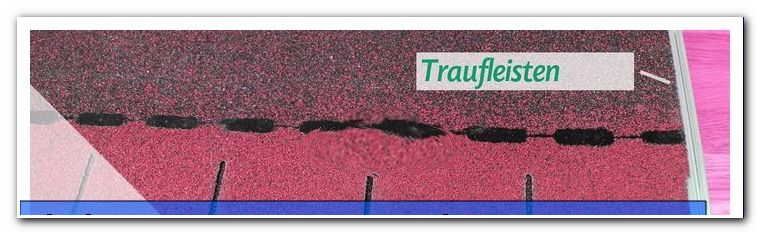
Correctly attach eaves moldings
Traufleisten, also known as roof gutters or gutters, are actually part of the basic equipment, at least in the garden shed. Of course, they must not be neglected when roofing with bitumen shingles.
Even with carport and Co., the processes can be useful, but the principle of attachment when covering the roof with bitumen shingles is always the same.
It should only be noted that the strips in the area of the gable above the first attached Vordeckbahn, at the eaves, however, is below this track. This is the only way to ensure trouble-free water drainage and to protect the roof.
Attach end plates
If the roof is closed off on one side with an outer wall, as is often the case, for example, with carports but also tool sheds, end plates should be used.
As a basis for this, in turn, a Vordeckbahn pulled up to the adjacent wall, as the connecting plate will be enough later. Once all shingles have been laid, the sheet metal is aligned so that it serves as a final transition and screwed into the pre-lay track.
Information on roofing in the overview
- Choose a safe leader and, for your own safety, ask for help from a second person
- Cover the roof only in dry weather
- When preparing for correct dimensions and number of shingles pay attention, if necessary mark with chalk mark on the Vordeckbahn
- Use a suitable tool (see list above)
- For very steep roofs, above 60 degrees, use bitumen shingle adhesive in addition to the nails
- Note protrusions and protrusions
- After measuring, counting, cutting and attaching the first row, the following Schindelbahnen should also be prepared - in this way, the laying is much faster possible
- Finally, hammer in nails with shingles, they must neither look out nor be pressed in too deeply
Tips for quick readers
- Before laying install a Vordeckbahn
- Fix the roof shingles and the roofing membrane from bottom to top
- Use as few nails as possible
- Perform the transfer offset
- Cover gable with wedge-shaped shingles
- Use connection plates for transitions to other buildings
- For steep roofs, also use bitumen shingle adhesive
- For orientation, draw chalk markings on the precoating track
- Attach eaves moldings with the cover strip
- Lay bitumen shingle only in dry weather and roof