Knit hand cuffs - free instructions with pictures

- Material and preparation
- Instructions - knit hand cuffs
- Stop and cuffs
- stripe pattern
- Knit leaf pattern
- Cuffs and binding
- Daumenöfffnung
- Second hand cuff
- Quick start Guide
The leaf motif on these hand cuffs provides a change in knitting and looks decorative. This guide will explain how to master the sophisticated pattern. The stripes of fluffy wool complete the soft cuffs.
The season for gloves has not come yet, but the autumn wind pulls unpleasantly cold into the jacket "> Material and preparation
You will need a ball of fluffy and regular yarn to knit the gauntlets according to this guide. Make sure that the wool is easy to wash. Also, check to make sure it feels soft to the touch so that the cuffs on the delicate underside of the arms do not scratch. For a pair of gauntlets made of high quality yarn you should budget 15-20 EUR.
We worked with four needle size for this tutorial. Knit a stitch before starting with the cuffs. This will ensure that the size of the gauntlets complies with the instructions. Knit 21 stitches with the yarn of your choice and knit 32 rows on the right. This should result in a square ten centimeters in edge length. Use a different needle size if the dimensions differ significantly.
This guide assumes that you can knit right and left stitches. In addition, you should master the handling of a needle game with five needles, because the hand cuffs are knit in rounds. Other needed techniques are explained in the manual.
You need this for a pair of hand cuffs:
- 50 g of soft wool
- 50 g of fleece wool
- 1 double pointed needles (5 needles)
- 1 auxiliary needle (pigtail needle)
- 1 big safety pin
- 1 darning needle

Tip: There are special braid pins to buy. However, you can also use a normal knitting needle in the same thickness as the needle play as an auxiliary needle.
Instructions - knit hand cuffs
Stop and cuffs
This guide starts with the right cuff. Beat 40 stitches in your regular (non-fluffy) yarn. Spread it on four needles (ten stitches per needle). Close the round and knit one stitch on the right and one on the left for twelve rounds. This gives your hand cuffs an elastic cuff.

Tip: Be sure to tighten the first stitches on each needle to avoid holes in the cuffs.
stripe pattern
Now knit over 26 rounds only right stitches. You work alternately two rounds with fluffy wool and four rounds with normal yarn.

Tip: You do not have to cut the thread to change the color. Just let the unused yarn hang down. At the end of each round, wrap the two threads around each other and pull tight.
Knit leaf pattern

Divide the stitches on your needle play as follows:
- 1st needle: 10 stitches
- 2nd needle: 7 stitches
- 3rd needle: 7 stitches
- 4. Needle: 16 stitches
Using the first 13 stitches of the fourth needle, work the leaf motif according to the following instructions. The rest of the round you knit on the right.
1st round: knit all the stitches left
2 - 7th round: 6 stitches on the left, 1 stitch on the right, 6 stitches on the left
From now on, stitches are crossed so that two more grow out on both sides of the middle stem. You will need an extra needle on which you can slip a stitch without knitting it. Then you work the next stitch. Only then the stitch on the needle comes to the series.

Round 8: 4 stitches on the left, 1 stitch on a needle behind the work, 1 stitch on the right, knit the stitch of the needle on the left, 1 stitch on the right, 1 stitch on a needle to work, 1 stitch left, the stitch of the stitch Knit auxiliary needle on the right, 4 stitches on the left
9th round: 4 stitches on the left, 1 stitch on the right, 1 stitch on the left, 1 stitch on the right, 1 stitch on the left, 1 stitch on the right, 4 stitches on the left
10th round: 3 stitches on the left, 1 stitch on a needle behind the work, 1 stitch on the right, knit the stitch of the needle on the left, 1 stitch on the left, 1 stitch on the right, 1 stitch on the left, put 1 stitch on a needle in front of the work, 1 stitch on the left, knit the stitch of the needle on the right, 3 stitches on the left
Round 11: 3 stitches on the left, 1 stitch on the right, 2 stitches on the left, 1 stitch on the right, 2 stitches on the left, 1 stitch on the right, 3 stitches on the left
12th round: 2 stitches on the left, 1 stitch on a needle behind the work, 1 stitch on the right, knit the stitch of the needle on the left, 2 stitches on the left, 1 stitch on the right, 2 stitches on the left, put 1 stitch on a needle in front of the work, 1 stitch on the left, knit the stitch of the needle on the right, 2 stitches on the left
Round 13: 2 stitches on the left, 1 stitch on the right, 3 stitches on the left, 1 stitch on the right, 3 stitches on the left, 1 stitch on the right, 2 stitches on the left
Round 14: 1 stitch on the left, 1 stitch on a needle behind the work, 1 stitch on the right, knit the stitch of the needle on the left, 3 stitches on the left, 1 stitch on the right, 3 stitches on the left, put 1 stitch on a needle in front of the work, 1 stitch on the left, knit the stitch of the needle on the right, 1 stitch on the left
15th round: 1 stitch left, 1 stitch right, 4 stitches left, 1 stitch right, 4 stitches left, 1 stitch right, 1 stitch left
The stems on the left and right are finished.

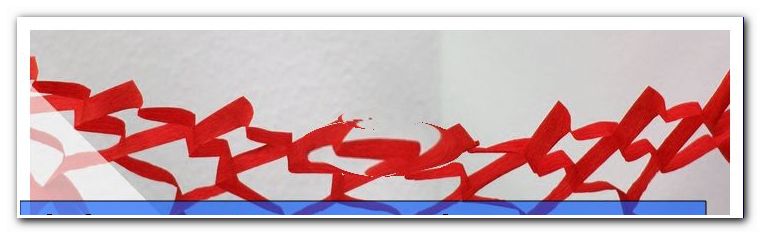
Envelopes now take more stitches to form the first two sheets. Meanwhile, the middle stalk continues to grow up on your hand cuffs. To work an envelope, place the thread over the right needle from the front to the back. The red mark on the picture shows you how the yarn must lie. In the next round, knit the envelope like a normal stitch.

16th round: 1 stitch left, 1 turn, 1 stitch right, 1 turn, 4 stitch left, 1 stitch right, 4 stitch left, 1 turn, 1 stitch right, 1 turn, 1 stitch left
17th round: 1 stitch left, 3 stitches right, 4 stitches left, 1 stitch right, 4 stitches left, 3 stitches right, 1 stitch left
18th round: 1 stitch left, 1 stitch right, 1 turn, 1 stitch right, 1 turn, 1 stitch right, 4 stitch left, 1 stitch right, 4 stitch left, 1 stitch right, 1 turn, 1 stitch right, 1 Envelope, 1 stitch on the right, 1 stitch on the left
19th round: 1 stitch left, 5 stitches right, 4 stitches left, 1 stitch right, 4 stitches left, 5 stitches right, 1 stitch left
20th round: 1 stitch left, 2 stitches right, 1 turn-up, 1 stitch right, 1 turn-up, 2 stitches right, 4 stitches left, 1 stitch right, 4 stitches left, 2 stitches right, 1 turn-up, 1 stitch right, 1 Envelope, 2 stitches on the right, 1 stitch on the left
Round 21: 1 stitch left, 7 stitches right, 4 stitches left, 1 stitch right, 4 stitches left, 7 stitches right, 1 stitch left
Round 22: 1 stitch left, 3 stitches right, 1 turn-up, 1 stitch right, 1 turn-up, 3 stitches right, 4 stitches left, 1 stitch right, 4 stitches left, 3 stitches right, 1 turn-up, 1 stitch right, 1 Envelope, 3 stitches on the right, 1 stitch on the left
Round 23: 1 stitch left, 9 stitches right, 4 stitches left, 1 stitch right, 4 stitches left, 9 stitches right, 1 stitch left
The first leaves on your gauntlets are half finished. Now reduce the number of stitches by pulling or knitting them together. For a cover, slip a stitch from the left to the right needle without knitting. Then work a right-hand stitch and pull the off-hook as if off-chain. Knitting two stitches together means that you are going to cut in two stitches at once and knit them off like one.

Round 24: 1 stitch on the left, 1 coat, 5 stitches on the right, knit 2 stitches on the right, 4 stitches on the left, 1 stitch on the right, 4 stitches on the left, 1 coat, 5 stitches on the right, knit 2 stitches on the right, 1 stitch on the left
25th round: 1 stitch left, 7 stitches right, 4 stitches left, 1 stitch right, 4 stitches left, 7 stitches right, 1 stitch left
Round 26: 1 stitch on the left, 1 coat, 3 stitches on the right, knit 2 stitches on the right, 4 stitches on the left, 1 stitch on the right, 4 stitches on the left, 1 coat, 3 stitches on the right, knit 2 stitches on the right, 1 stitch on the left
Round 27: 1 stitch left, 5 stitches right, 4 stitches left, 1 stitch right, 4 stitches left, 5 stitches right, 1 stitch left
Round 28: 1 stitch on the left, 1 coat, 1 stitch on the right, knit 2 stitches on the right, 4 stitches on the left, 1 stitch on the right, 4 stitches on the left, 1 coat, 1 stitch on the right, knit 2 stitches on the right, 1 stitch on the left
Round 29: 1 stitch left, 3 stitches right, 4 stitches left, 1 stitch right, 4 stitches left, 3 stitches right, 1 stitch left
Round 30: 1 stitch on the left, 1 stitch off, knit 2 stitches on the right, pull off the stitched stitch, 4 stitches on the left, 1 turn-up, 1 stitch on the right, 1 turn-up, 4 stitches on the left, 1 stitch off, knit 2 stitches on the right-hand side cover the stitched stitch, 1 stitch left
Round 31: 1 stitch left, 1 stitch right, 4 stitches left, 3 stitches right, 4 stitches left, 1 stitch right, 1 stitch left
The first two leaves on your hand cuffs are ready. In the middle now arises the third.

Round 32: 6 stitches on the left, 1 stitch on the right, 1 turn-up, 1 stitch on the right, 1 turn-up, 1 stitch on the right, 6 stitches on the left
Round 33: 6 stitches on the left, 5 stitches on the right, 6 stitches on the left
Round 34: 6 stitches on the left, 2 stitches on the right, 1 turn-up, 1 stitch on the right, 1 turn-up, 2 stitches on the right, 6 stitches on the left
35th round: 6 stitches on the left, 7 stitches on the right, 6 stitches on the left
36th round: 6 stitches on the left, 3 stitches on the right, 1 turn-up, 1 stitch on the right, 1 turn-up, 3 stitches on the right, 6 stitches on the left
37th round: 6 stitches on the left, 9 stitches on the right, 6 stitches on the left
Round 38: 6 stitches on the left, 1 coat, 5 stitches on the right, knit 2 stitches on the right, 6 stitches on the left
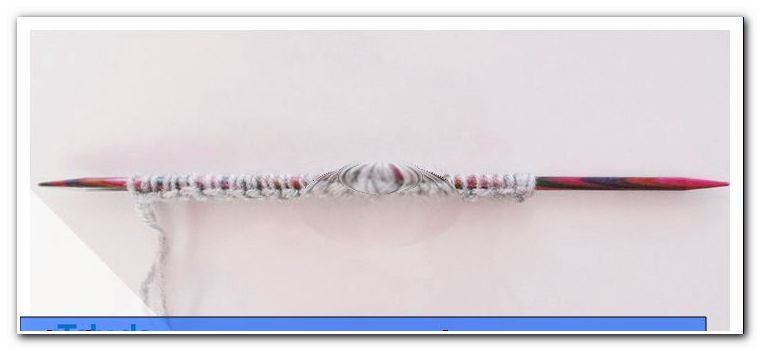
At the beginning of the 39th round, rest the last seven stitches of the first needle on a safety pin. Then you hit five new stitches and close the round again. Through the resulting hole stuck with the finished hand cuffs your thumb.

39th round: 6 stitches on the left, 7 stitches on the right, 6 stitches on the left
40th round: 6 stitches on the left, 1 coat, 3 stitches on the right, knit 2 stitches on the right, 6 stitches on the left
41st round: 6 stitches on the left, 5 stitches on the right, 6 stitches on the left
Round 42: 6 stitches on the left, 1 coat, 1 stitch on the right, knit 2 stitches on the right, 6 stitches on the left
Round 43: 6 stitches on the left, 3 stitches on the right, 6 stitches on the left
44th round: 6 stitches on the left, 1 stitch off, knit 2 stitches on the right, cover the stitched stitch, 6 stitches on the left
Round 45: 6 stitches on the left, 1 stitch on the right, 6 stitches on the left
46th round: Knit all stitches on the left
Cuffs and binding
To finish off the hand cuffs, knit two rounds of right-hand stitches in fleece and six rounds in a cuff pattern with your main yarn. Then chain the cuffs and sew the thread.
Daumenöfffnung
Insert the five stitches that you reassembled when creating the opening for the thumb.

Also, add the seven disused stitches from the safety pin. These twelve stitches are spread over four needles (three per needle). Knit four rounds in the cuff pattern before removing the piece and sewing the thread. The first of your hand warmers is ready!

Second hand cuff
The two gauntlets are knit the same except for the following small deviations. For the left hand cuff, divide the stitches according to this pattern before starting the leaf pattern:
- 1st needle: 7 stitches
- 2nd needle: 7 stitches
- 3rd needle: 10 stitches
- 4. Needle: 16 stitches
The leaf motif works in the last 13 stitches of the fourth needle. For the thumb opening, rest the first seven stitches on the third needle.

Quick start Guide
1. Cast 40 stitches on the double pointed needles and close the round.
2. Knit twelve rounds in a federal pattern.
3. Knit 26 rounds of right stitches, alternately using two rounds of fleece wool and four rounds of normal yarn.
4. Work the leaf motif into the hand cuffs according to the instructions, knit the remaining stitches to the right.
5. In the 39th pattern round, take seven stitches for the thumb and strike five new ones.
6. Finish the gauntlets with two rounds of fluffy wool and six rounds of the waistband and bind off all the stitches.
7. Pick up twelve stitches at the thumb opening and knit four rounds in the waistband.

Possible variations
1. Extend the striped part so that your gauntlets reach to the elbow.
2. Start right after the cuff with the leaf motif, if your gauntlets are just above the wrist.
3. For the stripes on your hand cuffs, use plain yarn in a second color instead of fleece wool.
4. Vary the width and color of the strips.
Here you will find another great guide for knitted arm warmers with owl pattern: arm warmers with owl pattern