Handicrafts with pine cones - 7 creative ideas for children
When tinkering with pine cones there are hardly any limits to your imagination. You can experiment as you please. For all those who want to implement a few concrete ideas when starting their new handicraft adventure, our contribution is the optimal reading and help. Pick out a manual and tackle it - with your children!
If you plan to tinker with your children a lot with small and large pine cones in autumn and winter, we recommend that you start collecting the wonderfully natural material in late summer, because at that point the first cones are already in front of the firs, With these appealing elements, a wide variety of craft ideas can be implemented.
content
Handicrafts with pine cones
Instructions 1 | Magic rainbow fairies
Instructions 2 | Create small fir trees
Instructions 3 | Tinker animal cool owl
Instructions 4 | Make flowers from pine cones
Instructions 5 | Simple pine cone decoration
Instructions 6 | Make pine cone elf
Instructions 7 | Create cone mice
Handicrafts with pine cones
In our DIY magazine we present 7 of them in more detail - with instructions and also with practical Talu handicraft templates . By the way, we also thought of something when choosing the variants: All of them are suitable for handicrafts with the youngsters. Here we go!
Free Download Talu craft templates | Handicrafts with pine cones
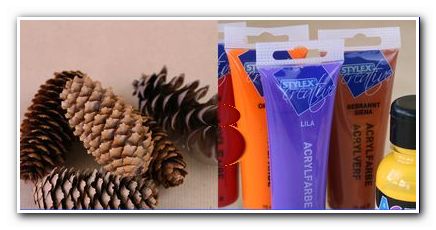
Handicrafts with pine cones, handicraft utensils
Instructions 1 | Magic rainbow fairies
What could be better for children than to dive into an imaginative, colorful world full of fairies ">
pinecone
Acrylic colors at will
Felt-tip pens (mainly black and red)
thicker and finer brushes
Felt or construction paper (for wings)
Talu wing template from "template fairies" or optional fabric sheets
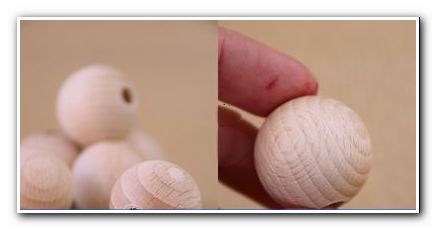
Raw wood balls, drilled through, diameter 25 mm
optionally attach wooden discs or cork coasters or hangers
Craft glue or hot glue
possibly a wide ribbon as a "ribbon wing"
our Talu handicraft template "template fairies"
Rainbow fairies, material
Note: If our Talu handicraft templates are not quite suitable, then simply pause our templates a little larger on another piece of paper. Or you can enlarge the view of the handicraft template on the screen of your tablet and carefully pause with a little pressure so as not to damage the display, the respective Talu handicraft template with a pencil.
Here's how to do it:
Step 1: Pick up the first spigot.
Rainbow fairies, pine cones
Step 2: Paint the cone with red acrylic paint using a thick brush.
Paint rainbow fairies, pine cones
Step 3: Grab our handicraft template and cut out the wing shapes you prefer.
Rainbow fairies, handicrafts cut out wings
Transfer the shape to the desired felt or construction paper color. Then cut out the wing shapes from the felt.
Rainbow fairies, wing shape transferred to felt
Optionally, you can also use two sheets of fabric and brush them with the red acrylic paint.
Rainbow fairies, cut out wing shapes
Step 4: Grab a wooden ball.
Rainbow fairies, wooden ball for head
Step 5: Use a fine brush to paint hair on the wooden ball. Choose the color as you like.
Rainbow fairies, paint a wooden ball
Step 6: Then give the wooden ball a face by first drawing two black eyes, then a black mouth and finally red cheeks. Use felt pens, for example.
Rainbow fairies, decorate wooden ball with face
Step 7: Are the spigot and the optional fabric sheets dry "> finished rainbow fairy
Step 8: optionally take a wooden disc.
Step 9: Glue the lower part of the cone that forms the fairy's body onto the wooden disc, again with the craft glue. The piece of wood gives the fairy a hold.
Step 10: Repeat all previous steps and only vary the colors - until you have covered all (desired) rainbow colors.
Also pick up a wider ribbon and form a bow. Fix the resulting loop in the middle with your fingers and then with a thin thread and a knot in the middle. Glue the bow to the back of the fairy. Then attach a thread to your head and your "fairy hanging decoration" is ready.
Rainbow fairy with loop wings
Finally, you can arrange the pretty pine cone fairy colors (rainbow!) One after the other - whether in a straight line, as a circle or otherwise is entirely up to you or your children.
finished rainbow fairies
Instructions 2 | Create small fir trees
Our second guide deals with a very winter decoration. It's about little green fir trees made of beautifully shaped cones. With just a few steps, which can be easily done by your offspring, you can achieve great accessories.
What you need for your little fir trees:
Pine cones, pine cones
green acrylic paint (s)
thick brush
little colorful stars
Craft glue or hot glue
Here's how to do it:
Step 1: Paint all of your chosen cones with green acrylic paint.
Paint fir trees, cones in color
The quickest way is with a thick brush.
Fir tree, green painted cones
Tip: You can brush every cone in a different shade of green, sometimes lighter, sometimes darker, to provide variety - both when crafting and with regard to the final decoration.
Step 2: Let the cones dry completely.
Fir tree, let painted cones dry
3rd step: Give small, colorful stars over your fir tree. Alternatively, place one of the small golden stars on the top of each fir tree.
finished Christmas tree with star decoration
Instructions 3 | Tinker animal cool owl
If you tinker with pine cones, you can "re-enact" a wide variety of animals with little effort. Here we show you how to turn a cone into a very good looking owl.
Important: Help your children to design the individual elements so that the result is all-round beautiful!
You need your cool owls:
Pine cones, pine cones
golden acrylic paint
thick brush
brown, gold ocher, white, orange and yellow felt
our craft templates for eyes made of felt or two black buttons or loose eyes
pencil
scissors
Craft glue or hot glue
Here's how to do it:
Step 1: Pick up a spigot.
Step 2: Paint the cone with golden acrylic paint using the thickest possible brush. Or just leave the cone in its natural state. Just as you like.
Step 3: Use our Talu handicraft templates and the colored felt sheets of your choice.
Owls, material
Step 4: Cut out two wings.
Tip: As an adult you are asked for the wings and all other felt elements. The individual elements should match the "body" of the owl, i.e. the size and shape of the cone. You can certainly assess that better than your (small) kids.
Step 5: Cut out additional parts from our "Owl template". Transfer this back onto the felt of your choice. This shape of the eight is supposed to form the "base" for the eyes.
Step 6: Now make two black felt circles according to the same scheme as before. These serve as eye pupils. You can also draw these on the white "paper figure eight" with a black pen if you use our paper template instead of felt.
Step 7: Cut out the triangle or rhombus for the owl's beak on our template. Then transfer the shape to the orange felt.
Step 8: Use the same principle to create templates for the yellow, jagged feet of the owl. You can also use our Talu handicraft template for this.
Tip: You are not particularly talented when it comes to painting shapes "> finished cone owl
The finished pine cone owl can be used in many ways - for example as a table decoration or as tree decorations (you only need to attach a thin thread for this purpose).
Owl from a pine cone
Instructions 4 | Make flowers from pine cones
Pine cones and flowers - natural treasures that are simply pretty to look at. Actually, the two natural beauties don't have much in common visually, but that can change quickly. We will show you how you and your children can transform cones into beautiful decorative flowers - more precisely zinnias!
What you need for your pine cone flowers:
Pine cones, pine cones
Acrylics
thick and thin brush
Make pine cone flowers
Here's how to do it:
Step 1: Paint each cone in a specific - your desired - color. The best way to do this is to use a thick brush and acrylic paint.
Paint the pine cone flowers, color the cones
Tip: We advise you on different shades of red, pink and purple. Green and blue in different shades are also excellent.
Step 2: Let the cones dry completely.
Step 3: Turn the cones over and paint a yellow center with a thinner brush to enhance the floral appearance.
Step 4: Again let the paint dry on the cones.
ready-made pine cone flowers
To bring out the colorful splendor in a particularly beautiful way, arrange the finished cones in a chic bowl . However, the colorful cone zinnias, also loosely distributed on the table or on a shelf, ensure an enchanting sight.
various pine cone flowers
Instructions 5 | Simple pine cone decoration
Here is the easiest guide to crafting pine cones for kids. No other handicraft requires less material and less effort. The good thing: During the handicraft, the motor skills and spatial understanding of the children are encouraged in a playful way.
What you need for your pine cone decoration:
Pine cones, pine cones
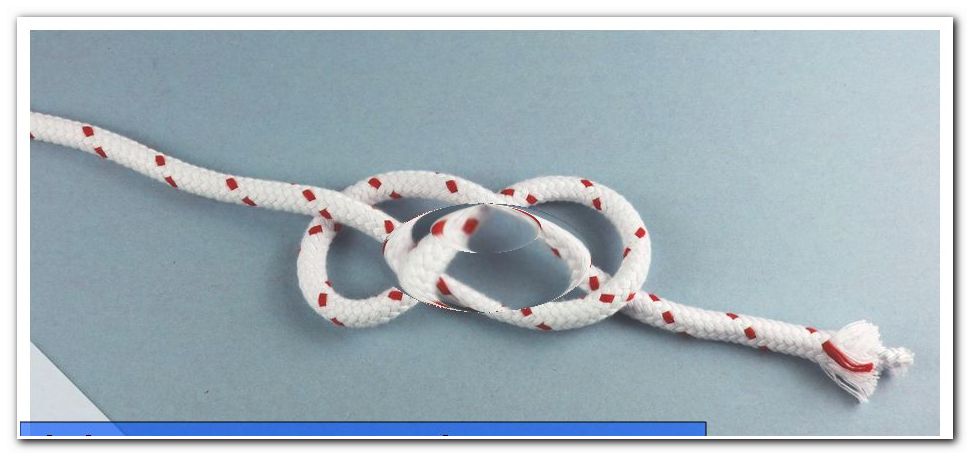
Yarn in various colors, including gift ribbons
Craft glue or hot glue
Here's how to do it:
Step 1: Pick up a sufficiently long piece of yarn in your desired color.
Pine cone decoration, with yarn
Step 2: Fix the end of the yarn with craft glue - either at the top or bottom of the tenon, depending on where you want to start.
3rd step: Wrap the individual "tiers" of the respective cones with the yarn.
Pine cone decoration, wrap cones with yarn
Tip: You don't have to follow a specific order. Simply wrap the cone according to your feeling.
Step 4: When you are satisfied with the wrapping, you can fix the loose end with craft glue.
Pine cone decoration, cones wrapped with yarn
The simple, but radiant decorative accessories are already made and ready for use - whether in the window, on the table, on the shelf or anywhere else.
Pine cone decoration, cones decorated with gift ribbon
Instructions 6 | Make pine cone elf
When crafting with pine cones, funny gnomes can be brought to life in a certain way. The decorative elements look cute and are very easy to design. However, you need a few more materials for this.
You need your pine cone gnome:
Pine cones, pine cones
wooden balls
Felt-tip pens (black and red)
if necessary, stick the kebab skewers or ball onto the tip of the cone
Felt in bright colors
little golden bells
pencil
scissors
Glue or hot glue
our Talu handicraft templates
Here's how to do it:
Step 1: Pick up a wooden ball.
Fir cone gnome, wooden balls
Step 2: Use felt-tip pens to draw two black dots as eyes and a red mouth on the ball.
Fir cone gnome, face with wooden ball
Step 3: Grab a felt sheet (for example in red, green or blue).
Step 4: Cut out a triangle from the selected felt. Use our prepared Talu handicraft template "template elf".
Fir cone gnome, hat made of felt
Step 5: Glue the bag with craft glue on the wooden ball (the head of the little man). Make sure that the pointed side of the bag is facing up.
Glue on the pine cone elf and the felt hat
Step 6: Attach a golden bell to the top of the hat you just fixed - again with craft glue or hot glue.
Attach pine cone gnome, metal bell
Note: The gnome also gives acoustic pleasure with the bell.
Step 7: Insert the wooden ball (the finished head), possibly with a skewer, into or on the cone.
Step 8: Grab the felt bow again, which is the same color as the hat.
Step 9: Cut out other parts from our handicraft template and transfer them to the felt. Then cut out the felt pieces.
Tip: Again, you can easily use our Talu handicraft templates.
Step 10: Cut out the elements. Step 11: Glue on the “Wichtelmann accessories” in the appropriate places.
ready made pine cone gnome
Step 12: Make several gnomes using this principle - in many different colors.
Instructions 7 | Create cone mice
At the end it gets animal again: We want to make sweet cone mice - and that from natural materials.
What you need for your cone mice:
long pine cones
Walnuts (in shell)
possibly cone seeds
optional grapevine (Vitis vinifera)
Crochet thread and crochet hook for the crocheted mouse tails
also alder fruits as mouse ears
Felt pen (black)
Felt for feet and optional for the mouse ears, optional construction paper
Hot glue or craft glue
with smaller cones, acorns can also be used as heads
our Talu handicraft templates "template mice"
Here's how to do it:
Step 1: Pick up a walnut.
Important: The walnut must still be in the shell.
Step 2: Draw two black dots on the walnut as eyes and a black nose - using a felt pen.
Paint the cone mice, walnut
Tip: Note that the tip of the walnut should form the nose and mouth area of the mouse.
Step 3: Optionally, grab two cone seeds. Or use alder fruits as ears. Or cut out our felt ears.
Step 4: Glue the ears on - with hot glue. Step 5: Grab an elongated spigot.
Step 6: Attach the head to the spigot (the latter is the body of the mouse). Carefully remove a small portion of the cone scales at the cone tip. Then you can attach the walnut even better to the tip of the cone.
Step 7: miss the mouse's forefoot and hind feet. Use our handicraft templates again and cut the feet out of felt or optional construction paper. Glue all parts to your cone mouse.
Step 8: Use light brown crochet yarn and a thin crochet hook to make an air chain, which finally forms the mouse tail.
Crochet cone mice, mouse tail from chain stitch chain
Alternatively, use a piece of grapevine as a curly tail. Glue this again with the hot glue.
Here you will find our Talu instructions for crocheting chain stitches.
ready-made cone mouse
Your cone mouse is finished. We hope you and your children and grandchildren will be able to rework our creative ideas on the topic of crafting with pine cones !