Sew Cosmetic Bag - DIY Instructions & Sewing Patterns

- Material and preparation
- The sewing machine
- The fabrics
- The zipper
- The yarn
- Tailor's chalk or water-soluble textile marker
- Nähanleitung
A cosmetic bag is very handy. This is where lipstick, eyeliner and concealer are on the go. Of course, cosmetics are not always necessary in a cosmetic bag. Of course, there is also space for pens, tools or anything else according to the size. It may also like to be a pencil case or a medicine bag. A real unique will be such a bag but only if this is also made by yourself. How this works you will learn step by step.
This piece of sewing is not that easy. Therefore, it makes sense to have already worked some other sewing pieces to acquire some basic knowledge.
Material and preparation
Before you start, it is best to prepare all materials. So you can work in peace, without constantly having to interrupt because of unnecessary searches.
If you frequently rattle the sewing machine, you probably have all the materials you need at home.
You need this:
- a sewing machine
- two different substances
- possibly ironing fleece
- a zipper 20 cm in length
- Yarn & scissors
- pins
- Tailor's chalk or water-soluble textile marker

The sewing machine
You do not need a special machine for this cosmetic bag. In our example, a machine from Silvercrest was used. This costs about 100 euros new. If you also have an edge presser foot for the machine, sewing on the zipper works even better, but it works without it. Therefore, the normal presser foot was used here.
The fabrics
We used a plain cotton fabric and a fabric similar to an oilcloth. The oilcloth makes the bag more stable and also wipeable on the inside. If you only want to use cotton fabrics, we recommend reinforcing the cotton fabric with non-woven fabric. You can get fabrics from 5 euros per meter.
The zipper
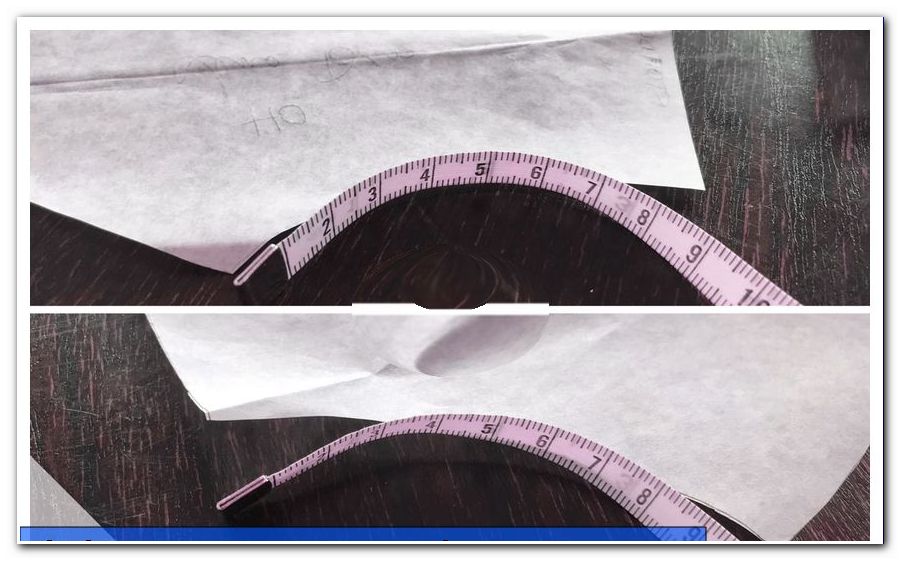
We used a zip from Prym here. He has a length of 20 cm and costs 1.99 euros in the trade. If you want to sew larger or smaller bags, you must also adjust the zipper accordingly.
The yarn
The yarn should match the outer fabric. Of course, a top and a bobbin thread are needed.
Tailor's chalk or water-soluble textile marker
To bring the pattern to the fabric, you need either tailor's chalk, which is usually in gray, white or blue in the trade, or a textile marker, which can be easily removed with a damp cloth.
Nähanleitung
1. Create a pattern.
This pattern is not very expensive. Make sure that the corners are really right-angled, ie 90 degrees. You can use a triangle or a book corner or similar. Draw the pattern on a sheet of paper and cut it out accurately. Experienced seamstresses and seamstresses can of course also bring the pattern directly to the fabric.
Important: The closer you prepare the pattern, the better the result in the end. So take your time.
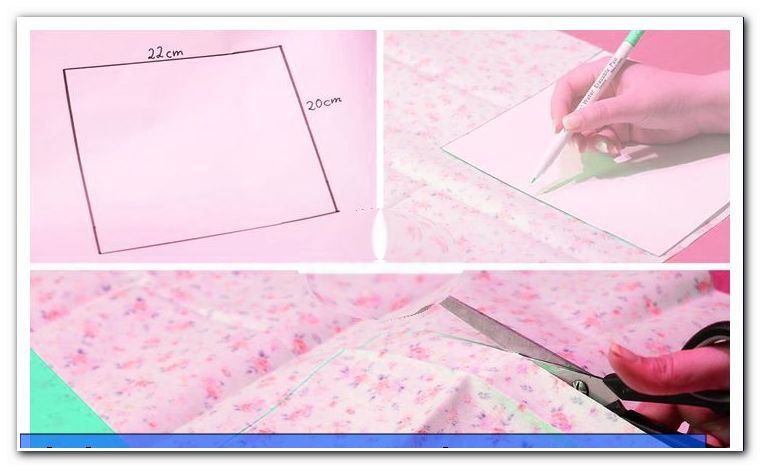
2. Draw the pattern on your fabric; once on the outer fabric and once on the inner fabric.
3. Cut out the pieces of fabric as exactly as possible.
Tip: Add new scissors that you only use for fabrics. So the scissors stay nice and sharp.
4. Now you have 2 equal pieces of fabric. If you use two fabrics made of cotton, bring now the ironing fleece on the outer fabric.

5. Now place the outer fabric with the right side, ie the "nice" side, facing upwards. The zipper is now placed with the right side down to the edge of the fabric. Thus are right to right. The best way to secure the zipper is to prevent it from slipping.
6. Now go to the sewing machine: Insert the upper and lower thread according to the instructions of your sewing machine.
7. Now sew the outer side of the zipper on the outer fabric. To do this, open the zipper one piece and sew first a few centimeters with a tight lockstitch. Then lower the needle into the fabric, lift the presser foot, close the zipper carefully and lower the presser foot again. Then you can continue sewing until the end.
Caution: do not forget to "lock" at the beginning and end of each seam. This means that you sew a few stitches at the beginning, then sew 2-4 stitches back and forth again. The "return switch" can be found on most machines on the right front side.

8. The zipper is now sewn to the fabric on one side.
9. Next, place the inner fabric right side down on the outer fabric. Thus, both substances are right to right again.
10. Join the fabrics together with a few pins.

11. Sew again on the previous seam. During sewing, make sure that you also sew through all three layers. Practiced seamstresses and seamstresses can, of course, sew all three parts together at once.
12. Now fold the fabrics apart with the right side up.
13. Sew close to the edge of the zipper on the outer fabric to stake it off.

Already known "> 
16. Lay the inner fabric from the other side on the same, unseeded side of the zipper. Of both fabrics are now the left sides outside.
17. Stick it now. If this is too difficult with pins, you can still use conventional hairpins.
18. Sew everything together along the outer edge. Keep going slowly, so that nothing slips.

19. Apply the bag already to be guessed. Open the zipper for this. This makes it easy to invert the fabrics.
20. Now also stitch the last seam just at the edge,
21. Turn the bag over once more, release the zipper, and lay it in front of you as shown in the photo.

22. Now sew completely over the lower open side.

Attention: Be careful when sewing over the zipper! Here you lock just before the zipper, lift the presser foot, push the fabric a little way to behind the zipper and lower the feet again. Otherwise, the sewing machine will thank you with a defect.
23. Now we also closed the other side. But: Leave an opening to turn inside fabric. This opening should be about 3 to 4 inches tall.
24. Now the almost finished bag is turned over one last time. The still open zipper makes it easier to turn.

25. Work out the corners nicely, if necessary use a pencil or a staff. Now the turning opening is still open.
26. Now close the turning opening. To do this, simply fold the fabric according to the seam allowance and sew just along the edge.

27. Now you only have to put the outer fabric in the inner fabric and work out the corners nicely.
Your cosmetic bag is finally finished and can be used immediately.
Of course you can also make larger or smaller bags. Make sure that you also pay attention to the size of the zipper. If you use a so-called "endless zipper", you can adjust the length individual. In this case: The fabric must have the length of the zipper plus 2 cm for the seam allowance.
Tips for quick readers:
- Prepare cutting pattern, mark and cut out each fabric once
- Bring zipper on the fabric, just quilt the edges
- turn around and close the open sides, do not forget the opening
- Turn the bag
- Close turning opening
- Insert inner fabric into the outer fabric
- The cosmetic bag is ready