Crochet rug - Instructions - Round rug made of textile yarn
- Material and preparation
- Crochet the carpet
- Crocheting in rounds
- The knitting stitch
- The color transition
- Variation with chopsticks
- Graduation with border
There are hardly any textiles that you can not crochet by yourself. Cuddly toys and clothing are probably quite common crochet products. But it is equally possible to make baskets, handbags or even carpets with crochet hook and wool. With a really thick textile yarn, this does not take too long. The result is a great one of a kind as always.
In this manual, it is specifically about the production of a round carpet made of textile yarn. This is the classic among the crochet carpets. Of course, it is equally possible to make a rectangular runner. Also, the textile yarn is not mandatory. You may as well opt for another material. A big advantage of the textile yarn carpet is its easy care. The material is very robust, dimensionally stable and can be cleaned well in the washing machine. The processing may be a bit strange at the beginning. But with a little practice, you can come in very quickly.
Material and preparation
Material:
- textile yarn
- Crochet hook size 12 or 15
Textile yarns are residues from the textile industry. It occasionally has small irregularities such as holes or seams. These are not noticeable in the finished carpet. Beginners should pay attention to the spandex share. Pure cotton fabric is in the end, although dimensionally stable, but much more difficult to process. For a rug with a diameter between 55 cm and 60 cm you need about 1 kilogram of textile yarn. If you have a lot of old T-shirts or sheets at home, you can make it yourself using a pair of scissors. It may not be quite regular, but that makes the rug even more interesting. Alternative materials would be, for example, braided cotton rope or a woolen cord. The latter results in a very soft carpet on which you will certainly like to sit. Unfortunately it is quite expensive.
Prior knowledge:
- thread ring
- slip stitch
- Solid stitches OR Knitting stitch
- Double stitches
- possibly whole chopsticks
Here we go into the basic technique of crocheting in rounds. Right at the beginning, we will show you the difference in the stitch pattern between fixed stitches and knitting stitch. Choose for yourself what you like better or easier to handle. The chopsticks do not necessarily need you. We suggest you a variation on the pattern, which is crocheted with chopsticks. If you have never crocheted chopsticks or if it is too difficult for you with the thick yarn, you will be able to create a wonderful carpet without this technique.
Crochet the carpet
Crocheting in rounds
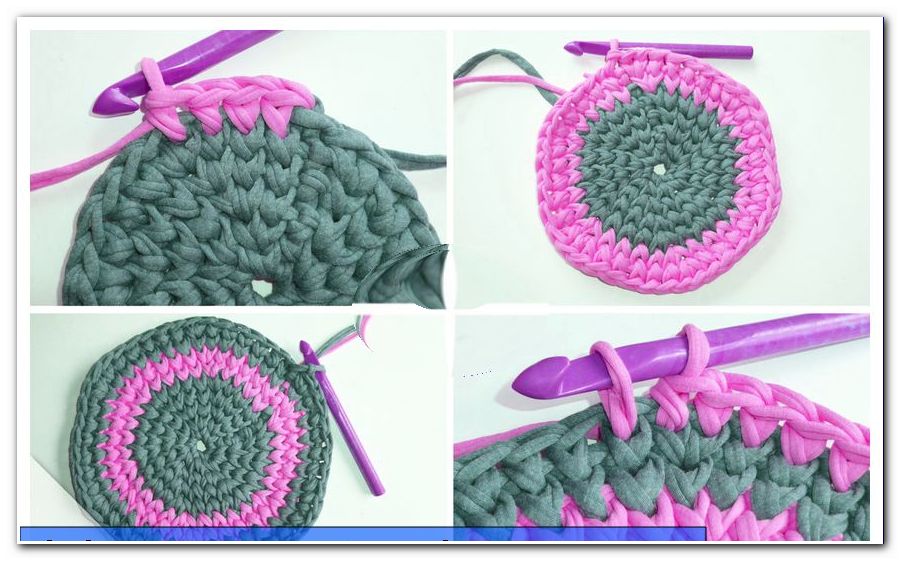
We start with a thread ring with 6 fixed stitches. Close the first round with a slit stitch in the first stitch.
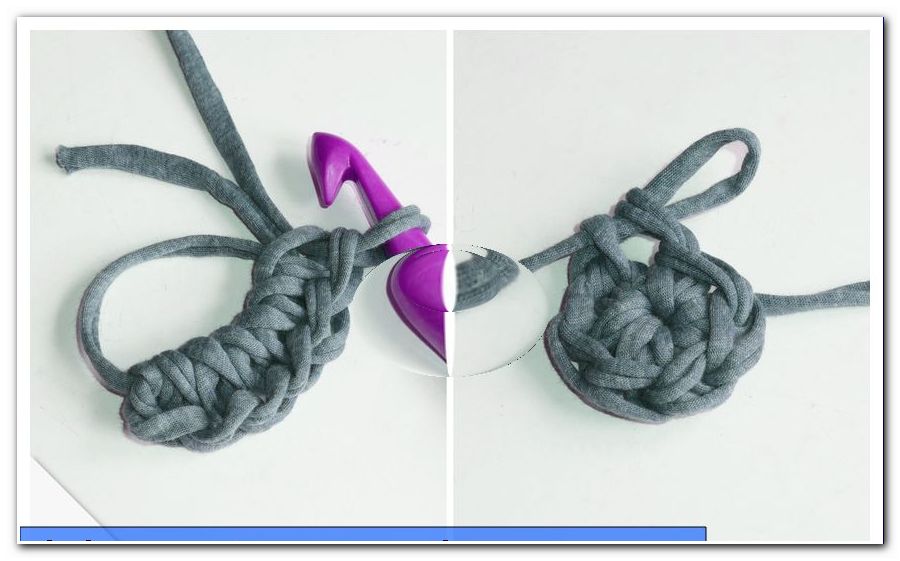
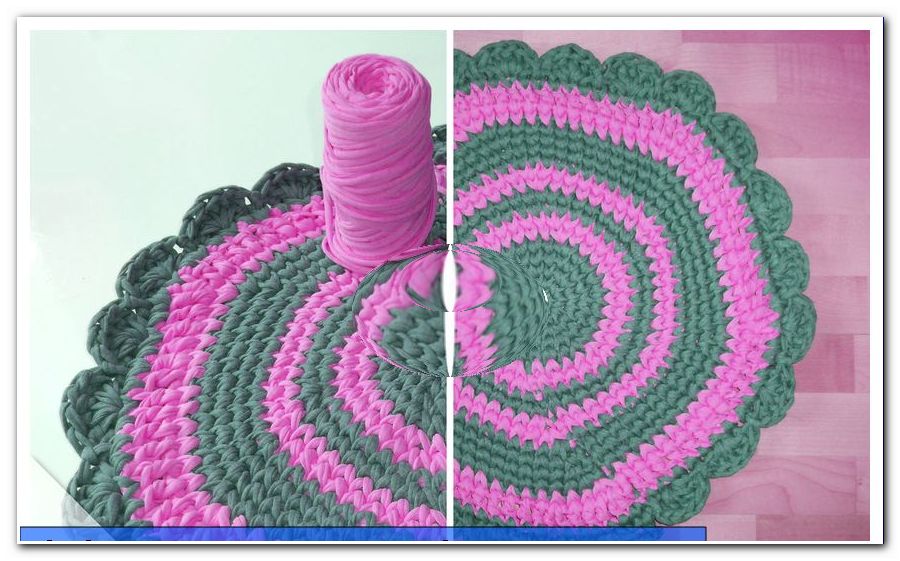
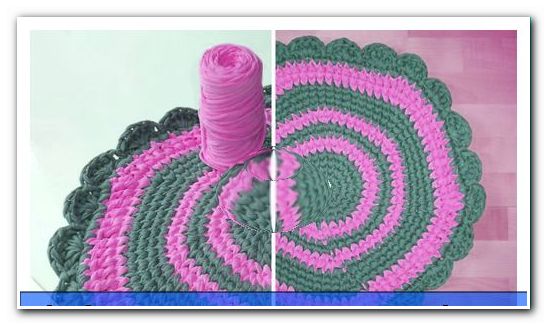
Now it's all about deciding: Do you like the fixed-mesh rug better, as you can see in the left picture ">
Tip: Make sure to crochet very loosely from the beginning. Otherwise, working with the textile yarn quickly becomes laborious and your wrists and fingers can hurt.
The basic procedure is independent of which crochet you crochet. First crochet an air mesh. Then you have to double all the stitches in the second round. This will give you 12 stitches in the round. Close the round again with a chain stitch in the air mesh from the beginning of the round.
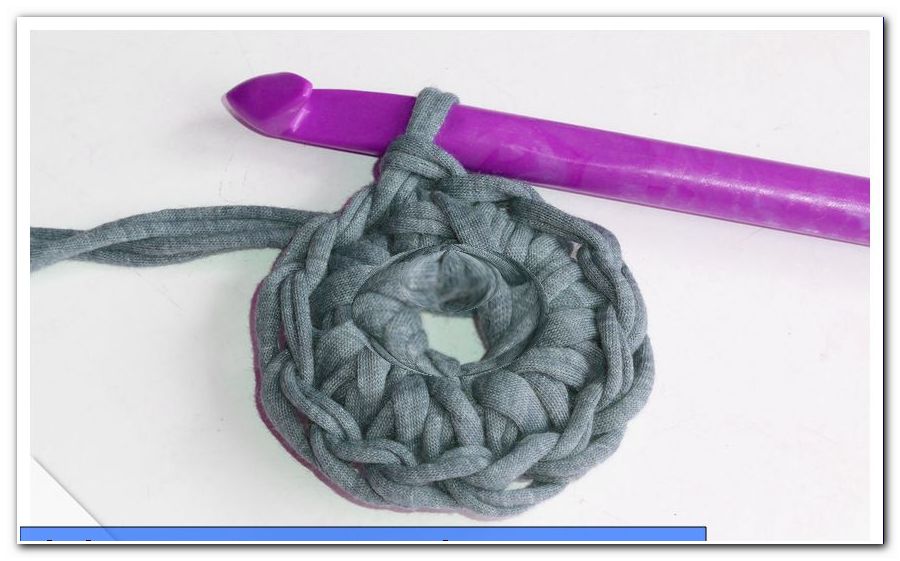
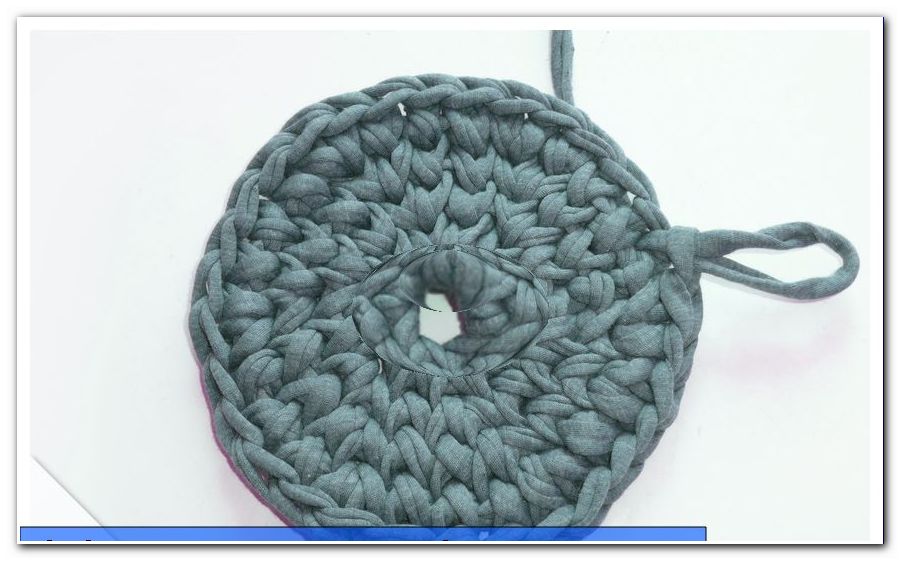
By completing the round with a chain stitch, the round is actually closed. This is especially important if you want to make the carpet in several colors. In a monochrome variant, you can skip the chain stitch and the air mesh during the lap transition. Then, instead of individual rounds, a spiral is created.
From now on, take 6 stitches in each round. This means to double every 2nd stitch in the 3rd round. In the 4th round every 3rd stitch is doubled and so it goes on. If the carpet curls outwards, crochet a round without increasing. On the other hand, if the edge is up, you have increased too few stitches. So keep an eye on your crochet work and expect to have to reraise one or the other round. Over time you will get a good feel for the increases. A general guide does not exist, because it depends very much on the material and the strength of the stitches.
The knitting stitch
As the name already suggests, the knitting stitch is similar to the stitch pattern when knitting. The only difference to the fixed stitch is where you stab with the crochet hook. Usually you go under the two threads of the stitch to get the thread. In the knitting stitch, stab the top of the small V after the hole. Check on the back if your crochet hook actually exits between the two threads.
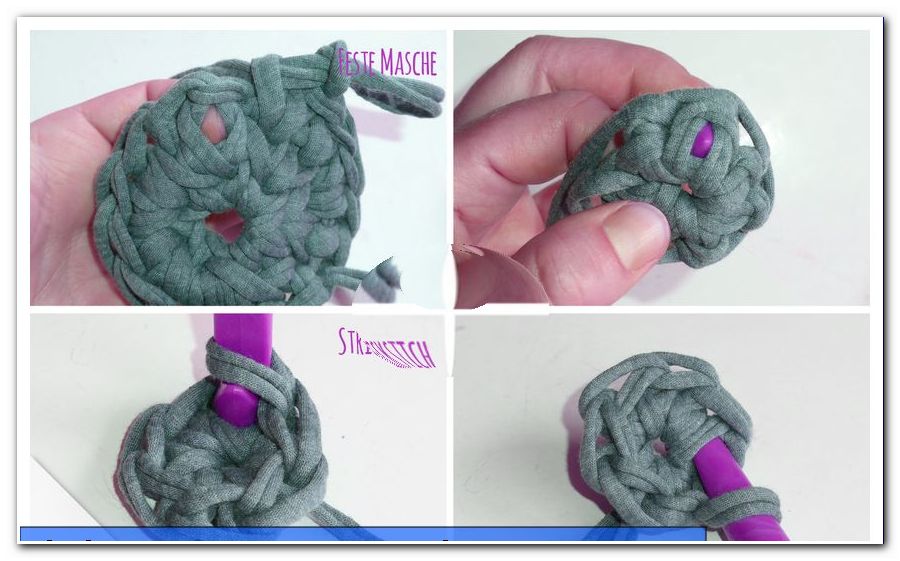
This mesh is a bit strange. Especially with textile yarn you have to pay more attention to work loose. Otherwise you have little chance with the thick needle to pierce through the V. Also for the knitting stitch, follow the pattern described above to gain 6 stitches in each round.
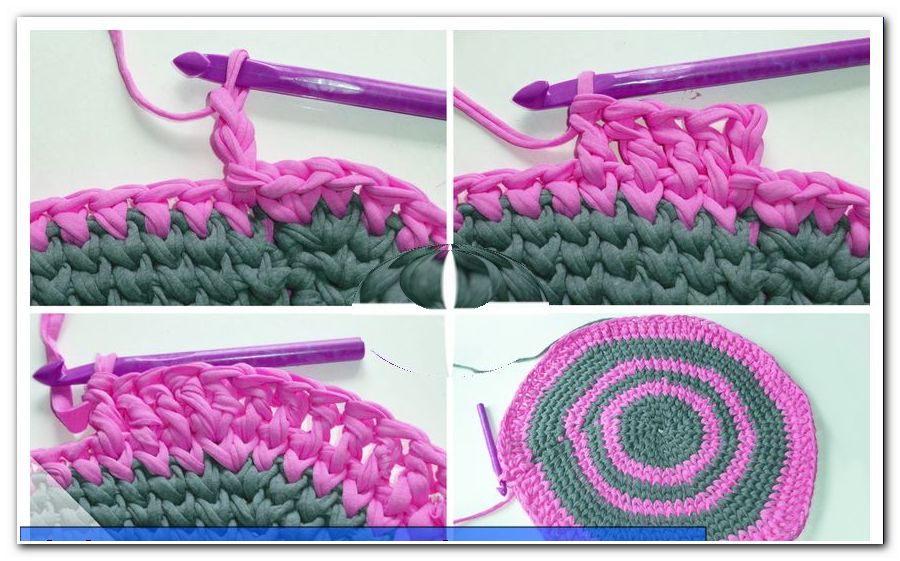
The color transition
You can crochet your rug in as many colors as you like. Our pattern carpet, where two colors change regularly, is just a suggestion. Also conceivable are color changes after half rounds. If you process remnants of textile yarn, you can also leave the color change to chance.
When crocheting whole rounds in one color, the color transition should always be between the warp stitch and the airlock. Just hang the old thread down the back and crochet with the thread of the new color. Later you can knot this beginning and end thread together. If you change color every few turns, you can also hang the thread on the back and pick it up the next time. Do not over tighten it. Otherwise the surface gets unsightly waves.
In this way you can make the carpet arbitrarily large.
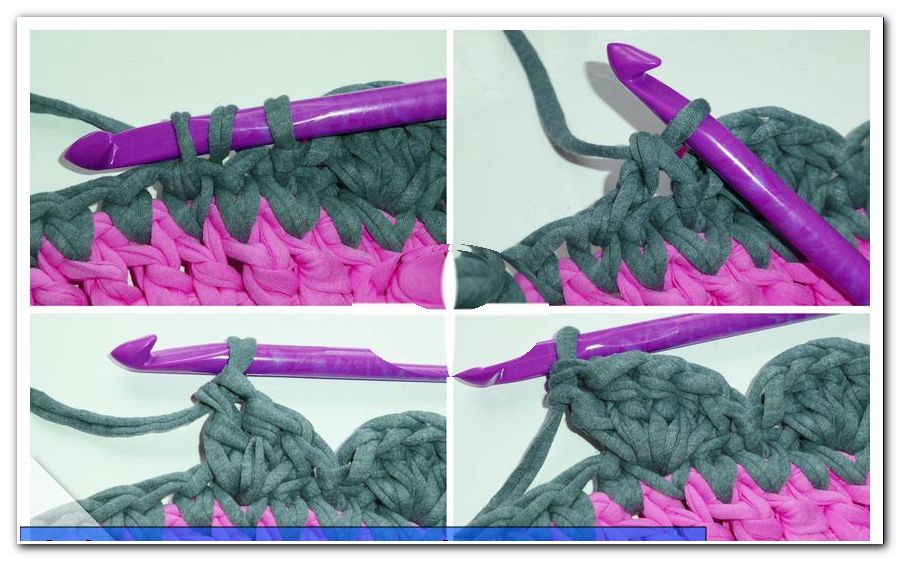
Variation with chopsticks
Here's a suggestion if you get bored of right-hand stitches in the long run. Start the round with 3 airguns. Now crochet whole sticks instead of the fixed stitches. If you have been knitting in knitting stitches so far, the sticks will also come into the V between the stitches. Double the stitches in the same places as before. If the edge pulls up despite increases, you can counteract this with air mesh. For example, make an airlock midway between the increases before crocheting the next chopstick.
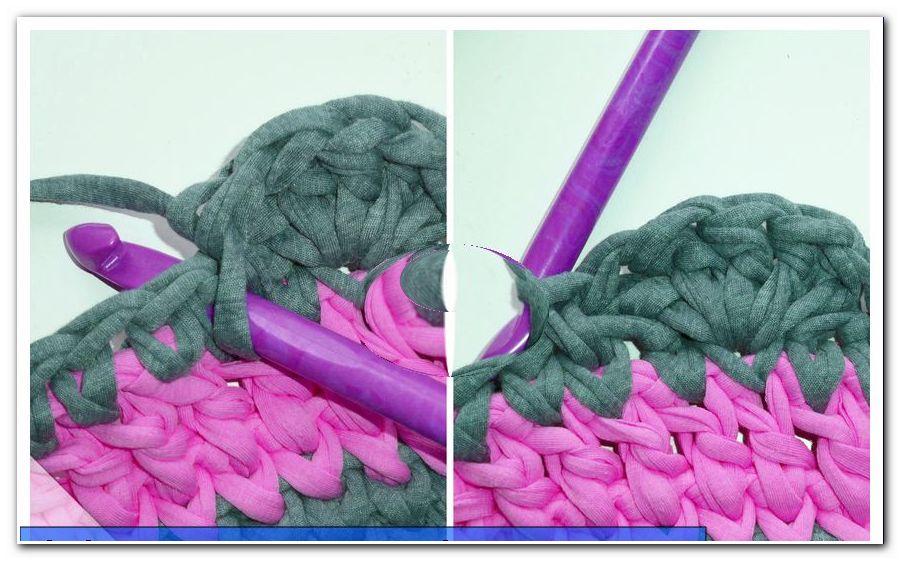
Graduation with border
Crochet your carpet as big or small as you like. With textile yarn, he gains in size surprisingly fast. You can decorate the border with a pretty border at the end. We have decided here for the variant "round arches". For this you always leave one stitch free and crochet 5 sticks in the next but one stitch.
Release a stitch again and fix the bow with a chain stitch in the next but one stitch. Work the border around. Finally, the yarn is cut and sutured.
The crocheted DIY carpet is now finished!