Set windows - the best tips and instructions
- Costs and craftsmen
- Tool for adjusting windows
- Instructions - Set the window
- find mistakes
- Warped in parallel and diagonally
- Adjust the contact pressure of the sash
- Replace window olive
Windows change with time completely by itself. However, this malfunction causes no permanent damage to the window, this should be set correctly from time to time. In many cases, this also saves a considerable part of the heating costs. See here how to adjust your windows.
Seals and hinges gradually take damage through an adjusted window. The result is increased heating costs and a window that at some point can not open and close. Modern windows have adjustment options in several different places, which either raise or lower the sash. In addition, the contact pressure of the window sash can be adjusted by the pins in the frame. Which adjustment you can make on which adjusting screw and where this screw can be found, we show you here in our tips for wood and plastic windows.
Material and preparation
You need this:
- Screwdrivers - cross and slot
- Allen wrench
- Torx
- spirit level
- ruler
- wedge
- helper
- WD 40 / sewing machine oil
- window handle
Costs and craftsmen
No complicated tool is needed to set the window. For heavy sashes, however, you should consult a helper who lifts the sash slightly during adjustment. It can also help you to find the exact error, because you can not be inside and out at the same time. An expensive craftsman is not necessary, because with a little tact and patience you can make all the settings yourself with the tips. Should it be necessary to change the window handle so the window handle, that is not difficult and can be accomplished with a simple screwdriver in a few minutes.
- Window handle / window handle from 5, 00 Euro
- lockable window handle from 10, 00 Euro

Tip: At first glance, the relatively many different setscrews and pegs, if you've found because, a little intimidating. But in most cases you will be able to adjust the window in just a few steps. Once again, practice is the master. Therefore, do not be afraid to always set your own windows.
Tool for adjusting windows
Which Allen key, Torx key or Allen key fits the screws in your window frame depends on the manufacturer of the window. For this you need for the attached caps, which are present on some windows, even a narrow slotted screwdriver. The eccentric locking pins or mushroom pins can be partially adjusted with a Phillips screwdriver or sometimes with a spanner or spanner in the appropriate size.
Instructions - Set the window
If the problems are still very small, but you feel that something is wrong, you can use a simple little test to find out if the window should be set. To do this, first open the window about a third. The window should remain in the position in which you opened it. Then the window is opened again for about two thirds and finally the window is completely opened. A perfectly adjusted window does not change its position automatically. You can also apply this small test when you are done setting your windows.
Tip: If the window has not been adjusted for a long time and maybe squeaks, then you should put some WD 40 or sewing machine oil on the hinges and screws before adjusting the individual adjusting screws. After a few minutes, the screws can then be easily adjusted, without causing damage to the screw.
find mistakes
If there is already a clear slot on one side of the window, the case is usually clear. Of course, it's never that easy. Often it is difficult to determine why the window is difficult to open and close. If possible, stand outside the window while your assistant slowly opens and closes the window sash. If this is not possible, perhaps because the window is on an upper floor, you should very slowly open and close the wing yourself. You should try to look as far as possible in the frame. Then you can usually tell at which point of the frame the window has shifted. 
If the window sash is left or right, you can find it out well with a spirit level . It is simply placed on the closed casement. If there is not enough space, you may be helped by a folding rule. Open the window wide and draw around the frame a distance from the inner edge of the frame, for example, five centimeters. When the window is closed again, you can determine by measuring which direction the window has moved. 
If the contact pressure is missing at one point of the window sash, you can easily feel it with your fingers. The window is then closed normally, then move by hand along the seam of window frame and casement. If there is a gap somewhere where the sash does not completely lie, then the contact pressure must also be adjusted. By pressing against the closed sash you can find out if the contact pressure is too loose. If the wing moves, the pressure must be adjusted.
Tip: In addition to the warped frame can still be missing the contact pressure of the wing. So you should look again after adjusting the crooked window sash, if the wing still has the right contact pressure all around.
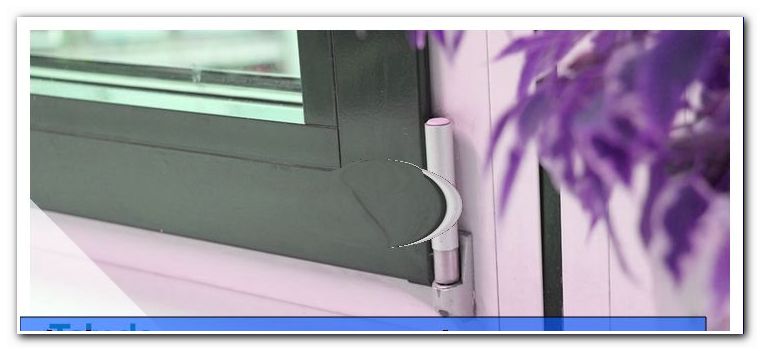
Warped in parallel and diagonally
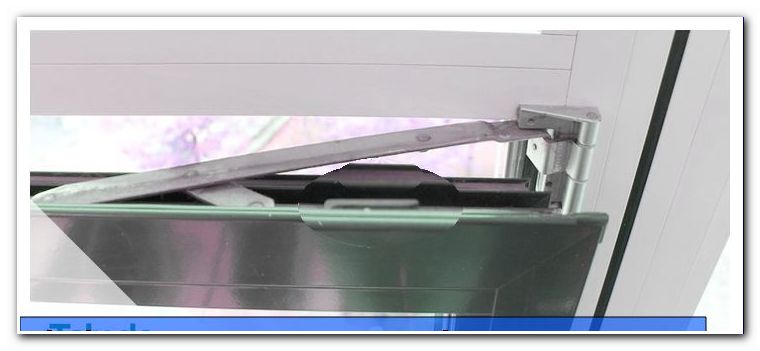
The diagonal of the sash, so a laterally distorted wing, can be adjusted to two to three screws. These can be found at the top and bottom of the frame. At the bottom corner support of the frame you will find the first and the second screw on the same side at the top of the scissor bearing. Some windows have a third option at the top corner store. First, insert only one of the screws and check that the window moves in the right direction. You will notice quickly if the screw has to be turned in the other direction or you first have to adjust the second screw on the scissor bearing.
Tip: Have the window wing raised by your helper so that you can turn the screws more easily. So you also notice faster if you turn in the right direction.
Unfortunately, there is no basic rule as to which screw should first be regulated in which direction. You can only find out the correct procedure by trying it out. Partially cover caps are placed on the screws, which you must first lift off. So if you can not find a screw, it could be hidden under a cap.
Tip: For some older wooden windows, there are also additional set screws or the scissor bearing is unfortunately designed completely differently. But the basic principle can usually be transferred and with a little searching you will be able to find and regulate the screws.
If the window sits on the bottom of the frame or hits it at the top, these two screws must also be adjusted. You should also start here with the lower corner bearing. With this problem, often only the adjusting screw on the corner bearing has to be adjusted down.
Adjust the contact pressure of the sash
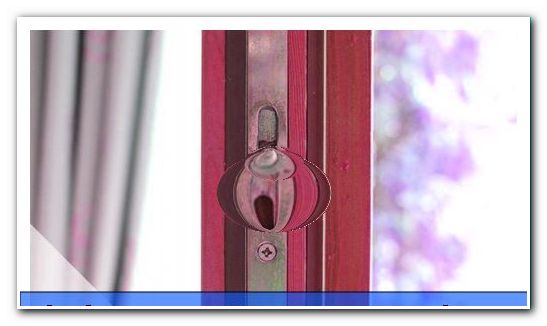
The contact pressure of the window sash is regulated by the closing or mushroom pins. However, you often have to adjust several locking pins. For example, if the window locks at the top, you must first adjust the pin at the top of the window frame. Then, however, usually the lateral pins must be readjusted, as they often sit too loose after the adjustment of the upper pin. Do not turn too far, but check again and again how tight the wing is. If you can not find a crack, you should try to push the wing against the frame with your hand. If the frame stops moving, the pressure is perfect. 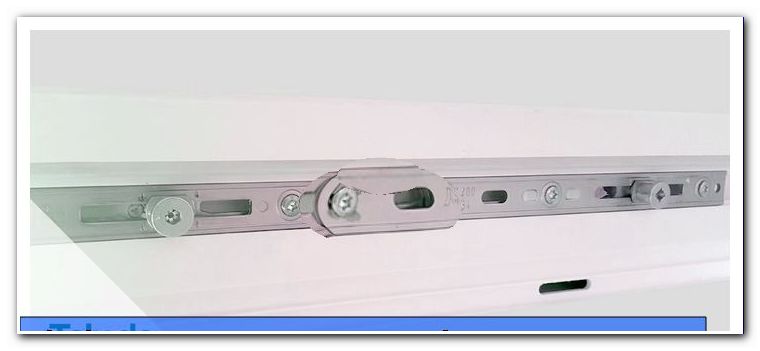
Replace window olive
If a window does not close properly, it may be that the square of the window handle is worn. Then a new window olive must be used. For this purpose, the handle is initially placed horizontally so that the aperture can be rotated in front of the two screws. Some panels are glued and must be treated a bit coarser.
Tip: On the ground floor and on the balcony, you should immediately install a lockable window handle, if you are already there. Since the burglars even get in today, when you are at home and only air something, you can also secure a tilted window against thieves.
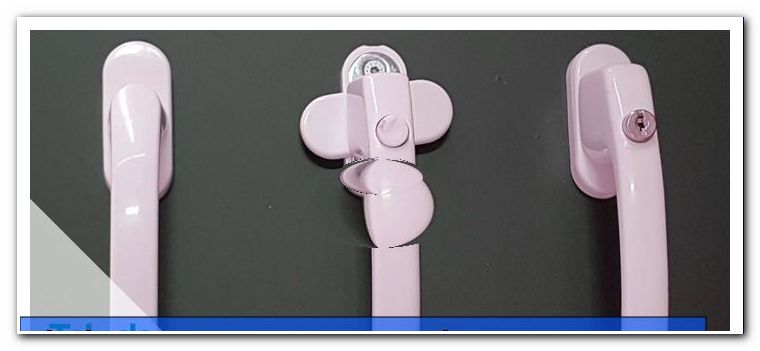
The two screws are usually removed with a large Phillips screwdriver. Then the handle can simply be removed and replaced with the new handle. But you also have to set this level horizontally. In a new window olive are usually new screws, which you should definitely use, because the old screws are certainly also damaged and loose.
Tip: If the screw holes for the window handle are also worn out, you can screw the new screws into the window frame with a little acrylic paste. This dries later and secures the screws. Unfortunately, the window handle can hardly be unscrewed afterwards, so you should pay attention to a particularly good quality when buying.
When the new window handle is screwed on, the cover is pushed in front of the screws and the handle is turned back to its correct position. For safety's sake, you should still test whether the handle turns well. If the handle mount still moves on the frame, the screws must be tightened a little.
Tips for quick readers
- Determine problem - open and close window sash
- Make screws easy with a little oil
- Check contact pressure - Determine gap
- with the hand around window sash buttons
- Place spirit level on the wing
- Adjust the height of the sash at the bottom corner storage
- lateral adjustment to corner bearing and shear bearing
- Contact pressure by adjusting the pins
- Open the window and check the settings
- replace defective window olive
- Horizontal window handle
- Twist or unscrew trim on handle
- Unscrew screws completely and pull off handle
- also put new window olive horizontally
- Screw on the window handle, advance the panel, check the handle