Drilling holes in Plexiglas - that's how it is with acrylic glass

- Cleaning Plexiglas
- The drilling of the holes
- Step 1 - Sufficient cooling
- Step 2 - Selection of the drill
- Step 3 - The drilling
- The control of the procedure
- The cost of drilling
Plexiglas is a popular material because the material is considered robust and comfortable. It comes in different sizes and shapes and can be easily processed with the right instructions. Read in our guide how to drill holes in the acrylic glass and thus increase the application possibilities.
The advantages of Plexiglas have been known for a long time. The material is often used as a substitute for glass because it is transparent. At the same time scores the high robustness. While glass plates can shatter easily, acrylic glass is tough. It holds high loads, such as weather conditions. Therefore Plexiglas is used both indoors and outdoors. Rain, storm and hail are usually intercepted and the material remains intact. In addition there are the diverse design options. You can buy the acrylic glass in different colors and even bend it if necessary. By drilling holes in the surface, you can once again increase the possibilities of use, making the panels part of smaller and larger construction projects.

Cleaning Plexiglas
Both before and after drilling the holes, you must clean the surface of the acrylic glass. Since dirt is difficult to settle on the smooth material, cleaning with a mixture of water and dishwashing detergent is generally sufficient. However, if the dust from drilling remained on the surface, it would cause scratches.
Tip: Use a soft and lint-free cloth for cleaning. A sponge is also suitable, but this must not be used with the rough side.
It is important that you do not wipe the surface dry. Existing dirt particles would thereby rub over the Plexiglas and leave scratches. In the case of fatty deposits on the surface, benzene-free pure gasoline is also an alternative.
Tip: When drilling, be careful not to wipe your hand over the chipped surface. This would already scratch.
The drilling of the holes
When drilling holes in Plexiglas, choosing the right tool and the correct procedure is crucial. It is important that you do not exert too much pressure or use too high a speed. Note the correct way of working, then drilling acrylic glass is not much harder than drilling in wood. Special machines are not necessary, you only need the right tool attachments.
Step 1 - Sufficient cooling
In any case, you must avoid that the material heats up too much. The heat generated in the acrylic glass tensions. The molecular chains change, causing changes to the material that can not be reversed. If it comes to the formation of cracks, then the Plexiglas is irreparably damaged.
Step 2 - Selection of the drill
Brass drill:
The drill should have a polished inside. In addition, the rake angle must be negative. Similar requirements apply to brass work, so you can orient yourself to these characteristics when selecting the drills.
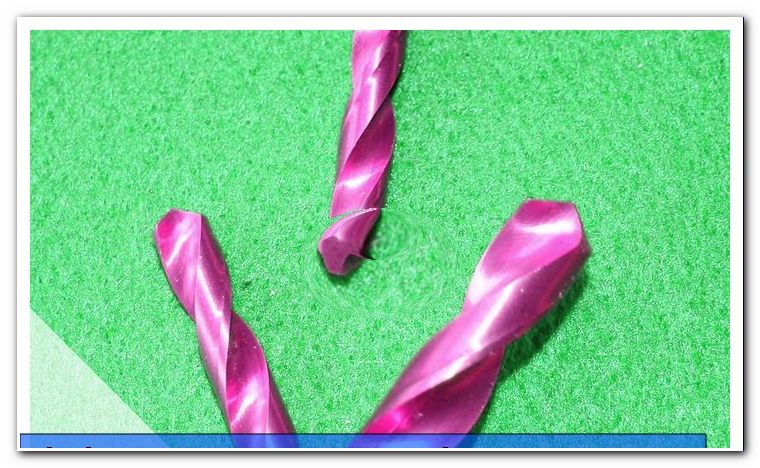
Steel drill:
Steel drills are basically suitable, but the blade is not dull enough. After a small modification you can therefore also use the steel drill: Use the steel drill to drill a hole in concrete. It is important that the cutting edge becomes worn and dull. The drill works by cutting, which is important for working with Plexiglas.
Wood drills and plastic drills:
Wood drills and plastic drills are very well suited for drilling in Plexiglas.
Twist drills, step drills, conical drills or countersinks ">
All these variants are suitable in principle. The twist drill should have an acute angle between 60 degrees and 90 degrees. If you have decided on a twist drill, then you must make sure that this scrapes and not cuts. Decisive for this are the two cutting edges or the rake angle. The sheaths should be sanded back accordingly. By scraping instead of cutting you prevent breakouts and cracks. The advantages of the taper drill lie in the conical bore, should this be desired. For deburring the countersink is the right choice.

This must be considered when choosing the drill and when drilling
- If you have used the acrylic pegs, then you should not use them for other fabrics.
- With a drill stand you work cleaner and more precise.
- If the drilling depth is more than 5 millimeters, then you should ensure in any case for sufficient cooling by compressed air or water.
- In order to reduce the heating of the material and the drill, you should vent the tool several times from a drilling depth of 5 millimeters. To do this, briefly lift the drill bit out of the material after the first millimeter. Repeat this procedure after every millimeter you drilled.
- In between, check the chip to adjust the drilling speed and feed rate.
- If you have reached the end of the workpiece, you must reduce the feed. Never pierce the end of the bit with a high feed rate.
Step 3 - The drilling
- First of all, draw the desired holes. Make sure that two adjacent holes are not too close together.
- Clamp the Plexiglas disc so that it can not slip. Take care not to fix the material too tightly, otherwise the tension will be too high.
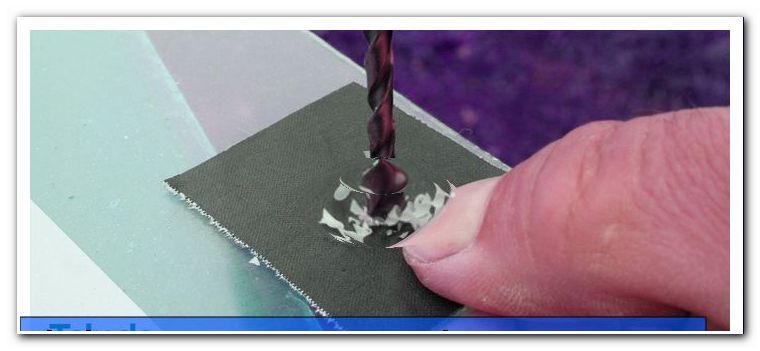
Plexiglas with tape

Tip: If necessary, cover the drilling area with adhesive tape to prevent it from breaking out and tearing.
- Ensure adequate cooling and first carry out a test well. You may need to change the drill attachment.
- Use the drill and make sure the pressure is not too high. Start with a low speed and increase it if necessary.
Important: It is better to work slower than too fast.
- Shortly before the breakthrough you reduce the speed again. In the meantime, check the chip and vent the drill.
The control of the procedure
To make sure you are working properly and avoiding damage to the material, you need to look at the chip in between. If this is crumbly and compressed, then there are two different causes. Either the speed is too high or you are working with too much feed. On the other hand, too low a speed or too low a feed lead to a fused chip.

What problems can occur when drilling ">
- The holes can go wrong. This happens, for example, when the disc bends up during drilling or is taken up by the drill.
- The holes may have ragged edges. In this case, mostly the wrong drill was used. The most suitable are plastic drills or HSS drills. The ideal polished section is between 60 degrees and 90 degrees.
Tip: Perform a test well. As part of this action, you'll see if you've selected the right tool. If cracks are visible at the edges, it is advisable to change the implement. The problem with the cracks is that the edges are weakened. This in turn increases the risk of breakage.

The difficulty of drilling holes in Plexiglas
Drilling the holes does not require great skills but only concentration and precision. It is important that you work wisely and not too fast. Please note, however, that damage to the Plexiglas can occur as a result of errors or material weakness. Therefore, you always have to expect that the plates will suffer damage. In this case, the acrylic glass must be replaced.
The cost of drilling
Special costs do not arise. Only the drill attachment used will be unusable for other materials, which you must consider when choosing.
Tips for quick readers:
- select the suitable drill variant
- Twist drills, step drills, conical drills or countersinks
- Brass drills, wood drills, plastic drills, steel drills
- Check the chip regularly
- Adjust feed and speed
- crumbly chip: Reduce speed and feed
- fused span: increase speed and feed slightly
- ensure adequate cooling
- Bleed the drill: lift it from the material in between
- Avoid cracks and breaks
- Reduce feed to avoid damage
- Test drilling: replace drills if necessary
- Cool with water or compressed air