Sew double piped pocket with and without flap - instructions with pictures

- Material and preparation
- Instructions - Sew on the piping bag
- Sew pocket flap
- Sew pocket bag
- variations
- Quick guide
Unfortunately, the piping bag is unjustly as feared as sewing a zipper. However, if you work exactly and follow these instructions, it is ratz-fatz sewn and looks professional. Normally, it's used to pocket pockets on jackets and blazers, but I think she does well on dresses and pants too.
So the piped pocket with flap also succeed beginners
In this guide, I'll show you how to sew a piped pocket with and without flap. There will be two more instructions in which I would like to introduce the one-sided piping bag and the welt pocket. I hope you find - as I do - a pleasure in this type of bag and can incorporate it in your projects in the future.
Difficulty level 2.5 / 5
(with this manual and a little patience but also suitable for beginners)
Material costs 1/5
(no additional costs - usually results from the pattern)
Time required 2.5 / 5
(variable depending on exercise and substance type)
Material and preparation
The material selection
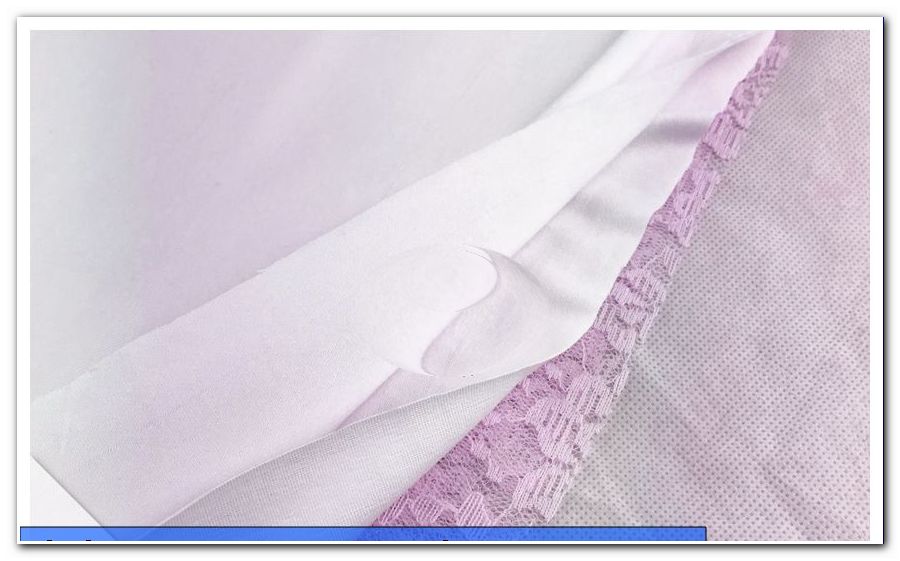
The material selection normally results from the pattern. For this tutorial, I use plain cotton jersey in different colors to better illustrate and explain each step. In fact, in most cases the same fabric is used as for the rest of the garment. For the pocket bag lining material is often used, because it is very thin and therefore does not apply. However, this slips heavily and requires more practice (or Wondertape).
In any case, the fabric parts should be reinforced with ironing fleece. On the one hand, this makes work easier and, on the other hand, it is more stable and the piping bag later nicely holds its shape.
The amount of material and the pattern
Garments with piped pockets are usually specified in the pattern, then the amount of material depends. Basically you can insert piped pockets everywhere. First, consider how wide the procedure should be and how big you want your flap to be.
For the width of the self-designed piping pocket, measure the hand width (no thumbs at the widest point) of the future wearer and add about 3 cm.

My piped pocket must therefore be at least 9 cm + 3 cm = 12 cm long (length of incision). At each end add 1.5 cm seam allowance, which you draw. The total length is therefore in my case 15 cm . For the height I take 3 cm . In total, I need two piping, so I cut myself a piece of fabric on which I can draw these measurements beautiful (around 2 cm clearance) and versehe this with a temple insert.
Tip: I do NOT use a volume fleece for the ironing insert. It is just to reinforce and support the fabric, but not make it thicker. I use H180 here, but you can also use eg H250.
Instructions - Sew on the piping bag
Now I draw all the measurements of my two piping stripes on the fleece and cut out the outer lines exactly.
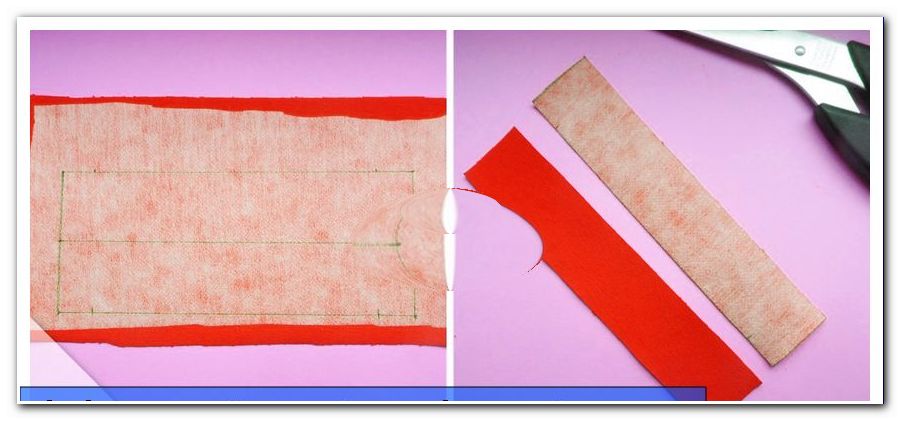
Then I iron both strips lengthwise inwards, draw an auxiliary line at the half (0.75 cm) and step it off in the middle.

I reinforce the place on the fabric, where the piping bag is to be used with ironing fleece. The fleece should go on the sides at least 2 cm beyond the Einrifflänge (12 cm) and up and down, I also give generously a few cm. Then I draw the Eingrifflänge and mark me beginning and end. These lines are now quilted - I show it here for better visibility because of contrasting colors - namely the long line with a large basting stitch of the machine, the short side lines by hand.

The hand-sewn markings are not sewn. So you can see the markings on the right side of the fabric.

Now I put one of the two piping strips with the cutting edge in the middle of the quilted line and pin it down. Now, I stitch all the layers along the seam on the piping strip with a simple straight stitch, just between the two end marks.

In the same way I do with the second piping strip.

I mark a distance of 1 cm at the back and draw lines from there into the corners. Then I cut the quilted midline up to those triangles and down the tips along the thighs right to the end points of my seams. Here you have to work very carefully, otherwise the bag will not look nice. Be careful not to cut into the piping strips.

Tip: If you have cut too far: fold back the piping and stitch to the top of the incision.
If you have not cut far enough: fold back the piping and cut in until the seam ends.
Now I turn the piping. If you lift the piping strips at the sides, you will see the small triangles. Fold your workpiece in such a way that the piping strips and the triangle come to lie on each other and sew them together exactly. Now iron the piping bag from both sides.

Tip: When ironing with steam, the edges are especially beautiful. To ensure that the seam allowances of the piping do not press through, place some cardboard between the outer fabric and the seam allowance on both sides.
If you want to sew the double piped pocket without flap, start now with the pocket bag and skip the flap instructions.

Sew pocket flap
For the flap I use the engagement length with a height of 3 cm and rounding at the visible corners plus seam allowances on all sides of 0.75 cm . Thus, I need two pieces of fabric, each with 13.5 cm by 4.5 cm . I reinforce the outer fabric again with the ironing insert. I put the two pieces of cloth right to right (ie with the nice sides to each other) together and stitch both sides and the bottom straight together, then I cut in the corners in the seam allowance, turn and iron the pocket flap.

I put the flap in the opening between the two piping.

Here, the open edge of the flap with the also open edge of the piping should close exactly. Stick all layers to the top of the fabric and stitch them in the seam shadow (ie in the seam between the piping and the outer fabric).

Here you can see the seam very well due to the sewing thread in the contrasting color. If you use matching colors, this seam does not stand out.

Sew pocket bag
You can either sew the pocket bag from the outer fabric or use lining material for it. A combination of both is common. If you work with lining material, you should plan at least one panel from the outer fabric, so that when opening the bag does not flash out the lining material. It just looks more professional and looks a lot nicer.
Cut the fabrics to match the piping length, ie 15 cm. The height can be adjusted to your personal preferences. I think it's nice to be able to put your hand up to the upper row of ankles at least.

That's me at least 10 cm for the lower pocket plus seam allowances, so 11.5 cm. For the back pocket part you need 1.5 cm more, because it is sewn on higher up. This pocket piece is also optionally pieced with the panel of outer fabric. The aperture should be at least 3 cm high, better more.
Thus, the dimensions of my fabric pieces for the bag are 15 x 11.5 cm and 15 x 13 cm .
Tip: If you are sharing these dimensions for a panel, remember to add extra seam allowances!
Place the smaller pieces of material right to right on the lower edge of the piping, insert them, fold down the upper material at the bottom and sew the pocket bag fabric to the piping just beside the existing seam.

Fold the bag fabric outwards and proceed in the same way with the other piece of fabric on the top. Both bag fabrics are flush at the bottom. Put the bag pouch sides and the pouch bottom together and stitch them together. Include the piping strips at the side as well. To make sewing easier, fold the outer fabric backwards. The hand-stitched page markers can now be removed.

And so the double piped bag is already finished.

variations
If no inner lining is planned and you do not want to see the seam allowances of the pocket seams, you can also stitch them together left to left, turn them over and stitch them again with a short edging so that you can not see the seam allowances either from inside or from outside.
For decoration can also (with and without flap) buttons are attached. These can either be dummies or actually work. How to sew buttonholes, please refer to our tutorial "sewing buttonholes".
Quick guide
1. Determine the length of the incision (hand width +3 cm) + cut 1.5 cm each with a height of 3 cm twice
2. halve lengthwise / iron, in the middle lengthen stepwise
3. Place open edges on the guide for the procedure and center in the middle
4. Open the incision and cut in each case approximately 1 cm in front of the edge at an angle to the seam ends
5. Turn the piping and lock with "triangles"
6. Ironing
7. If desired, cut flap pieces, reinforce, sew together and turn over
8. Insert the flap and stitch in the seam shadow of the piping
9. Cut fabric pieces for the pocket bag
10. Place the smaller piece of fabric flush with the lower edge of the piping and stitch tightly
11. Place the larger piece of fabric flush with the upper edge of the piping edge and stitch in place
12. Pin the bag at the side and at the bottom and stitch (including piping)
And done!
The twisted pirate