Knit Hangmats: Learn Basics | Drop stitch pattern

- Knit drop stitches
- Material and preparation
- Basics
- Drop stitch pattern
- Horizontal fall mesh pattern
- Vertical fall stitch pattern
- Wavy drop stitch pattern
- Exercise project | Knit loop
- Knit loop
- Possible variations
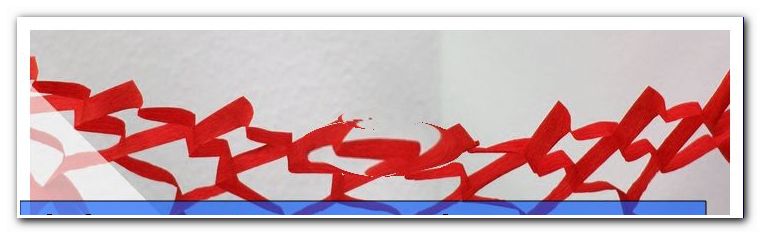
Dropping stitches is usually a big mistake that, in the worst case, ruins the whole knitting project. However, this is not the case with the drop stitch patterns in this manual: you may allow specific stitches to slip from the needle to create loose patterns. We show you three different ways to knit drop stitches. As an exercise project we suggest a summery loop.
Knit drop stitches
They are looking for a pattern for a knitting project that suits the warm season "> Material and preparation
To knit stitches ribbon yarns are particularly good. Due to the broad, flat thread, the patterns come into their own. Such yarns are available in various designs, for example in matt or glossy. When our thread Goldglitzer provides whistle. Instead of a ribbon yarn you can use normal cotton .
In any case, grab a thick yarn that is at least knitted with needle size six. On the band you will find information. Take the larger one with several specified needle sizes, so that the knit will fall nicely.
Basics
Knit pattern
The pattern guide tells you how many stitches you need to use. First, knit a row of left stitches to make the stop edge less noticeable. Then work through the pattern series . In each row, repeat all the steps until your stitches are completely entangled.
If there are stars in the description (*), knit the stitches in front of the first symbol only once at the beginning of the row. The steps behind the second star you work only at the end of the series. After the last row, start again with the first until your piece of knitting is long enough.
Tip: Keep a tally so that you always know which row you are in at the moment.
edge stitches
Edge stitching is required so that the side edges become beautifully even. Hit two more stitches than you need for the pattern. For margins that are to be sewn together later, the knot margin is a good choice. To do this, knit your edge stitches, that is the first and last stitch, in each row to the right. If the side edges remain open, the edge of the kettlebell is recommended . Lift the first stitch in each row without knitting. To do this, push it onto the right-hand needle, leaving the thread lying before you work. The last stitch you always knit right.
envelope
Lay the thread over the right needle from the front to the back. If the instructions give two envelopes, pass the yarn under the needle after the first one and put it over it again. Each envelope creates a new mesh . For drop stitch patterns, drop them as soon as the description prompts you.
Drop stitch pattern
Horizontal fall mesh pattern
For this pattern you will need a mesh size divisible by ten and six additional stitches.
1st row: * 6 stitches on the right, 1 turn-up, 1 stitch on the right, 2 turn-ups, 1 stitch on the right, 2 turn-ups, 1 stitch on the right, 2 turn-ups, 1 stitch on the right, 1 turn-up *, 6 stitches on the right

2nd row: knit all stitches to the right, dropping the envelopes from the previous row

3rd row: knit all stitches to the right
4th row: like 3rd row

5th row: * 1 stitch on the right, 1 envelope, 1 stitch on the right, 2 envelopes, 1 stitch on the right, 2 envelopes, 1 stitch on the right, 2 envelopes, 1 stitch on the right, 1 turn, 5 stitches on the right *, 1 stitch on the right, 1 Envelope, 1 stitch on the right, 2 envelopes, 1 stitch on the right, 2 envelopes, 1 stitch on the right, 2 envelopes, 1 stitch on the right, 1 turn-up, 1 stitch on the right

6th row: like 2nd row

7th row: like 3rd row
8th row: like 3rd row

Tip: Do not count the stitches after the first or fifth row because the envelopes temporarily increase the mesh count.

Vertical fall stitch pattern
Your mesh size must be divisible by eight for this pattern. You also need six additional stitches . The dropped stitches rib across several rows. This creates the vertical drop stitches. Do not worry, the knit will not break. The stitches only dissolve to the point where you made an envelope a few rows before.
1. Preparation series: * 2 stitches on the left, 2 stitches on the right, 2 stitches on the left, 1 stitch on the right, 1 turn-up, 1 stitch on the right *, 2 stitches on the left, 2 stitches on the right, 2 stitches on the left

2. Preparation series: 2 stitches on the right, 2 stitches on the left, 2 stitches on the right, * 3 stitches on the left, 2 stitches on the right, 2 stitches on the left, 2 stitches on the right *

The two preparation series knit only in the first round. Then repeat the following twelve rows continuously.
1st row: * 2 stitches left, 2 stitches right, 2 stitches left, 3 stitches right *, 2 stitches left, 2 stitches right, 2 stitches left
2nd row: 2 stitches right, 2 stitches left, 2 stitches right, * 3 stitches left, 2 stitches right, 2 stitches left, 2 stitches right *
3rd row: Like 1st row

4th row: Like 2nd row
5th row :: * 2 stitches on the left, 1 stitch on the right, 1 turn-up, 1 stitch on the right, 2 stitches on the left, 1 stitch on the right, 1 stitch dropped, 1 stitch on the right *, 2 stitches on the left, 1 stitch on the right, 1 turn-on, 1 stitch on the right, 2 stitches on the left

6th row: 2 stitches right, 3 stitches left, 2 stitches right, * 2 stitches left, 2 stitches right, 3 stitches left, 2 stitches right *
7th row: * 2 stitches left, 3 stitches right, 2 stitches left, 2 stitches right *, 2 stitches left, 3 stitches right, 2 stitches left
8th row: like 6th row
9th row: like 7th row
10th row: like 6th row
11th row: * 2 stitches left, 1 stitch on the right, 1 stitch dropped, 1 stitch on the right, 2 stitches on the left, 1 stitch on the right, 1 turn-up, 1 stitch on the right *, 2 stitches on the left, 1 stitch on the right, drop 1 stitch, 1 stitch on the right, 2 stitches on the left
12th row: like 2nd row

Tip: When counting, note that after the preparation rows, the first through the fourth, and the eleventh and twelfth rows, you have one more stitch on the pins than you hit. After the fifth to tenth row, there are two stitches more.

Wavy drop stitch pattern
Suggest a number of stitches that can be divided by six and an additional stitch.
1st row: 1 stitch on the right, * 1 stitch on the right, 1 turn-up, 1 stitch on the right, 2 turn-ups, 1 stitch on the right, 2 turn-ups, 1 stitch on the right, 1 turn-on, 2 stitches on the right *

2nd row: knit all stitches to the right, dropping the envelopes from the previous row

3rd row: 1 stitch on the right, 2 envelopes, 1 stitch on the right, 1 turn-up, 3 stitches on the right, 1 turn-up, * 1 stitch on the right, 2 turn-ups, 1 stitch on the right, 2 turn-ups, 1 stitch on the right, 1 turn-on, 3 stitches on the right, 1 envelope *, 1 stitch on the right, 2 envelopes, 1 stitch on the right

4th row: like 2nd row

Tip: Count the stitches only after the second and fourth rows, because in the other rows the number of stitches through the envelopes is higher than at the attack.

Exercise project | Knit loop
Material and preparation
For a summery loop with one or more drop stitch patterns, cotton (or a cotton blend) is the right yarn. We used 100 grams of ribbon yarn and needle size nine. Knitt a piece in your desired drop stitch pattern and measure how many stitches are ten inches wide. Later, you can work out how many stitches you need to apply to your loop.
You need this for a loop:
- 100 grams thick cotton yarn (for example, ribbon yarn)
- matching knitting needles
- Needle for sewing

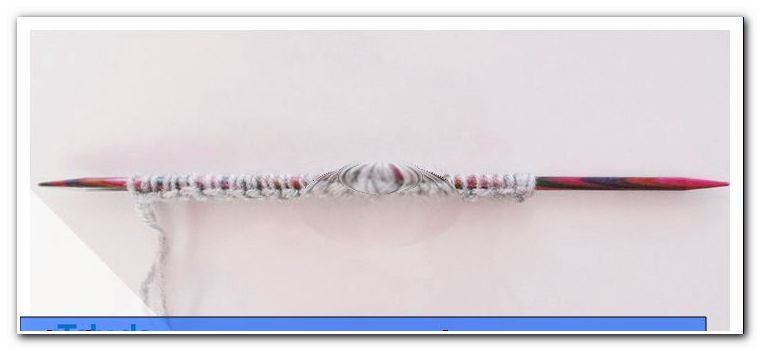
Tip: We used a circular needle to make the stitches comfortable. Two short needles are connected by a cable. You can do the work as usual after every row.
Knit loop
There are two ways to knit your loop. Either you suggest stitches for 25 to 30 centimeters wide and knit 60 to 70 centimeters long (= possibility one ) or vice versa (= possibility two ). In the first case, you knit around the neck from one point, from the bottom up in the second. We have decided on the second option.
Tip: Pay attention to the number of stitches your pattern needs. Also think of edge stitches. For the first option, the edge of the kelp is recommended, for the second, the edge of the knot.
We worked all three drop stitch patterns side by side on our loop. If you prefer, separate the stitches for each pattern with threads of different colors or special stitch markers to let you know when a new pattern begins. Bear in mind the number of stitches needed for each pattern.
If you want to knit your loop in the first way and combine several patterns, work them one after the other. Start with a pattern and change after a few centimeters to the second and so on. If the patterns require different numbers of stitches, make additional stitches before changing them or remove them as you did on the bind off. Distribute this over the row and not directly on the edge so it does not stand out.

Once your loop has reached the above dimensions, chain it off.

Now sew the two narrow sides together and sew all the hanging threads.

Ready your summery loop in the drop stitch pattern!

Possible variations
1. If you want to wrap the loop twice around your neck, knit it a little longer (if possible) or wider (if possible two). 110 to 120 centimeters are a good value. Remember that you need more yarn.
2. Make an open scarf instead of a loop by striking as many stitches as you need for the desired width and knitting until the scarf is long enough. If you want to knit several types of drop stitches, do this as described for the loop for the first option. If you want, you can decorate the finished ends with attached fringes. Note that you need to knit the scarf longer than a loop and therefore need more yarn.