Folding napkins into cutlery bags - DIY napkin bag

- 1. cutlery bag
- 2. Cutlery bag
- 3. cutlery bag
- 4. Cutlery bag
With appropriate table decoration every table or just a simply decorated table looks much better. Napkins can be the highlight in matching color and folding, but also discreetly support the other decoration. Important is the matching selection of napkins. Both material, color, size and folding technique must be right. Not every technique suits every occasion.
Napkins made of napkins are not only beautiful to look at, they are also extremely practical. Especially for buffets, barbecues or similar events in which the guests provide themselves with food, they are well suited. You can put the filled cutlery bags on any place, or even place them in a central location, from where then the party guests can serve themselves.
Folding napkins is not science. With the appropriate instructions you can fold over step by step. For the first one needs a little more practice, from the third or fourth napkin it almost goes by itself. For the cutlery can be used both monochrome, as well as printed napkins. It is important that both sides of the napkin are colored, including the inside, as this is also visible through the folding. Motif napkins are rather unsuitable for the cutlery bags. They come out unfolded better. In principle, the standard size is 33 x 33 cm, but you can also use larger formats. Stronger materials are better than very thin, soft napkins.
1. cutlery bag
Lay the napkin in front of you so that the closed tip is on the lower left. The finished bag looks particularly nice when you select a napkin, where the colors are different for inside and outside, so in patterns, for example, outside green-white and inside white-green.

Step 1: Fold the top layer of the napkin diagonally in the middle. To do this, place the upper right corner on the lower left corner.
Step 2: Unfold the newly folded side and put the right, upper corner on the diagonal fold and fold.
Step 3: Place the resulting fold on the diagonal auxiliary line and fold a strip (just fold it over again).
Step 4: Fold this strip down again. He must lie below the diagonal.
Step 5: Fold the next position of the napkin with the tip in the middle at the diagonal.
Step 6: Fold again right to the diagonal. It creates a second volume right next to the first one.
Step 7: Turn the folded napkin over. The bands are now on the back. Fold the right side of the napkin towards the middle.
Step 8: Then fold the left side towards the middle.
Step 9: If you turn the napkin around again, you can see the two folded ribbons in front and top the cutlery can be inserted.
Click here: To the picture gallery
If a napkin with different exterior and interior color was used, the bands are different colored, which works very well. Of course, the bag can not only be used for cutlery, but also for flowers, long-stemmed flowers or name cards.
2. Cutlery bag
This cutlery bag is probably the easiest to fold. It is suitable both monochrome, as well as multi-colored models. Too large patterns should be avoided. Unfold the napkin once and place it in front of you so that the closed edge points downwards.

Step 1: Fold the top layer completely to the bottom edge of the napkin. Nice smooth.
Step 2: Turn the napkin upside down, then turn it again so that the closed edge points to the right.
Step 3: Fold the entire napkin from the bottom to the center line and smooth.
Step 4: Fold up again, beyond the center line.
Step 5: Fold up again as the last step. It has emerged a bag in which the cutlery can be inserted.
Click here: To the picture gallery
3. cutlery bag
For this cutlery one uses napkins, in which in a corner something is imprinted or a picture is to be seen on it. Mostly it is a company logo, or names, such as a wedding or a birthday. The logo or image must be printed so that if you place the napkin in front of you, it will face downwards (with the tip forward) and the closed edge towards the bottom left.

Step 1: Open the napkin to the left.
Step 2: Fold the upper left corner to the lower middle.
Step 3: Fold the napkin back together. The logo must appear again at the top.
Step 4: Turn the entire napkin upside down, with the back side up.
Step 5: Fold both peaks, ie from the right and left to the middle, so that they overlap slightly. The whole holds better when this point is fixed with a paper clip.
Step 6: Turn the napkin over again. That's all.
Click here: To the picture gallery
4. Cutlery bag
For the napkin bag you can use both monochrome and multi-colored napkins. Bigger patterns do not look good, smaller ones are much better suited.

Lay the napkin in front of you so that the closed tip points downwards, ie the opening upwards.
Step 1: Guide the upper tip to the lower tip and smooth the midline.
Step 2: Do the same with the second layer. Then turn the entire napkin, with the back side up.
Step 3: Bend the right napkin tip to the left until just over half of the napkin.
Step 4: Do the same with the left tip, of course to the right.
Step 5: Pin the overlap with a paperclip, that will hold up better.
Step 6: Turn the napkin over again. Finished.
Click here: To the picture gallery
If you do not want to use a paper clip, you can also put a ribbon around the bag with the cutlery at the end. That too holds everything together.
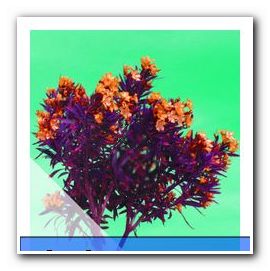
Folding napkins is easy with a good guide. If you decorate your table simply, you can tear everything out with napkins. Strong colors are suitable for this, for example orange in spring, burgundy red or dark purple in autumn. The good thing is that at this time cheap plants can be found as a table decoration, primroses and pansies in the spring and autumn heather, purple bells, asters and chrysanthemums. In summer, all colors work, there is enough choice. Two-tone napkins are also well suited for a wide variety of folding techniques. Too much color should be used sparingly.