Sewing clutch - Free instructions for an evening bag

There is hardly a woman who claims to have enough bags. You can still use the elegant evening bag for a visit to the theater or the lively, fresh clutch for the next movie night. The amount of time and money involved is limited, but success and recognition will make you addicted to even more hand-sewn bags. Therefore, in this guide, we reveal how you can sew a clutch.
You have been invited to a family celebration or a visit to the theater, have found the perfect outfit (compliment, that's a great achievement!), But no matching evening bag ">
content
- Large clutch with zip
- Material and preparation
- cut
- Sew the clutch
- Small clutch with buckle
- Material and preparation
- cut
- Sew the clutch
- Mount the lock
Large clutch with zip
Material and preparation
Difficulty level 2/5 (suitable for beginners)
Material costs 2/5
- Imitation leather in a metallic look in two harmonizing colors (I used taupe and copper) for 11.95 EUR per meter = 4.18 EUR for 35 cm: 8.36 EUR
- Zipper with fine ribs, 25 cm long: 2.50 EUR
- Crochet bead 1 EUR
Time expenditure 1/5 (approx. 1 to 1.5 hours)
You need:
- 30 cm synthetic leather / imitation leather metallic in two matching colors
- 25 cm long zip, matching colors
- Tape measure, set square or tailor's ruler
- color-matching sewing thread
- Fabric clips (alternatively foldback clips or stable paper clips)
- Pen or pencil
- possibly wrapping paper
- Dimensions of the finished clutch: approx. 20 x 30 cm
cut
ATTENTION: The paper cut contains all necessary seam allowances!
1. Draw the first side line 25 cm long at right angles to the bottom edge of the pocket (31 cm long).
2. Draw the second side line 35 cm long.
3. Connect the end points of the two sides with a diagonal line. The paper cut is finished.

Tip: Alternatively, you can also draw the dimensions on the back of the synthetic leather. However, keep in mind that possibly incorrect lines can later be seen on the inside of the clutch.
1. Transfer the paper cut once to the two synthetic leather backs.
Tip: Make absolutely sure that you need a front and a back, so the parts must be mirror-inverted (= opposite).
2. Cut the two pocket parts with sharp scissors.
3. Also cut a 10 x 3 cm strip from each of the imitations of leather.

Sew the clutch
Do not use pins when processing synthetic leather, they would leave ugly holes in the imitation leather.
1. Bend one short side 1 cm of each of the two small synthetic leather strips.
2. Clamp the strips at the ends of the zipper so that the "good" (= right) sides can be seen from the zipper and the synthetic leather strips.
3. Sew the faux leather strips to the ends of the zipper. The seam is about 0.5 cm next to the crease.
4. Clamp the zipper strip in the middle of the upper (oblique) edge of a pocket part, the zipper teeth point towards synthetic leather.

5. Sew the strip a few millimeters next to the zipper teeth.

6. Bend the zipper and topstitch the seam.
7. Sew the other side of the zipper in place as well.

8. Open the zipper. If you forget to open it, the finished bag cannot be turned later!
9. Fold the clutch so that the two parts of the bag are on the right and right and clasp the parts on the outer edges.

10. Close the seam all around, starting from one end of the zipper strip across the bottom edge of the pocket to the other side of the zipper strip.

11. Turn the clutch over. To do this, cut the seam allowance back a little at the tapered corner of the zipper strip.
12. Attach the crochet bead to the zipper with two small rings.

Small clutch with buckle
Material and preparation
Difficulty level 2/5 (suitable for beginners)
Material costs 1/5
- coated cotton blend (washable), turquoise mottled for 13.50 EUR per meter = 4.05 EUR for 30 cm (minimum order for Buttinette)
- Canvas or solid cotton for 5.99 EUR per meter = 1.80 EUR for 30 cm
- Twist lock (often called a wallet lock) 5.50 EUR for 2 pieces = 2.75 EUR
- Corner and edge former EUR 3.50
Tip: If you use solid fabrics for both the outside of the clutch and the lining, then you do not need a fleece for reinforcement.
Time expenditure 1/5 (approx. 1 hour)
You need:
- Rest or approx. 30 cm of firm (washable) plain cotton fabric for the outside
- Rest or about 30 cm of solid patterned cotton fabric for the inner lining
- screw cap
- pins
- shears
- (Packing) paper and pencil
- ruler
- color-matching sewing thread
- sharp small scissors or scalpel to cut the hole for the twist lock
- Zipper feet, if available for your sewing machine

Tip: If you sew bags more often, then buy a larger piece of fabric or use remnants of existing fabric.
cut
1. First make a paper cut. To do this, draw a rectangle measuring 25 x 37 cm on solid paper.
2. Divide the rectangle along the long edge into three sections, twice 13 cm each for the front and back of the clutch, 11 cm for the pocket flap.

3. Use a glass to round off the corners of the pocket flap.
4. Transfer the paper cut once to the back of the outer fabric and the lining fabric.
5. Cut the pocket part out of the two fabrics, adding 1 cm seam allowance on each side.

Sew the clutch
Dimensions: approx. 14 x 23 cm
1. Put the two parts of the bag together right and right and pin the bottom edge (short straight side opposite the pocket flap). Mark the turning opening.
2. Shoot the seam, but leave the turn opening open. Make sure to secure the start and end stitches of the seam, also in front of and behind the turning opening.

3. Place the two pieces of fabric sewn together on the table in front of you, on the right side of the fabric below, and transfer the markings for the front and back of the clutch to the fabric.
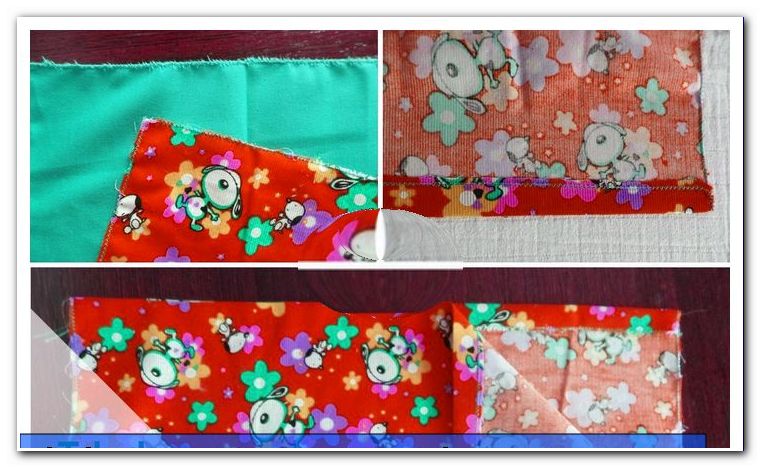
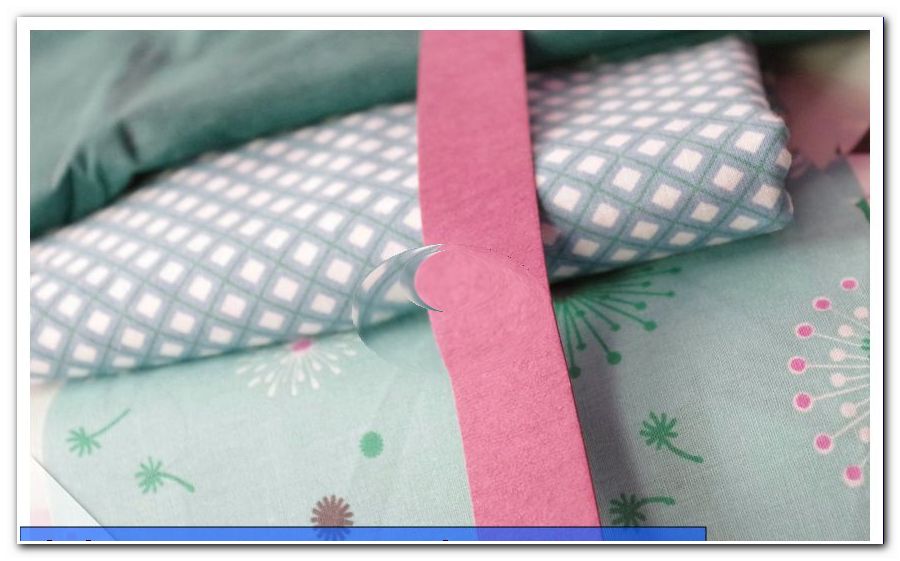
4. Now fold the clutch as shown in the photos.

Place the seam edge on the marking for the pocket flap of the lining material.

Now fold the outer fabric at the lower edge so that the pocket flaps of both fabrics lie on top of each other on the right. Pin the bag all around.

5. Now sew the bag together. The edge opposite the curve for the pocket flap remains open.

6. Shorten the seam allowance at the corners and cut the seam allowance at the curve as shown so that the clutch can be turned easily and all edges become smooth.

7. Turn the bag through the turning opening. A corner and edge turner can serve you well.

8. Now close the turning opening. To do this, topstitch the pocket edge just next to the edge. You can topstitch the pocket flap in the same step.
If necessary, iron the clutch. Now all that is missing is the closure.

Mount the lock
1. Mark the center of the pocket flap.
2. Place the locking eye on the pocket flap. And trace the inner contours.

3. Cut a hole for the eyelet along the contours.
4. Mount the eyelet.

5. Now close the pocket flap and mark the position of the eyelet on the front side of the clutch. To do this, carefully push the pins of the rotary latch through the eyelet into the fabric.

6. Now mount the rotary latch.

Your new clutch is ready!