Wandtattoo attach - instructions and tips for woodchip
- paraphernalia
- preparation
- Attach Wall Decal: Instructions
- Tips at Raufasertapete
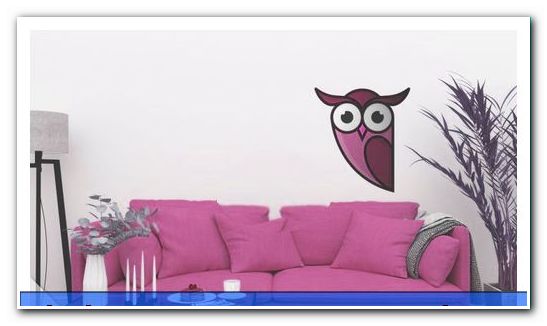
Wall tattoos are becoming increasingly popular for designing your own home. No wonder, they are easy to attach, just as easy to remove and present themselves in intense colors and numerous motifs. If you choose a wall tattoo instead of a poster or painting, you'll need to consider a few things when attaching it to effectively implement the project.
In recent years, the wall tattoo has become a decorative element that is offered in many styles and can even be personalized. The popularity of modern adhesive images is due to the simple use, which can be done in a few simple steps. Depending on the size of the tattoo and the type of wallpaper, the gluing process must be done differently to avoid blisters or other problems. Especially with larger specimens it can be helpful to have a helping hand available. Still, you'll be amazed at how easy it is to install wall decals effectively and quickly in your bedroom or hallway.
paraphernalia
When applying wall tattoos only a few tools are needed, but these are important in order to perform all the steps of the following instructions efficiently. It does not matter whether you want to attach the wall tattoo in the first children's room or in the bedroom, the process is the same.
The important utensils are:
- doctor
- Cloth (lint-free)
- spirit level
- hairdryer
- Head for big or high tattoos
- pencil
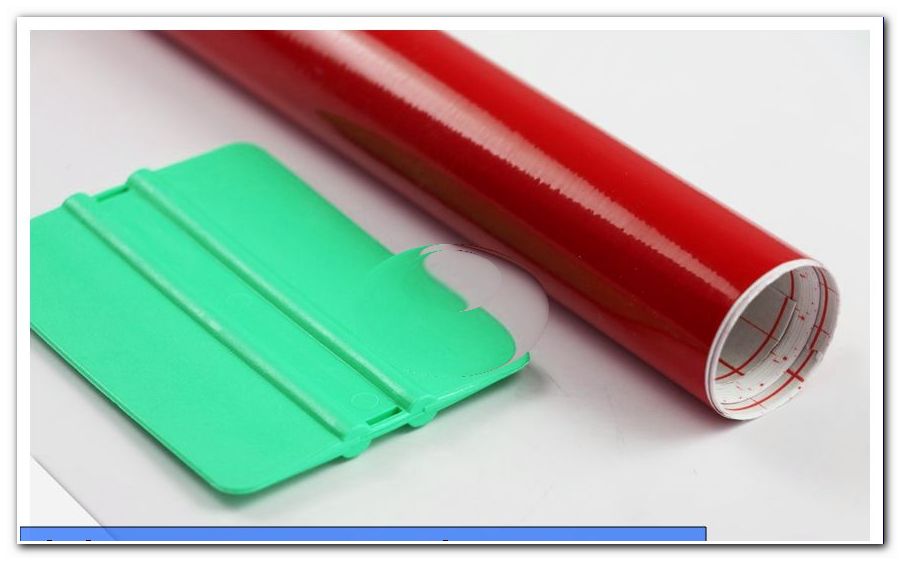
These utensils can be obtained within a short time and prove necessary to handle the project easily. For example, you can use microfibre cloths with the cloth, these are often lint-free and work very well for attaching the wall tattoos.
Tip: if no squeegee is included with your wall tattoo, which varies depending on the manufacturer or service, you can purchase them separately. For this purpose, DIY stores and online shops offer a wide assortment in the wallpapering area.
preparation
The most important step before applying the wall tattoos is time. It is not recommended to hang the tattoo when you need to get to work in ten minutes or pick up your children from elementary school. The reason for this is the time it takes to attach, because the larger the size of the tattoo, the harder it is to hang it up. This also applies to tattoos, which consist of several parts and can cover several walls. As mentioned above, you should definitely take the help of friends or family members for large projects, because otherwise the wall tattoo will end up crooked and loose tattoos can not be attached again. The preparation as follows:
1. Fresh Walls: For the walls, it's important to allow them to dry completely before the tattoo is applied. Moisture from the wall acts against the glue and creates unsightly bubbles that accumulate under the film over time. You should note the following waiting times:
- freshly papered or painted: 3 weeks
- newly plastered: 5 - 6 weeks
2. Clean your walls before attaching a wall tattoo. This means:
- dust off
- remove possible animal or human hair
- free from grease stains
- clean up small bumps (eg exfoliated paint)
This step is especially important with Raspasertapeten.
3. Location: choose a location that is not too humid. While the glue on the tattoos may be enough to make the tattoo stick to the wall, it should not get steam or spatter all the time. It could swell over time and peel off. For that reason, the bathroom and kitchen are rarely recommended for wall tattoos unless you have plenty of room. Also, choose a wall that does not get cooler than 15 ° C, as the adhesive film might otherwise suffer from the cold temperatures.
4. Test sticker: It is recommended to order a test sticker before gluing, these are usually free, and to attach this to your wall. If it lasts without any problems, the wall tattoo will end up being compatible with your wallpaper or wall paint and can be applied.
5. Edit wall tattoo: the tattoo must be smoothed out before attaching. Do not unpack this from the carrier and transfer film, but place it on a flat surface. The tattoo should point in your direction. Carefully trace the entire tattoo with a squeegee. This removes possible air bubbles and bumps, which makes attaching a lot easier. Always start from the middle of the wall tattoo at this step. Once a page has been edited, reverse the tattoo and repeat the entire process. Here, however, you only paint over the back from the inside out.
Tip: for walls that have been painted with acrylic paint, there are special wall tattoos that adhere to this surface and are usually a bit more expensive. Unfortunately, there are no tattoos for latex or silicone paints yet.
Attach Wall Decal: Instructions
After you have completed the preparations and your wall tattoo in your hands, it can start already. Remember: two pairs of hands are better than one, especially if you have a big project in mind. The instruction:
Step 1: Have all the utensils and the wall tattoo within reach; You do not want to look for your squeegee while holding the tattoo on the wall.
Step 2: Do not remove the wall tattoo yet from the foils, because for the time being, the markings must be made for attachment to the wall. Just hold the tattoo on the wall and choose a place that you like. Use a spirit level to align the tattoo so that it fits harmoniously into the room and does not stick to the wrong angle. Mark the position with a pencil. For tattoos on the ceiling or high walls, the use of a ladder is recommended.
Step 3: Now remove the carrier foil of the wall tattoo. This is the white or blue foil on which the tattoo is located. Be sure to remove the tattoo from a corner. You should never peel off the tattoo from the middle and touch the adhesive surface after peeling.
Step 4: Attach the tattoo to the wall according to the markings. To do this, hold the top two corners of the transfer ribbon, stretch them a little and glue the top edge firmly to the wallpaper.
Step 5: Now gently stroke the transfer foil from top to bottom and fix the tattoo. Swipe over the entire tattoo for the adhesive to work.
Step 6: Pick up the squeegee again and press evenly across the tattoo motif or lettering, not the foil itself. This will allow the tattoo to stick to the wall while the transfer foil can be removed at the end.
Step 7: Slowly peel off the transfer ribbon from an upper corner. Make sure that the subject does not detach. If this is the case, the film is placed over it again and struck.
Step 8: After the transfer film has been removed, take the cloth to hand and rerun the entire motif. This increases the adhesive power. If you have problems with this, heat the respective place with the hair dryer to intensify the effect.
Step 9: Now you can check the tattoo again and make sure that all parts sit well and have no air bubbles or the like.
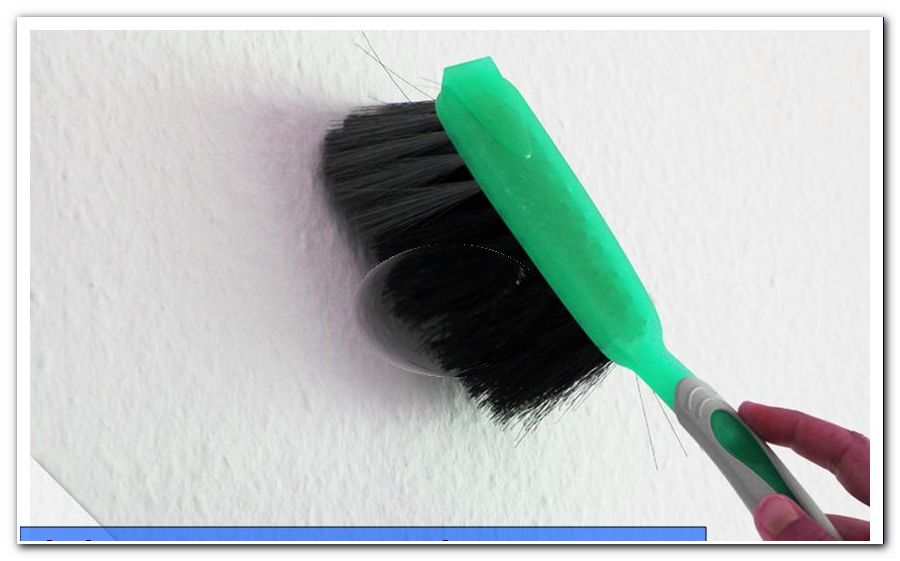
Tips at Raufasertapete
Woodchip wallpaper is a bit more difficult to tattoo than regular wallpaper. The reason for this are the numerous bumps that are desired in the Raufaser. This is precisely what proves to be an obstacle when applying a wall tattoo, since the film is best placed on a flat surface. Still, it is not impossible to apply a tattoo to this type of wallpaper, even if it requires a bit more work. The following tips will help:
1. Hair dryer: the hair dryer is the best utensil when it comes to attaching tattoos on woodchip. You should heat the tattoo at the lowest level through the hair dryer and then gently press it with a cloth. The heat ensures that the tattoo closes better to the unevenness of the wallpaper and so easily takes the form.
2. No squeegee: With Raufasertapete completely renounce the use of the squeegee to fix the wall tattoo. This would only push the grain of the wallpaper into the wall and affect the entire surface sustainable. Only use a cloth in this variant.
3. Grain: the grain of the woodchip is crucial, just how easy the wall tattoo holds. The rougher the wallpaper is, the more difficult it is to attach, since every single point of the sticker must fit perfectly and be pressed. The finer, however, the easier this step and the tattoos hold much better.
4. Raufaser tattoos: as a working alternative, you should get attractive wall tattoos, which is suitable for woodchip wallpaper. These are easier to stick to the wallpaper, as they take the form faster and take off so much work.
Otherwise, the wall tattoos on the woodchip wallpaper are applied in exactly the same way as normal tattoos. There is no need for additional tools. The most important thing in itself is plenty of time to be able to work every inch of the wall tattoo carefully and thoroughly with the cloth and the hair dryer.
Do you want to remove an old wall tattoo?>> Remove wall tattoo