Tile the balcony yourself - How to lay balcony tiles

- Tools and materials
- preparation
- Tile the balcony: instructions
A balcony invites you to relax, provides even in small apartments for more space and can even be used as a garden. Balcony tiles protect the balcony from wind and weather and can also be used decoratively. Whether you want to renovate the balcony with new tiles or this is to receive a completely new design, the process always takes place the same.
You want to tile your balcony to refresh the old look "> Tools and Materials
When it's time for the refurbishment, you need a variety of materials and tools to do the job effectively. Important are:
- high pressure cleaner
- watering Can
- grinding machine
- spatula
- Malerrolle
- Quast
- mortar
- Rissvergussharz
- screed
- sealing coat
- insulation strips
- End profile in the outline of the balcony
- Decoupling mats, also drainage mats or construction mats
- sealing tape
- tile glue
- tile crosses
- balcony tiles
- silicone
- hammer
- chisel
When selecting individual materials such as the sealing tape, make sure that it is sufficient for the process. Especially with very large balconies, this is important to enable the necessary weather resistance. Of particular importance in terms of materials are, of course, the balcony tiles. Here you have the choice between several variants that are specially designed for outdoor use:
1. Classical tiles: this type of tile is the well-known variant, which is laid in the traditional way and is specially designed for outdoor use. They do not differ in relation to the bathroom or kitchen tiles in terms of laying tiles and can be cut in the same way. They are mainly made of weather-resistant wood species such as Douglas fir or Bangkirai, concrete, ceramics or natural stone and are also used for terraces. The cost of tiles vary greatly and depend on the manufacturer, size, quality and design. Typical costs are 5 Euro to 130 Euro per m².
2. Click tiles: In comparison to conventional tiles, click tiles are a particularly easy-to-install tile type and do not require any tile crosses or joints. They are made of either wood or WPC (wood-plastic composite) and have a plug-in system that holds the tiles in place. They are made especially for people who want a simple system and do without special designs, because the appearance of the click tiles is always similar. Only the color and width of the individual "strips" changes from model to model. Costs for click tiles are 30 euros to 70 euros per m².

3. Anti-slip tiles: Anti-slip tiles are traditional tiles, usually made from a robust wood whose surface has grooves. These grooves make the water run faster and also provide a profile that reduces the risk of slipping. They provide a very natural look and are very suitable for outdoor use. The cost is between 40 euros and 50 euros per m².
You see, the costs to tile around the balcony depend on the selected tiles. If you opt for cheap ceramic tiles, which are offered for 20 euros per m², and your balcony is 10 m², you need 200 euros for the tiles. Depending on the size of your balcony, it may be worth ordering from a retailer instead of buying the tiles at a hardware store. For large order quantities there are often discounts. For decoupling mats fall about 15 euros per m².
Tip: if you need a grinder, you do not have to buy it, you can borrow it. In DIY stores and at numerous companies, you pay about 40 euros per day, which is perfect for this project.
preparation
The preparation is necessary to tile the balcony. It ensures that the existing flooring is removed and the concrete is available for tiling. First, you should dismantle the railing, as this otherwise prevents the application of the seal. Prepare for the balcony tile with the following points:
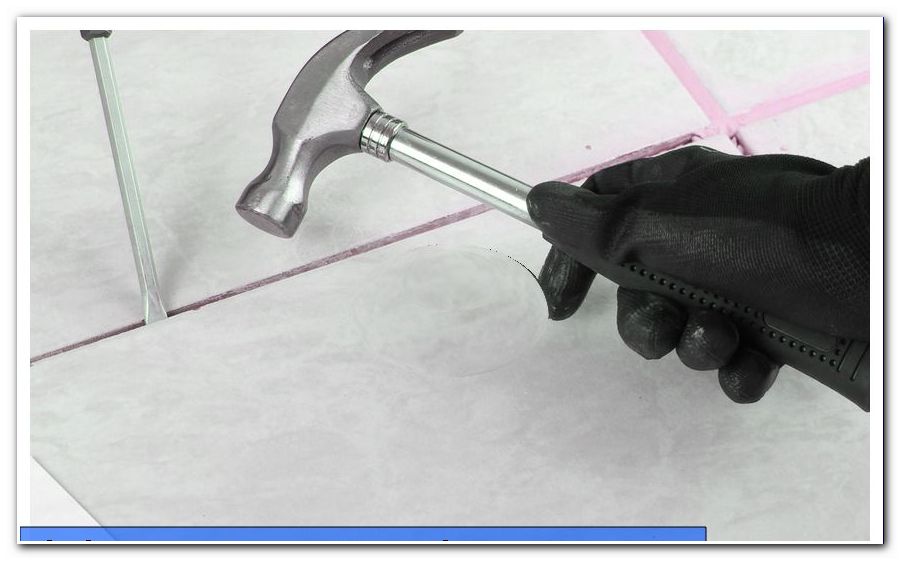
Step 1: Begin by removing old tiles, as well as any deposits under the tiles. If you have not laid any tiles yet, you only have to remove the existing floor covering. For this you use hammer and chisel and wear through this also the bottom covering, which consists of tile adhesive, sealant and tile adhesive. This may take a while, but is necessary to apply the new tiles. It is best to dispose of the waste via a container and bring it to the landfill or similar service.
Step 2: Now take the high-pressure cleaner and use it to clean the concrete that serves as the basis for the tiles. You have to be thorough here to remove any bumps, so that in the end only the concrete is visible.
Step 3: Then perform the absorbency test:
- fill a watering can with water
- Take a watch and pour some water on the concrete
- If the water does not enter the concrete after three minutes, it must be sanded down
4th step: Sand the concrete thoroughly with the grinder. Then seal all notches, holes and cracks with mortar. Use the smoothing trowel to achieve a particularly even result.
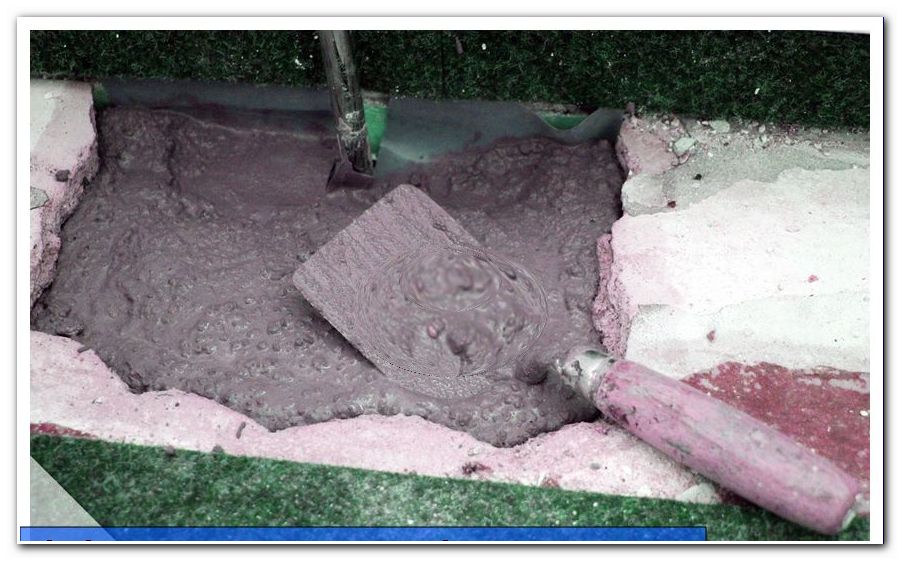
5th step: Now comes an important point. Measure whether your balcony still has a gradient of 1 percent to 2 percent. This is important so that water can drain and does not build up in the building material. If the balcony does not have a slope, mix screed and put a Dämmstreifen on the wall. Now distribute the screed so that a gradient of no more than 2 percent is created and it becomes flatter to the side, where the water should flow down. If drainage is present, the slope should go in that direction. Then let the screed dry. If there are cracks in the screed, use the crack casting resin.
Step 6: After the screed has dried out, the seal is applied. Now apply the seal coat in several layers over the entire surface. Use either the painter roll or a quast. The individual layers must first dry before the next one can be applied. Orient yourself to the manufacturer's instructions when drying.

The preparation takes a lot of time, but after the seal painting is finally time to tile the balcony. Make sure that all layers are really dry and check this more often.
Tile the balcony: instructions
If you tiled the balcony, you should first find a day that does not rain and has a minimum temperature of 10 ° C. The winter is therefore flat, otherwise the tile adhesive freezes too fast. If there is a risk of rain, it is advisable to hang a tarp over the balcony so that all damp elements can dry. The balcony tiles are processed in the following way:
Step 1: At the beginning the balcony is decoupled. For this you need the decoupling mats. Lay the mat first with no glue, so you can cut the size. Then the tile adhesive is applied thinly to the screed and the decoupling glued. Attach end profiles at the edges. This ensures the necessary protection against waterlogging. Possible joints and edges are also provided with sealing tape.
Step 2: Tile adhesive is now applied again on the decoupling and, depending on the selected pattern, the balcony tiles are laid. Apply glue to the back of the tile to be laid and begin with the tile closest to the balcony door. Slightly turn the balcony tiles when placing them in the glue so that the surface grips properly.
Step 3: Follow the same procedure until the selected pattern has been laid. Be sure to use tile crosses. These are placed at the corner joints, so that the distance between the tiles does not change during drying. Only then are just possible joints that are not under tension.

Step 4: Then tap the tiles with the rubber mallet to stop them from moving.
5th step: If you have chosen the click tiles, you will save a lot of work. These even work without glue and only need to be put on the ground as a plug-in system. Of the tiles, which lie directly against the wall, the rubber knobs are cut off. This creates a seal to the wall. Lay balcony tiles and make sure they are tight.
Step 6: The tile adhesive takes about two days to dry, much longer in wet weather. After it has dried, start filling the connection and corner joints with silicone. The other joints, however, are filled with grout. Let them dry out.

Step 7: Now they are finished with the balcony tiles and should finally mount the railing again. Then you can relax on your newly tiled balcony.
Tip: when applying the adhesive, make sure that you only apply one square meter to prevent it from drying too quickly. So you can take your time and are not under time pressure, also the result is more accurate.