Mixing and processing the trass cement - information on properties

- Production of trass cement
- Use of trass with cement
- Ingredients of the trass cement mixture
- Price of trass mortar
- Mixing ratio of trass mortar
- Laying natural stone slabs in the garden with trass cement
Owner of a half-timbered house know and appreciate trass cement. Other homeowners usually get to know this particular cement when they want to create a natural stone terrace. Especially for natural stones and Verklinkerungen trass cement is the drug of choice. Through the added trass efflorescence is largely prevented, as they may otherwise occur in Portland cement.
Whether for the clinker of a new modern house or for the restoration of an old half-timbered house, trass cement is the ideal connection between the stones. Its slightly gel-like consistency after drying makes the trass cement durable and flexible at the same time. Due to its special properties, cracking as well as discoloration of the stones is largely prevented. The only drawback with trass cement might be the low compatibility with steel. So this trass cement is not suitable for reinforced concrete. In addition to all important information about trass cement, you will also find the instructions below on how to lay natural stones or polygonal tiles on your terrace.
Production of trass cement
Pure Trass alone can not be used as a cement, it must be added a sufficient amount of different binders such as lime, pozzolan or cement. Trass is also a name for a naturally occurring pozzolan. These individual ingredients must be prepared according to an exact mixing ratio under high temperatures. This makes it impossible to simply mix the trass cement itself from cement and trass. Partly also Tuff, a volcanic rock is added that resembles the Trass. Trass consists to a large extent of aluminum and silicon compounds, which are particularly resistant to chemicals. At the same time, these ingredients naturally provide the suppleness and elasticity of Trass after it has set. Curing itself, however, may take longer with a Trass cement mix for the same reasons.
Use of trass with cement
As already described, cement with trass is very well suited to the restoration of old trusses. Efflorescence of lime, which is not noticeable in conventional cement on red bricks, is effectively prevented by the trass mortar. This is due to the lime-binding property of Trass in conjunction with the ease of gelation. The trass in the mortar thus closes the pores of the clinker brick and is therefore also particularly suitable for clinker and stone masonry, when this is often exposed to rain. That is why, in addition to the truss, modern brickwork is also often used by the craftsmen with trass-containing mortar.

Even more popular is the trass mortar in the construction of a natural stone wall. This is often exposed in the garden area from both sides to the ingress of moisture. Especially in rain and frost, a natural stone wall is easily broken when using conventional cement mortar. The moisture from the rain can penetrate into the cement and the frost then blows it off. Therefore, one sees especially in spring very often damaged natural stone walls. This problem is largely prevented as well as the unsightly whitish efflorescence of the lime through the trass cement.

Stairs made of natural stones, which are created on the slope, are particularly susceptible to damage by frost. Therefore, just like natural stone, they should be laid on the terrace or on the garden path in the appropriate trass mortar. This is also the most popular use of trass mortar for home improvement today.
Ingredients of the trass cement mixture
Depending on the manufacturer of the trass cement mixture, it contains between about 20 and 50 percent of the trass. Bear in mind that pozzolan and tuff are basically the same as trass. Often trass mortar is therefore also referred to as pozzolana cement. So do not be confused, if in a mix of trass apparently very little trass is contained. The other ingredients may be the following ingredients:
- Portland cement
- lime
- trass
- pozzolan
- tuff
Price of trass mortar
For the 25 kilos of bag of trass cement you have to pay from about six euros in a very cheap hardware store. However, the price can vary quite a bit depending on the dealer, some even ask for the twelve euros for the same bag of trass mortar. Many building materials dealers still offer 40 kilos of bags, which cost around eleven euros in the best case. In many cases, the price is cheaper with a decrease of at least 56 bags, or a pallet. However, that is already a lot that you can no longer process with a normal mixing machine and your own muscle lard. Then you can order a mix of trass in the local cement works. 
Tip: When ordering a large amount of trass mortar, keep in mind that trass is not suitable for pouring a floor slab or foundation if a steel reinforcement is to be embedded there.
Mixing ratio of trass mortar
Trass cement is particularly durable outdoors. But for exactly this reason, it should not be mixed as well as a cement or lime mixture, which is also used indoors. The amount of lime added should therefore be limited. While you can use a high-lime cement mixture with two parts of lime, one part of cement and eight parts of sand to build an inner wall, you need to use far less sand and less lime outdoors.
Depending on the load of the components in question, however, the mixing ratio can also be slightly modified. If necessary, ask your local building materials dealer, as he knows the regional requirements well. For example, the more the wall or flooring is exposed to frost and moisture, the more trass cement you should add when mixing. 
- Natural stone wall:
- 1 part lime + 1 part trass mixture + 5 to 6 parts sand
- Klinkermauer:
- 2 parts of trass cement + 6 parts of sand
- Natural stone staircase or terrace covering:
- 1 part cement + 4 parts sand
You need this:
- shovel
- mixer
- rubber hammer
- guide
- Vibrating plate or rammer
- Maurer bucket
- trowel
- long straight board
- spirit level
- Natural stone / Polygonalplatten
- trass
- sand
- lime
- gravel
Laying natural stone slabs in the garden with trass cement
The irregularly shaped polygonal panels make walkways and terraces in the garden look very natural. In order for the boards to be really good and durable, the ground must be carefully prepared. On the other hand, you should plan before laying which of the angular plates should go where. This will make it easier to place the plates in the mortar bed later.

- Preparation and underground
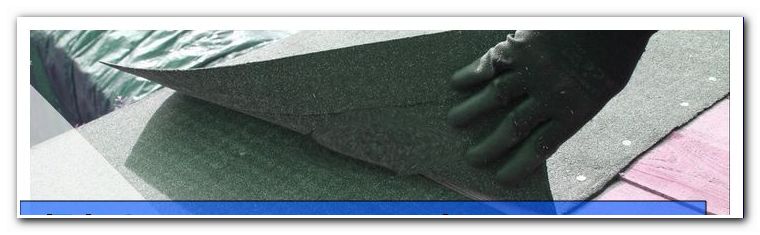
Once the mortar has hardened, no moisture should be allowed to enter the natural stones or the polygonal panels from below. Therefore, a gravel bed must first ensure perfect drainage. For this purpose, first the relevant area should be excavated at least 20 centimeters deep.
Then a gravel or gravel layer is spread on it. This layer must be compacted well with a rammer. At the same time a slight gradient should be incorporated. Above all, if the area is directly at the house, the water should necessarily be diverted in the other direction.

Tip: In areas with high soil moisture or heavy precipitation, you should rather lay some drainage pipes under the gravel bed. But you can also bring in the thick yellow drainage pipes along the terrace or the path to get rid of excess water masses faster. The garden will thank you, because both the lawns and the other plants do not like wet feet.
- dry runs
Later, it will be easier if you lay out the stones or plates in advance. Often, you will need a while to make the irregularly shaped sheets so that the joints do not get too big and wide. More than three to a maximum of five inches, the joints should not be as wide as possible. Therefore, it is recommended to arrange the plates first without mortar on the surface. Then take a piece of white chalk and number the plates before removing them. Place the individual plates in reach next to the later storage location.
Tip: The technology on mobile and smartphone makes it possible today to photograph the numbered plates on the spot. Print the plan then simply in black and white. So you have it really easy when laying and are much faster at the finish. Of course, you can also make a small drawing on which you enter the individual numbers.
- Prepare plates and mix mortar
The panels should be cleaned from the bottom and at the edges of any dust. Take an old brush and wash the plates wet so that the trass cement can set the polygonal plates well.
Mix only as much trass cement as you can process in about half to one hour. For exterior stone flooring, as described above, mix about one part of trass cement mortar with four parts of sand. Unlike masonry mortar, less water is needed here. As a rule of thumb, one liter of water per kilo of cement should be used here. Use only enough water to make the mortar mass a moisture-moist mass.

The more water you add, the easier it will be for the surface to slip under the plates. The slabs might also sink one-sided when laying and you would have after drying a roller coaster instead of a straight terrace.
- Lay polygonal panels in trass mortar
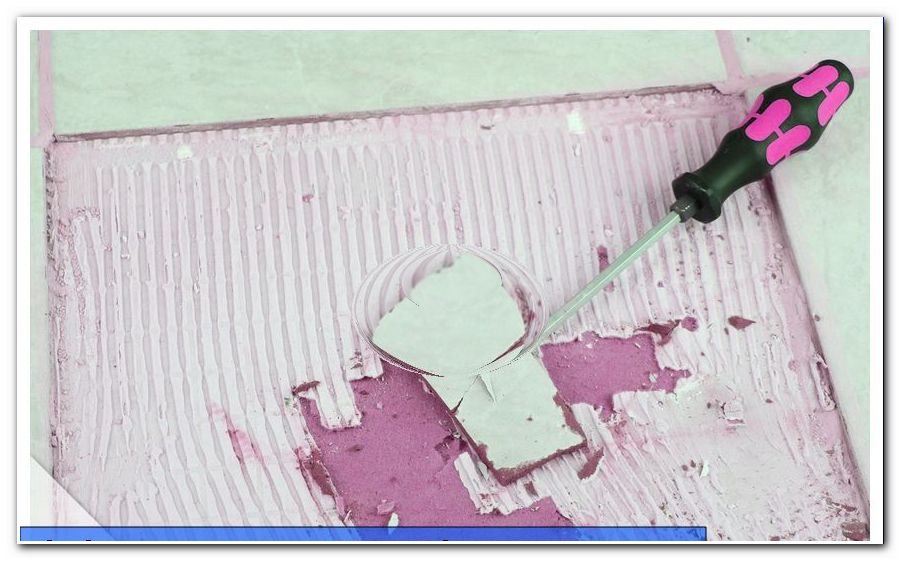
The earth-moist mass of trass cement and sand is spread about five centimeters thick on the prepared surface. Now you can put the polygonal plates in the trass cement according to your previous plan. Use a long board and spirit level to align the plates perfectly. If a plate sinks too deep, you must bite into the sour apple and get them out of the trass mortar again. If mortar has gotten to the top of the plate, you should wash it off before re-design. Although the trass cement hardly causes streaking, thick residues could permanently dry on it.
Tip: If you need to knock larger plates into the mortar, you should always hit the longer board with a rubber mallet. The slabs break easier the bigger they are, so never hit directly on the slabs.

- Balance joints
When you process the slabs in the trass cement, they are automatically pushed slightly into the mortar bed. If, however, not enough mortar is pushed up, you must then fill the joints with trass cement. Continue to make sure that you do not put any mortar on the plates. You can now fill even larger joints or imperfections with smaller pieces of slabs. This looks more harmonious than a large gap with trass cement.
Tip: When filling the joints, always keep a wet sponge and a bucket of clear water ready so you can remove any residue from the trass cement immediately. This will save you a lot of work after drying and possibly even special chemical cleaners that you would otherwise need.
Tips for quick readers
- Select polygonal plates or natural stones
- Prepare the surface with grit and gravel
- Compact surface with rammer
- Merging plates by trial and error
- Number plates
- Mix trass cement
- Apply mortar
- Lay out the plates
- Align with spirit level and board plates
- Let mortar bed dry
- Prepare polygonal plates with trass cement
- Protect path or terrace from rain
- observe sufficient drying