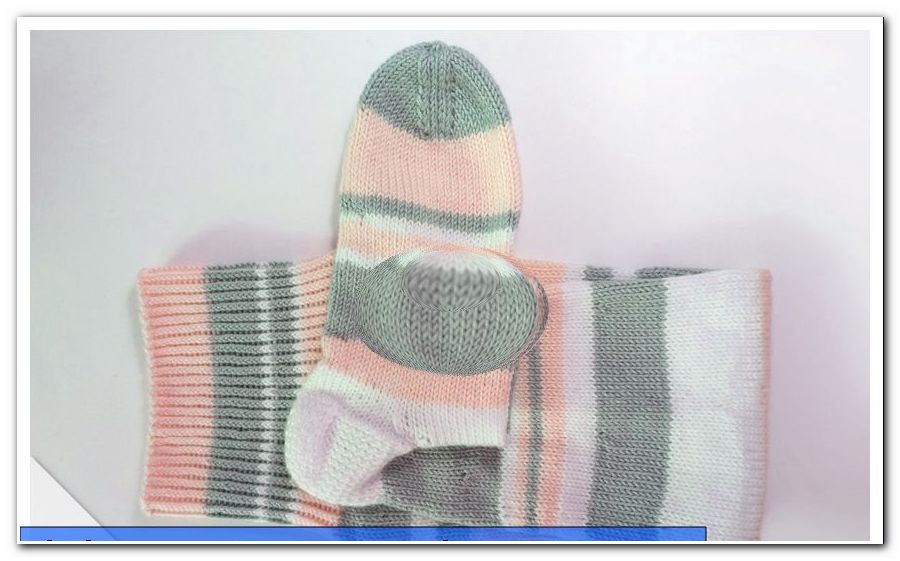
Knit Stockings - Instructions for Overknee Stockings
- Material and preparation
- rib
- pattern
- Knit overknees
- attack
- cuffs
- The leg
- The heel
- The foot
- Knit knee socks
- ornament
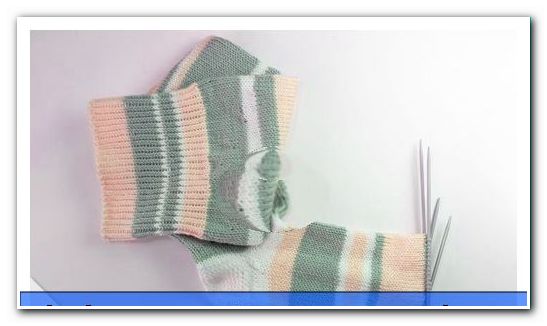
Knee socks and overknee stockings are the absolute hit for a fashionable outfit. They are often referred to as unique, cheeky and upbeat. And with that you hit the mark. Overknees are not only a warming accessory, they are the absolute eye-catcher. In our knitting instructions, we show you how to knit your own knee socks or overknees yourself.
What is the difference between overknee stockings and knee socks ">
Unlike Overknees, the length of the knee socks begins below the knee. If you do not want to appear so outrageous in your outfit, but like to put fashionable accents, you can also be an eye-catcher with self-knit knee socks.
We show you a knitting pattern that you can use in all three variants. And what is again very important to us, even beginners can use this guide to knit their overknee stockings or knee socks. We have deliberately renounced a knitting pattern. We have just set the accents in the colors and crocheted as the icing on the cake in addition to small flowers. The only thing you should be able to do as a beginner is knitting with a double pointed needles. We will show you the rest.
Become your own fashion designer for self-knit knee socks
Not only do you knit stockings, you become your own fashion designer. According to your ideas, you create your knee socks yourself. Some people love it very discreetly, they only choose one or two colors, but others love the color mix, which can really let off steam in such stockings. They can be naughty, the new knee socks, but they must be knitted themselves.
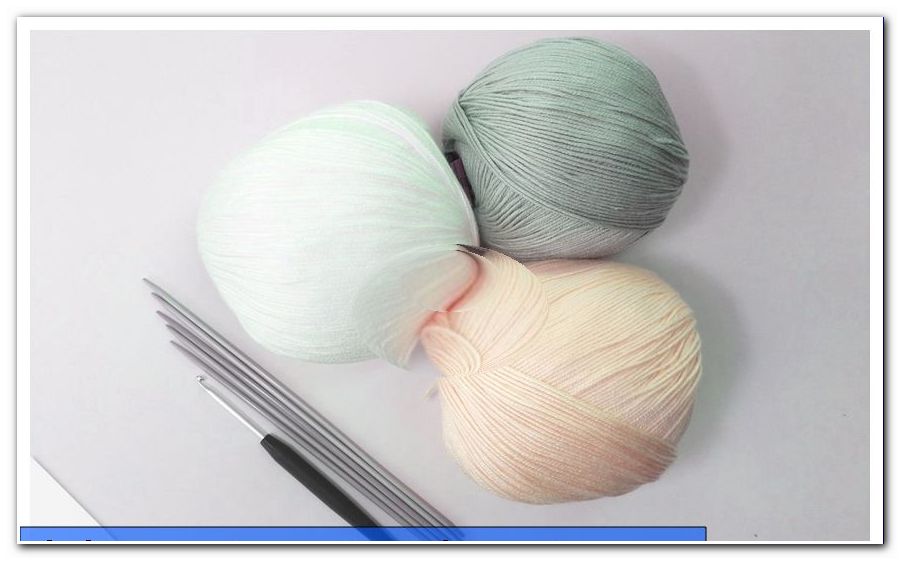
Material and preparation
No matter what you knit, you should always consider carefully when you will be wearing the knitwear, in this case the overknee stockings. Accordingly, your decision for the wool should be canceled.
For the cold days, we recommend a Schurwollgarn, with which also like normal stockings are knitted. This yarn is now available in many fashionable colors, so that nothing stands in the way of a special color mix. It is important for new wool, that you pay attention to the fact that the yarn is awarded with superwash. That is, this yarn is durable and can be washed in the washing machine in the wool wash cycle.
For the warm days we recommend a cotton blend. Well suited for overknee stockings are cotton stretch yarns. This yarn keeps the shape very well, is a bit elastic and also equipped with superwash. We opted for a stretch cotton blend. Our yarn corresponds to the sports and stocking cotton stretch of wool Rödel.
According to our instructions you need for shoe size 39 and dress size 38:
- 200 grams of cotton yarn / 320 meters run length to 100 grams
- 1 needle size 3 mm
- 1 crochet hook 2 mm thick
- 1 tape measure
- possibly a circular needle of 3 mm thickness
Sizing - The dimensions of our leg model:
- Circumference above the knee: 42 centimeters
- Calf circumference: 36 centimeters
- Circumference at the ankle: 26 centimeters
- Stocking length to the ankle: 50 centimeters
Based on this information, you can adjust the stitch limit to your measurements.
Tip: Be sure to knit a stitch test with the double pointed needles.
You should knit several rows of cuffs and several rows only right stitches. This will allow you to calculate exactly how many stitches you need to apply.
And at the same time, you can see the right stitches in the cuffs. Despite the same number of stitches, the circumference changes. Please keep in mind that knitting also causes yarn-to-yarn differences. Cotton yarn stretches differently than virgin wool yarn. Therefore, a stitch test is very important.
You should bring these requirements:
- Knitting with the needle game
- right stitches
- left stitches
- It would be an advantage if you have knitted a heel before.
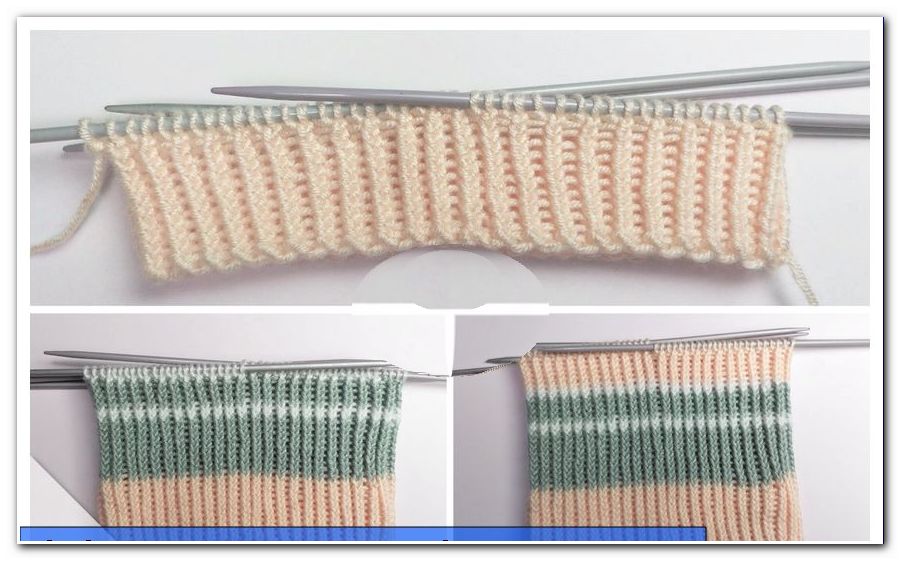
rib
The cuff is knitted alternately by the right and left stitches. We knitted the right stitches crossed. This results in a very nice stitch pattern and the cuff is more elastic with crossed stitches. That is, it retracts well after wearing and washing. Crossed right stitches are knitted like a right stitch, but the stitch is stitched in from the back with the needle.
- 1 stitch crossed right
- 1 stitch left
- 1 stitch crossed right
- 1 stitch left
In this order the whole round is knitted.
pattern
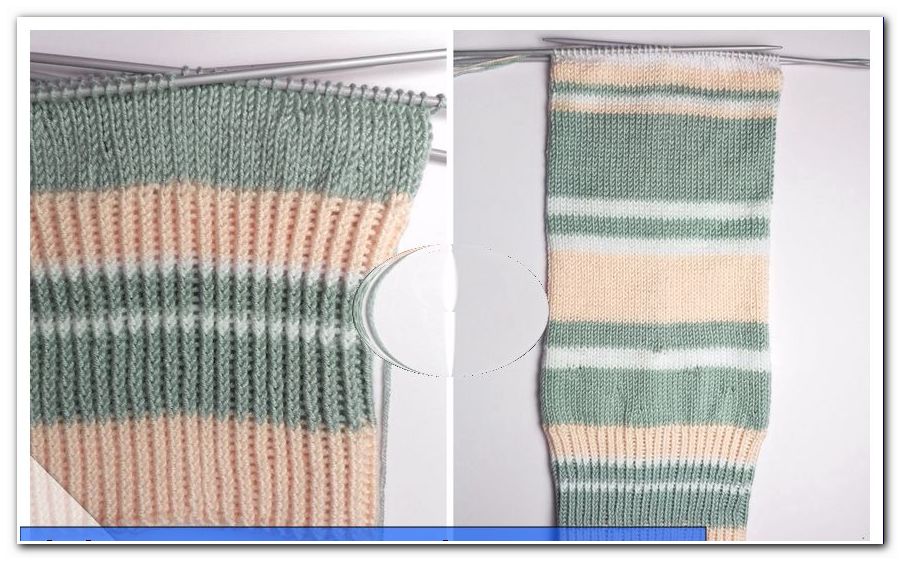
The knee socks and the overknees are - except the cuffs - knitted with right stitches. Since you knit in rounds, there are no back and forth rows. That is, the pattern consists only of right-hand stitches.
Tip: If you knit with different colors, tighten the two threads of the old and the new color tightly.
It has been proven to make this color change not at the end of a needle, but at the beginning of the needle, after the first 2 or 3 stitches. There are no unwanted holes when changing the thread.
Knit overknees
attack
Cast on 96 stitches.
Tip: We first struck the entire stop on a circular needle, all 96 stitches.
Only in the second round did we divide these stitches into four needles. This attachment technique is a little easier than attaching all the stitches to the needle play.
cuffs
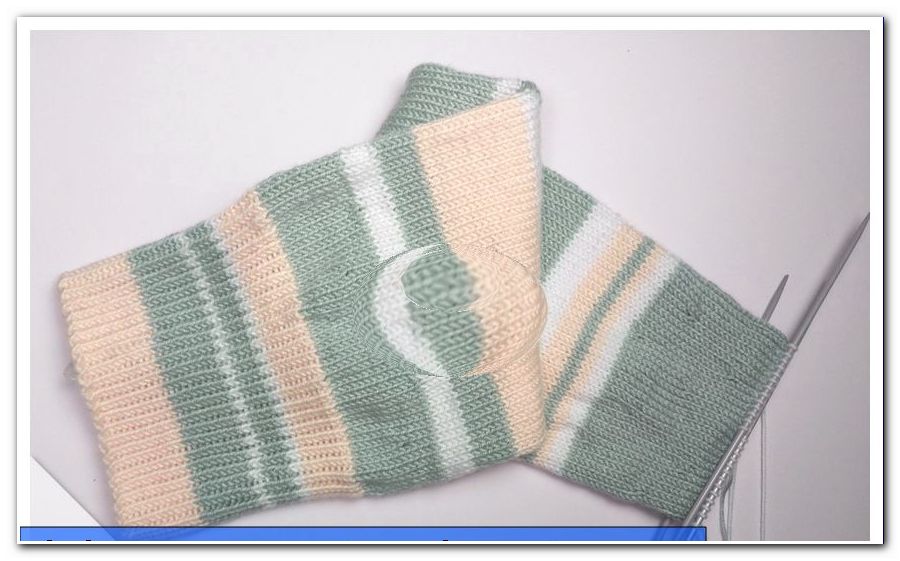
In the round after the attack, distribute the stitches on the needle game. Put 24 stitches on each needle and close the round. The waistband of these knee socks is knitted 10 centimeters long in a ribbed pattern.
The leg
After this 10 centimeter cuff pattern starts the basic pattern for the entire leg. From now on, only right stitches will be knitted.
The first declines begin already in the first round after the rib pattern.
For this purpose, 2 stitches are knitted together on each needle. That is, take 4 stitches per round.
1st weight loss round
- Needle 1: 2 stitches right
- Knit the 3rd and 4th stitches together on the right
- Knit the needle with the right stitches
- Needle 2, 3 and 4 knit the same way.
There are now 23 meshes on each needle. For the next 4 rounds knit all stitches to the right.
Tip: When knitting two stitches, hold the thread a little tight. You are welcome to wear it. Now fix the new stitch with your thumb. The following stitch should also be worn well.
2nd weight loss round:
Each needle is knitted like this:
- 9 stitches on the right
- Knitt the 10th and 11th stitches together on the right.
- Knit the remaining stitches of the right needle.
- Each needle now counts 22 stitches
The remaining 3 needles knit exactly the same way. Knit 4 rounds of right stitches.
3rd weight loss round:
- 16 stitches on the right
- Knit together on the 17th and 18th stitches on the right.
- Knit the last three stitches on the right needle = 21 stitches / needle
- Knit 4 rounds of right stitches.
4th weight loss round:
- 2 stitches on the right
- Knit the 3rd and 4th stitches together on the right.
- All remaining stitches right = 20 stitches / needle
- Knit 4 rounds all stitches to the right.
5th weight loss round:
- 8 stitches on the right
- Knit the 9th and 10th stitches together on the right.
- Work all other stitches on the right needle = 19 stitches / needle
From this weight loss round knit 19 centimeters only right stitches.
This length of 19 inches may vary. Not every leg is the same length. We have now arrived at an approximate total length of 35 centimeters. With our stocking size, the calf length is finished, the leg is now narrower again.
From now on come more weight loss.
6. weight loss round
- Knit 2 stitches on the right
- Knit the 3rd and 4th stitches together on the right.
- Knit the remaining stitches to the right = 18 stitches / needle
- Knit 5 cm right stitches.
7. weight loss round
- 7 stitches right
- Knitt 8th and 9th stitches together on the right.
- Remaining stitches work right = 17 stitches / needle
- Work 4.5 centimeters right until the next weight loss.
8. weight loss round:
- Knit 12 stitches to the right
- Knitt 13th and 14th stitches together on the right
- All other stitches right = 16 stitches / needle
- Knit 5 rounds only right stitches
9. weight loss round:
- 2 stitches on the right
- Knit the 3rd and 4th stitches together on the right.
- The remaining stitches only right = 15 stitches / needle
- Knit 5 rows of right stitches
10. weight loss round:
- 5 stitches right
- 6th and 7th stitch together on the right
- Remaining right = 14 stitches / needle
- Knit 5 rows of right stitches
11. weight loss lap
- 10 stitches right
- 11th and 12th knit together right.
- Remaining stitches right = 13 stitches / needle
The overknee stocking now has a length of about 49 centimeters.
If you do not knot a foot, now is the time to finish the overknee stocking with a cuff. Knit the cuff according to the pattern in the introduction.
- 1 Ma crossed right
- 1 Ma left
You can determine the length of this cuff yourself. But with 3 - 4 inches, you are certainly right. If you want to knit a foot, continue working after the 11th weight loss round:
Continue to knit 5 turns to the heel start. Her overknee stocking now has an approximate length of 50 centimeters.
The heel
Knit the heel as described in this guide: Knit the coping heel
Even though they are children's socks, you work your heel exactly for these pictures. The only difference is the different mesh size.
Put 2 needles together for the heel wall so that you now have 26 stitches on the needle. Knit the heel wall 4 centimeters with crossed right stitches.
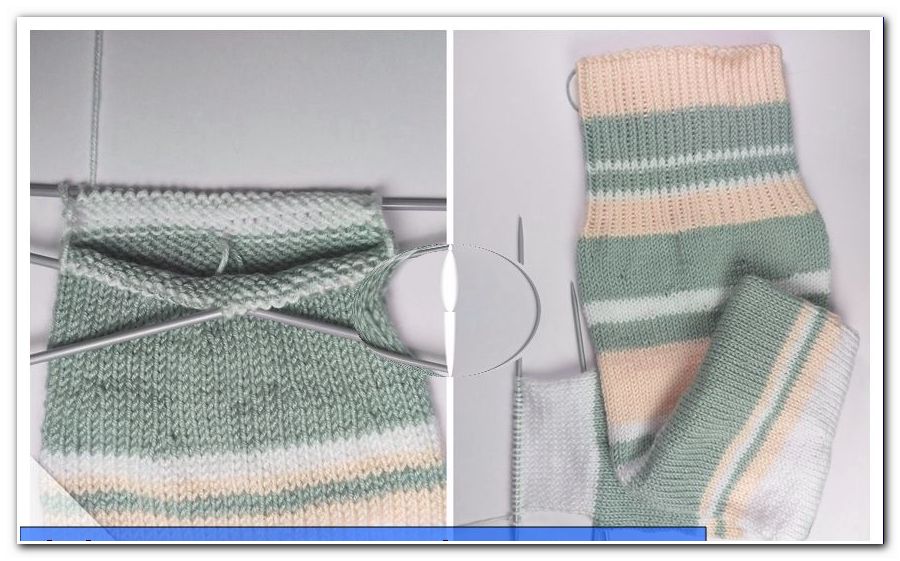
For the coping divide the stitches: 8 - 10 - 8. That is, the middle part of the coping counts 10 stitches, the right and left side each 8 stitches.
Just knit the coping just like the children's socks and take a new stitch from each edge stitch on the heel wall. These edge stitches will be knit in the next round. The excess stitches are removed after 2 normal rounds to a gusset. You can also follow this closely on the pictures.
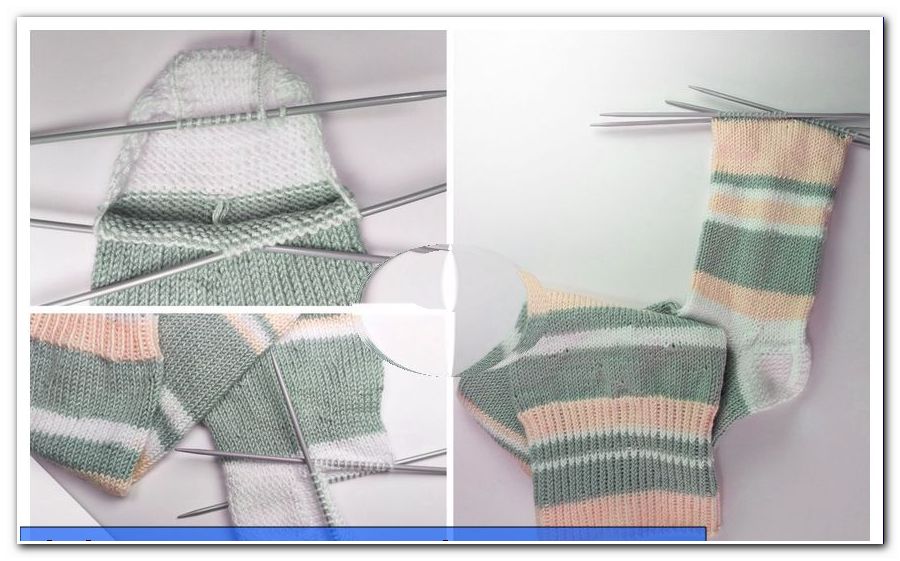
The foot
The foot is worked to the toe without loss. The foot length depends on your shoe size. Our foot length to the decrease of the tip is 16 centimeters.
The toe:
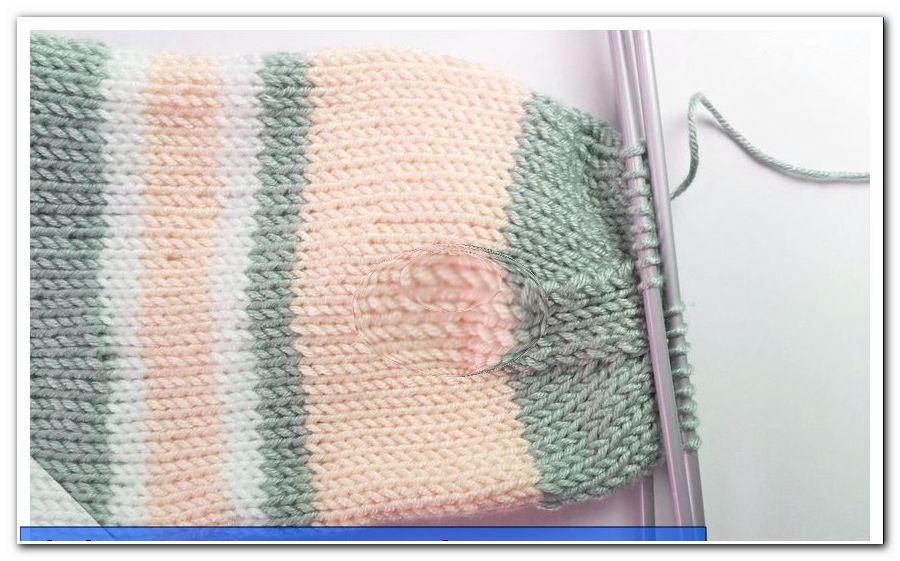
At the toe, the needles are split into two groups. There are 13 stitches on each needle:
- Group 1 = needle 1 and needle 2
- Group 2 = needle 3 and needle 4
decrease
1 round:
Needle 1
- All stitches right.
- Knit the 2nd and 3rd last stitch together on the right
- Last stitch on the right
Needle 2
- 1st stitch on the right
- Knit 2nd and 3rd stitches together on the right.
This means:
2. Lift off the stitch
Knit 3 stitch
Lift the lifted stitch over the knitted stitch.
- Knit needle 3 like needle 1
- Knit needle 4 like needle 2
2nd round
Knit all stitches to the right. No stitch is taken off.
3rd round
They take the stitches just like in the first round.
4th round
Knit all stitches on the right - without loss. Repeat these rounds until you have only 8 stitches left on each needle. From then on, take off the stitches in each round. The toe is formed.
If there are only 2 stitches left on each needle, cut off the thread and pull it through all stitches at the same time. Tighten the thread and sew.
Picture Overknees 15
The first overknee stocking is ready. The second stocking you knit as well.
Knit knee socks
The overknee stockings have started above the knee. The knee socks start knitting below the knee. This means that you also have to work with fewer stitches.
Strop knee socks: Cast on 86 stitches
Again, it is advisable to hit all the stitches on a circular needle and divide the stitches on four needles only in the second round.
Close the round and knit 8 centimeters in the rib pattern. After these 8 centimeters cuffs begins the calf decrease. This calf take knit just like the Overknees up to and including the 5th weight loss round. Then knit 10 centimeters without loss.
The rest of the mesh decrease will be spread over the coming rounds. Follow the instructions for the overknee stockings. You now have a total length of 40 inches to heel start. There are 13 stitches on each needle. The heel, the foot and the toe knit as described in the Overknees.
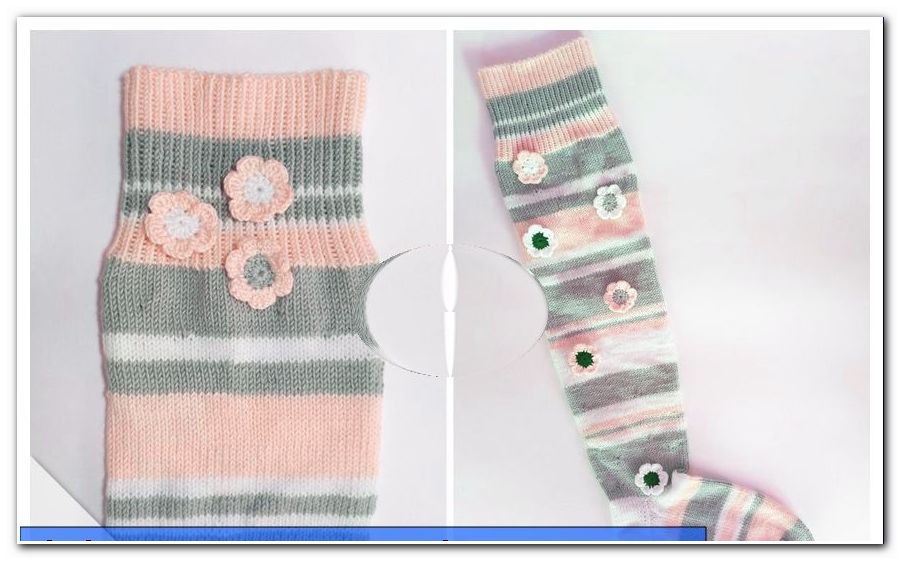
ornament
You can still decorate your knee socks or overknee stockings with small flowers. This loosens up everything and gives the stockings their special charm. We crocheted small flowers that you are welcome to work on.
Instructions flowering
- Apply a thread ring or air mesh ring
- Crochet 3 pieces of air and 11 sticks into this ring
- Tighten the thread ring firmly and close with a chain stitch
- 3 ascending streaks and 3 sticks in the first stitch of the preliminary round
- 2 air meshes
- 1 sliver in the next stitch of the preliminary round
- 2 air meshes
- 4 sticks in the next stitch of the preliminary round
- 2 air meshes
- 1 sliver stitch in the next stitch
- 2 air meshes
- 4 sticks in the next stitch
Crochet the flower in this order. The flower has 6 petals.
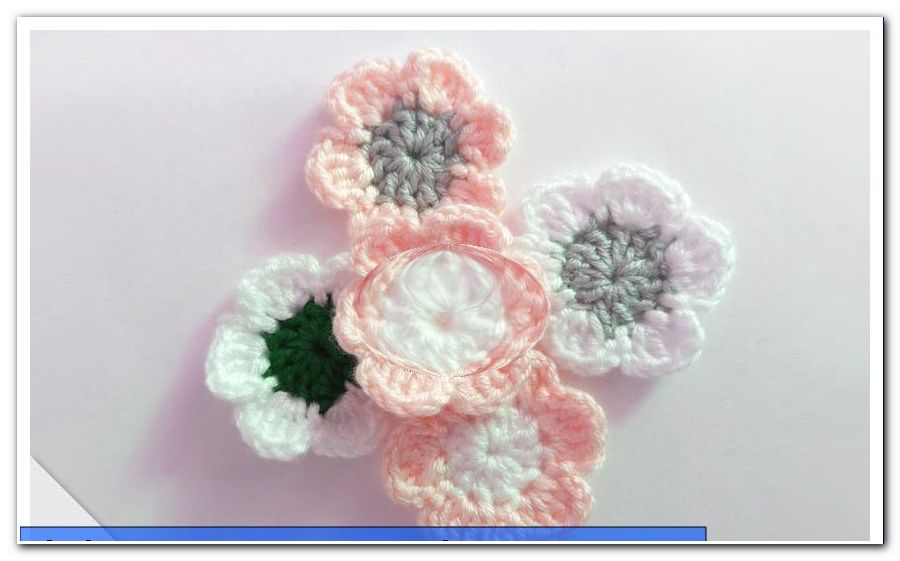
Sew the work threads. With the beginning thread of the thread ring you can sew the petals to your stockings. How many flowers you make, we leave that to your imagination. If you enjoy it, you can additionally crochet leaves or flower stems to the flowers.