Make Easter | Easter decoration to make yourself with templates

- Make Easter
- Easter bunny out of filter bag
- Easter bunny made of cloth napkin
- Easter gift bag made of butter bag
- Easter bunny - garland
The temperatures are getting milder and the sun is shining more and more and spring has arrived. Since it is not far to Easter. We have put together four beautiful crafting ideas for Easter crafts for you and your small and large fellow craftsmen! At Talu, you will not only find the inspiration for your next Easter gifts or small gifts, but also the appropriate instructions for the different variations of the Easter theme Oster tinker.
Our ideas are all about realizing the Easter decoration to make yourself with templates. You can use our templates prepared for you or use our templates as templates for your colorful craft papers. It's up to you and your creativity will guide you. Our colorful crafts are suitable for those who like to make small Easter presents themselves and give away the right unique items. Tinker with your children, grandchildren or with your kindergarten group. Everyone will love the Easter crafting ideas and have a lot of fun crafting them!
Make Easter
With our free instructions you can make a great Easter decoration in no time. We show you how to make the Easter decorations in a jiffy yourself, and you do not need any extensive crafting utensils, as most of them are already in your household. In our article, we introduce you to four different craft variations, for the Easter make, to the upcoming Easter celebrations.

Easter bunny out of filter bag
With this crafting idea you make an Easter bunny out of a coffee filter bag . You only need the aforementioned filter bag for the coffee filter of a coffee maker, a pair of scissors, a pen and a few colorful gift ribbon rolls.
required materials:
- a few filter bags for coffee filters
- scissors
- Pen for painting the rabbit's face
- colorful gift ribbon

Step 1: First, pick up a filter bag and lay it in front of you.

Fold both parts of the opening of the coffee filter bag down a few inches.

Tip: Whether you use white or brown filter bags is up to you, both are easily possible.
Step 2: Now you can do the filling of the filter bag. Here you are completely on the preferences of your loved ones, even small gifts can be packed well with and in a coffee filter.

Step 3: Close the filter bag again and fold your fold from step 1 back down.

Step 4: Now comes the colorful gift ribbon used.

Cut two small pieces off the ribbon and tie the coffee filter to the right and left. This creates the two rabbit ears.

Tip: You can use the cutting edges of the scissors to shape the gift ribbon and turn it into curls. For binding can also be used fabric ribbons or small, colorful wool remnants.
Step 5: Use a pencil to paint the bunny's face.

Tip: Depending on the filled you can also paint the rabbit's face before filling the filter bag, so painting is even easier on the hand.

And then your first crafting idea about Easter making is complete and your first Easter decoration for DIY is created.

Easter bunny made of cloth napkin
With this crafting instructions you form a cloth napkin and an egg in it, a decorative bunny, which is not only suitable for the festive table decoration, but also finds its place as a festive Easter decoration in your home safely. Again, you do not need much more besides the cloth napkin, a pair of scissors and a ribbon and an Easter egg.
required materials:
- a few cloth napkins
- scissors
- colorful gift ribbon
- a painted easter egg

Step 1: Pick up the cloth napkin and fold it into a triangle.

Tip: You can also use a scarf or other cloths, only note the square format of the fabrics used.
Step 2: Roll the triangle from the top until a small, elongated and wound roll has been created.

Step 3: Halfway up the wound roll and firmly hold the rolled cloth napkin to prevent it from reopening.

Step 4: Now put the Easter egg in the central small opening. Now you can adapt the rolled cloth napkin to the egg.

Tip: Do not let the cloth napkin too loose, otherwise the Easter egg will not find a foothold. Again, do not pull the napkins too tightly around the Easter egg, otherwise a slightly thinner eggshell could be cracked. Especially with blown and painted Easter eggs, please be extra careful.
Step 5: Then wrap the cloth napkin over the ice tip with a piece of gift ribbon.

In just a few steps, an Easter bunny is made from a cloth napkin and it is just waiting to be given away to a loved one or to catch a nice place on the banquet table. Her second Easter decoration to do it yourself is ready and another ideas for making Easter is finished.

Easter gift bag made of butter bag
With this crafting instructions you make a gift bag out of a butter bag. In this small bag can be so some treats and small gifts and attentions festive and suitable for Easter packaging. And also for this you only need a few crafting utensils.
required materials:
- a few white sandwiches
- scissors
- punch
- colorful gift ribbon
- possibly loose eyes or other decorative material as you wish
- our prepared easter tinker templates

Download: Easter crafts templates
Step 1: Print out our templates for the Easter and cut out the desired rabbit shape with scissors.

Tip: If you do not come with the big scissors in the small curves, then take a small nail scissors for the trickier places to help.
Step 2: Then glue the cut rabbit shape to the front of the bag with some hot glue.

Step 3: Now use the pair of scissors to cut the upper opening of the butter bag to the same height so that both parts of the paper towel are flush with each other.

Step 4: Using the punch, punch the holes in at the top of the butter bag opening.

Tip: The double inner parts of the butter bag make a few more holes when punching holes, which is not bad, because the bag is tied up. If a larger gift comes into the Easter gift bag, the few more holes will leave room to tie in a larger opening.
Step 5: Now fill your tinkered Easter gift bag as you wish.

Then tie the Easter gift bag with a piece of gift ribbon and seal it with it. Decorate your gift bag with a flower bow or the like according to your choice.

Tip: Also use the rabbit ears of our craft templates for your gift bags. Glue these to the right and left of the top sandwich bag opening and then fix loose-fitting eyes on the bag or paint a rabbit's face onto your Easter gift bag. On the lower edge of the bag, so to the right and left of it, you can even stick or paint small feet. There are no limits to your creativity!
Schwuppdiwupp is ready to make her next crafting for Easter and she is just waiting to be found and opened on the feast days by a lovely person!

Easter bunny - garland
In this manual you make a small rabbit garland for your Easter. Use it to decorate a shelf, the entrance area of your home or even the festively set table on the Easter holidays.
required materials:
- Yarn or wool in white
- Cord or other deco tapes of your choice
- scissors
- fork
- maybe a thin crochet hook
- possibly a small nail scissors
- our prepared easter tinker templates

Step 1: Use our crafting templates prepared for you again and print them out or use the other templates that you have already used for the Easter gift bags. Cut out the shapes you want.

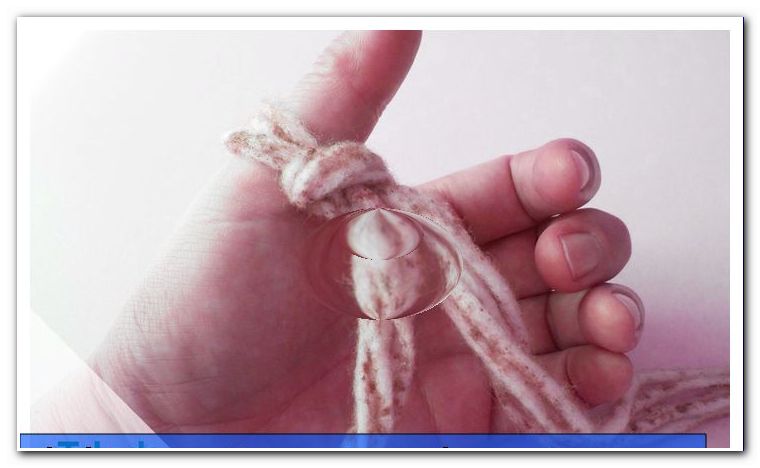
Step 2: Then continue with the fork and wrap some of the thin white yarn or some white wool around the tines of the fork. It should be at the end of a small pompom as a stubby tail for the hare.

Step 3: Wrap the yarn around the fork a few times.

Then cut a small piece off the yarn and pull it through the middle point of the fork. When threading through the forks, a thin crochet hook can be helpful. Tie the small piece of yarn around the wraps of your fork.

Then cut the wraps on the right and left with a small nail scissors. A small, white pompom is made.

Our instructions "Do Bommel yourself | Mini-Pompon "shows you step by step under the item" Mini-Pompon "how you can conjure a bobble with a fork.
Step 4: Using a little hot glue, glue the mini pompom to your cut out bunny shape.

Then take a little string of string to hand and glue the bunnies to the ear tips on the string again with some hot glue. Proceed with the sticking of the bunny figures to the parcel string until the desired length of the garland has been reached.

Tip: Use our rabbit templates as templates to then cut the rabbits out of clay or sample paper. So you can also color your rabbit-garland and provide pattern variants.

A cute rabbit garland is ready and can be decorated in your living environment or serve as an ornament for your Easter gifts.

We wish you a lot of joy when making our Easter craft Easter decoration for DIY! Talu.de wishes you nice Easter holidays in the circle of your loved ones and of course equally great anticipation when giving away your homemade Easter decoration!