Sewing flowers - instructions and patterns for fabric flowers

- Material and preparation
- cut out
- Sew flowers
- Sew tulips
Each of us knows this: You have smaller scraps at home and no idea how to best process them. Here I show you how you can easily sew pretty fabric flowers from leftovers. Whether as a decoration or as a small gift for Easter or Mother's Day, the sweet colorful flowers are well received everywhere and are ready in a jiffy. So you can quickly and easily sew colorful and everlasting fresh flowers.
Here we show you how to easily sew different types of flowers by hand. In the lower section you will also find instructions to sew beautiful tulips.
Difficulty level 1/5
(Also suitable for beginners)
Material costs 1/5
(Between 0, - and 10, -, depending on how many small cotton remnants you have at home)
Time expenditure 1/5
(Depending on the type of flower between 20-30 minutes)
Material and preparation
To sew the flowers you need:
- small cotton scraps
- a pen
- a scissors
- yarn
- a sewing needle
- a glass or a cup or our pattern
- a button or other small round object like a coin
- about 20 minutes of your time

To sew the tulips you will also need:
- green fabric
- wooden skewers
- fiberfill
- Textile adhesive or double-sided adhesive tape

Tip: If you would like to sew several flowers at the same time, sort out your scraps to find the best color combinations.
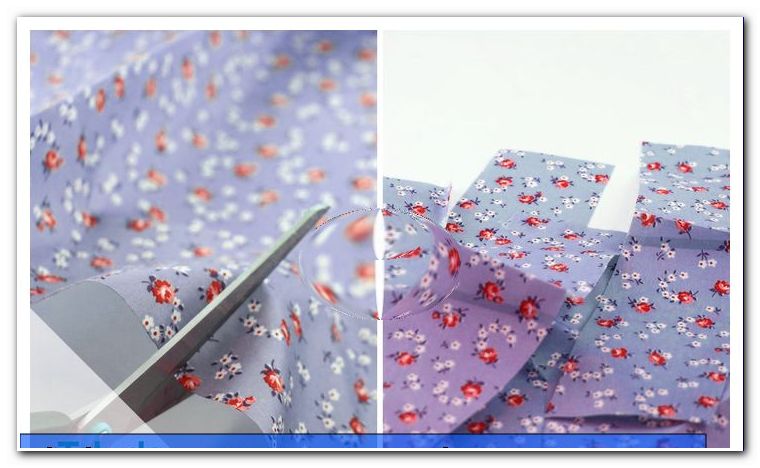
cut out
1. Place the glass or cup upside down on the left side of the fabric and draw the circle with the pencil. These circles later form the individual leaves of the flowers. The larger the flower should be, the larger the diameter of the circular object should be.
Alternatively, you can easily use our pattern:

Click here: To download the pattern
Simply print this out, cut out the desired circle size and use paper as a template. For the tulips in the lower part of our tutorial, the circles along the dashed line are cut again and should be much larger.
Tip: If you want to cut out several petals at once, you can put several layers of fabric on top of each other and pin them with pins or Wonderclips. Make sure that the fabrics do not slip!
2. Now we cut out the circles as precisely as possible with scissors.

Sew flowers
1. Now the individual fabric circles are folded twice in the middle until a triangle with a round side is created:

If you want, you can iron this triangle briefly with the steam iron to sharpen the edges and make sewing easier.
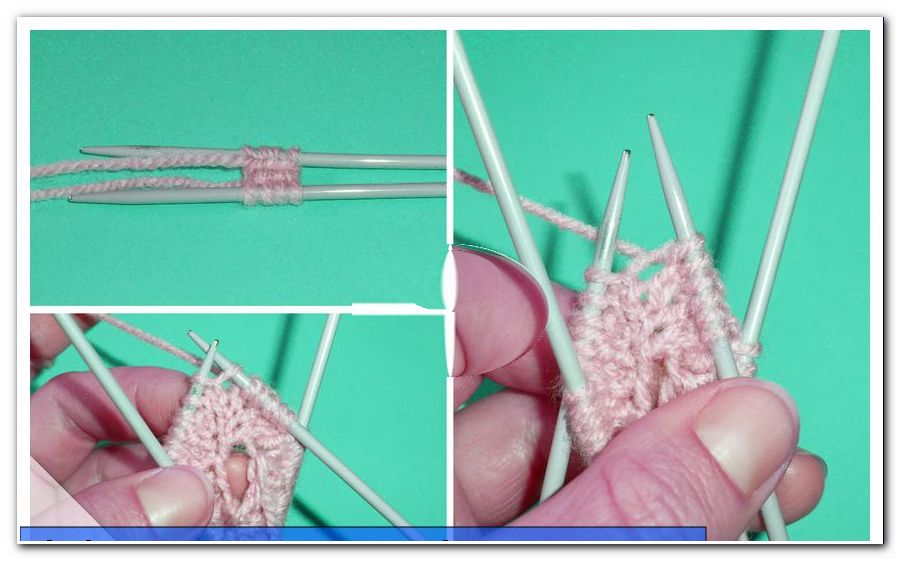
2. After threading the sewing thread, start the seam at the beginning of a round side of this triangle and pull the thread almost completely through until only 20 cm of the yarn is visible.
3. Subsequently, the round side is sewn with a so-called basting stitch or pre-stitch:

The needle pierces each from bottom to top or vice versa with a wave motion through the fabric and leaves on both sides small gaps. That's why the flowers can be pulled together later and throw small waves.
4. Now all petals are sewn together one behind the other at the respective round side. At the end of the round, take the two thread ends in one hand and pull the petals together tightly with the other hand. The threads are now knotted together as closely as possible.
ATTENTION: Due to the many fabric layers, the thread tears very easily!
Tip: To get a different leaf shape, you can fold the cut circles only once through the middle. The seam is made on the round side of the crescent.
This creates wonderfully curved petals without a peak in the middle.
If you already like the fabric flowers at this time, you can skip sewing the blossom in the middle in the next step.
5. For flowering, we use the button or another round object of similar size. We place this on the left side of a piece of fabric, which we would like to use for the center of the flowers. With the pen we draw a slightly larger circle around the button and cut it out.

Tip: If you do not have a button at home, you can, for example, use a 20 or 50 cent coin, depending on how big the flower should end up. For a flower with a diameter of about 20 cm, a 20-cent coin is perfect.
6. Now also sew this small circle with a basting stitch and make sure that at the end both thread ends are on the same - namely left - side of the fabric. The button or the coin we place in the middle.
7. Subsequently, the threads are pulled together and knotted together directly on the fabric. Again, care must be taken not to pull too hard on the threads. Please do not cut the threads yet, we will need them in the next step.
Tip: With a little stuffing under the coin or the button, the flower at the top gets a slightly "rounder" shape and looks softer.
8. Then with one of the threaded ends of the flower we stab from above into one of the petals on the inner edge. So we sew - alternately through the fabric of the flower and the leaves - in a circle until the flower is sewn. There we sew the thread and cut off the ends.

Tip: In order to save the sewn on the flower in the middle, can also be used on textile adhesive. Here you should be careful not to apply the adhesive too far on the outside of our flower to avoid unsightly stains.
That's it! Depending on your mood, the fabric flowers can be sewn with monochrome or colorful fabrics, be big or small, or even be sewn together on a chain.
The fabric flowers are perfect as a small gift or as a decoration of a nicely designed package. Small flowers can also be attached to a hairband or a clasp, for example with glue, and make themselves magnificently as a hair ornament or as a brooch.
Also as an original application to children's clothing can use our fabric flowers.

Sew tulips
Even beautiful tulips can be sewn from our fabric remnants.
1. As with flowers we cut out circular pieces of fabric. So that the tulips do not get too small, the largest circle on our pattern should be used as a template. Now, however, these circles are cut through in the middle.
2. Now the circle half is folded right to right - ie with the "beautiful" fabric sides to each other - and sewn together the open, straight side with a so-called "backstitch". This is the stitch that the sewing machine would also sew when setting the "straight stitch". It is stung from bottom to top, then from top to bottom and back to top (as the basting stitch). Now, however, "back" is sewn and the gap closed. The needle goes again from top to bottom and leaves on coming up again a small gap, which is in turn closed with the backstitch.
3. Next, the flower is turned so that the right side of the fabric is facing outwards again. The tulip can now be filled with cotton wool.

4. With the basting stitch (see instructions of the flowers) we now sew around the opening, pull the whole back together nicely and knot the thread ends carefully.
5. The length of our spit is first measured for the stem and a green cloth strip about 2.5 cm wide is cut in this length. We place the skewer in the center of the left side of the fabric.

6. With fabric adhesive or double-sided tape, the fabric can now be attached to the spit and finished is the tulip stem.
Tip: To make the stem a little firmer, the fabric strips can also be rolled diagonally over the spit and glued so.
7. Now the stalk just finished is put into the center of the tulip and fastened there. For this you can either simply knot the thread ends of the tulip or you sew again with a short basting stitch around the underside of the tulip and pierce through the fabric of the stem every second stitch.

Voilà - our tulip is ready!

Of course, if you want, you can also make a whole bunch of tulips and give them for Mother's Day or Valentine's Day! The advantage - our bouquet lasts forever!