Knit raglan from above - RVO | DIY guide for beginners

- Material and preparation
- rationale
- Preparation and arithmetic
- Knit raglan from above | manual
- The raglan stunts
- The hole pattern
To knit a sweater does not have to be an impossible project even for beginners. Certainly it requires a little more skill than a scarf. But the right technology can simplify much. For example, the raglan saves you from sewing together the individual parts. Collar, sleeves and body are knitted in one piece.
Here we present you a special version of the raglan, the raglan from above - in short " RVO ". This means that you knit the sweater down from the collar. Normally, the raglan is also used to knit the body and sleeves first. Then everything is taken on a common needle and worked the upper body to the neckline. We're going to work the opposite way at the raglan from the top . This makes it easy for beginners to knit the right arm and back length. Overall, the procedure is quite simple. Read it yourself!
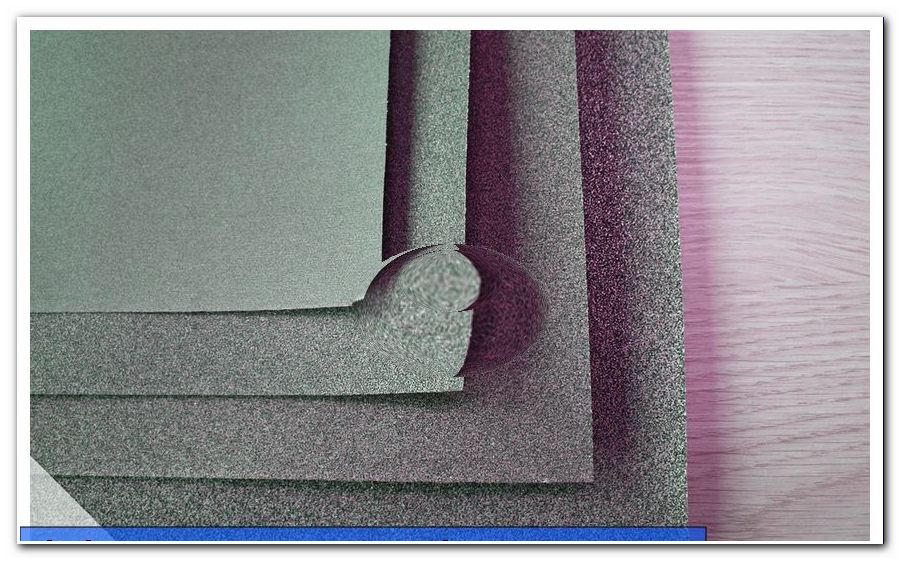
Material and preparation
Material:
- enough wool for the sweater of the chosen size
- matching needles
- matching circular needle
- scissors
- wool needle

Quantities for an average adult sweater can be found on the banderole of your wool. We have knit a size 80 kids sweater as part of this guide. Here a circular needle of 60 cm length is sufficient. For an adult jumper you need 100 cm.
We also used yarn in two different colors and built in a hole pattern. If that sounds too complicated for you, you can just leave it out.
Note: First, the basics of Raglan are explained from above. At the end follows a short description of the hole pattern.
Prior knowledge:
- circular knitting
- right stitches
- left stitches
- envelope
rationale
There are sweaters where the sleeves are sewn to the shoulders . These can be recognized by a circular seam that runs from the armpit to the shoulder. Then there are sweaters where the sleeves start right at the neckline . There are a total of four strips (two in front, two in the back) sloping down from the collar to the shoulders. These are the so-called "raglan slopes".
When knitting raglan from the top, divide your lap into front, back, left, and right arm from the beginning. At regular intervals, all four parts grow evenly. When you have reached the shoulders, knit only with the stitches of the front and back until the desired length is reached. The stitches for the arms rest meanwhile on a thread. You will finish knitting at the end.
But how are the raglan slopes ">
Note: When raglan from the top, the raglan slopes arise from the increases. At the Raglan from below, you form through the decreases.
Now there are different ways to knit the increases and also the intervening stitches. Here is a nice but simple version with envelopes and left stitches. The result is an airy hole pattern along the raglan slope.
Preparation and arithmetic
There is a wide range of methods for calculating the raglan slope. We do not spend much time billing here, but give you some rules of thumb that will work in any case. Most importantly, you can easily knit your first sweater with raglan. The experience will then show you where refinements are needed. Once you knit one or the other raglan sweater, the complicated calculations are easier to understand.
First, choose the following measurements for your sweater size and wool:
- neck size
- chest
- Number of stitches for 10 cm width (smooth right)
For the last point you will ideally make a stitch test .

Now determine the required number of stitches for the neck circumference . Also calculate the number of stitches for the chest circumference. Multiply the chest circumference by 1.5. The difference between one and a half times the circumference of the chest and the circumference of the neck tells you how many stitches you need to increase along the ridge inclines .

For example, if you have 90 stitches on the neck circumference and 226 stitches on the one and a half times the chest circumference, you will need to increase 226 - 90 = 136 stitches in the chest area. Now, divide this number of stitches by eight, as you gain eight stitches in each round of increase 136: 8 = 17. That means you will work a total of 17 increase rounds .
If your mesh size is not divisible by eight, round up the result to the nearest whole number (eg, 22.5 becomes 23). A rule of thumb is that raglan from the top every other round is an increase round. From the neckline to the underarms, 2 x 17 = 34 rounds are knitted in this example.
After this little math lesson you can start right away!
Knit raglan from above | manual
Hit the calculated number of stitches for the neck. As a rule, the needlestick is best suited for this purpose. First, knit a few rounds in crease pattern two on the left, two on the right.

After a height of two to four centimeters you go over to smooth right.

In the first round of plain right stitches, you distribute a total of five stitch markers . You place the first marker at the beginning of the round. Put the next marker after one sixth of all stitches. The third marker is again set to one-sixth, the fourth to one-third of all meshes. After another sixth place the last marker. Select a different marker color for the start of the round than for the remaining four digits.

Note: You are knitting a simple, round neckline here.
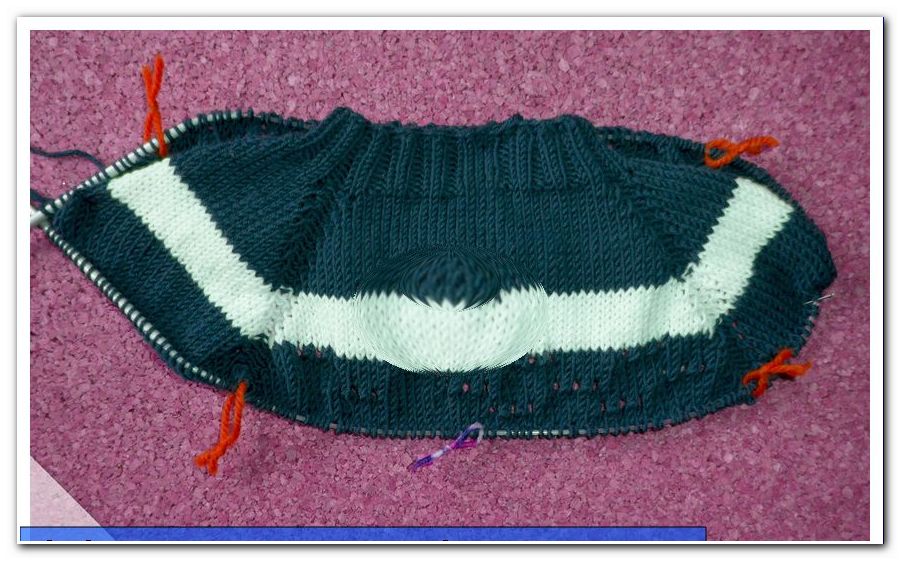
Assuming 90 stitches, one sixth equals 90: 6 = 15 stitches. The markings are therefore at a distance of 15 - 15 - 30 - 15. The four identically colored markings show you the places where the raglan frames are being worked on. The start of the round is on the back of the pullover. The small distances of 15 stitches are the sleeves, the large gaps form the front and back.
If your number of stitches can not be divided by six, beat the remaining stitches to the front piece. For example, if you have 104 meshes, you get 104: 6 = 17.33. One sixth corresponds to 17 stitches. Since 17x6 = 102 stitches, you have two left of the 104 stitches. These beat them to the front part, which then has 19 instead of 17 stitches.
From now on, take two stitches every 2 rounds at the marker . The exact pattern can be found in the next section. Knitting over the number of laps you have calculated. In our example, this is 34 rounds.

In the course of the increases, you will have to switch from the needlestick to the circular needles.

When the increases are finished, rest the loops of the arms on one thread at a time. Close the front and back parts to a lap. From now on knit smooth right until the desired back length is reached.

At the conclusion, there are again some rounds in the cuff pattern.

Take the stitches from one arm onto the knitting needles.

Now knit the arm in rounds down to the wrist. You also need to remove even stitches, as the circumference at shoulder height is significantly greater than at the wrist.

If you have knitted both sleeves, your raglan sweater is ready.

The raglan stunts

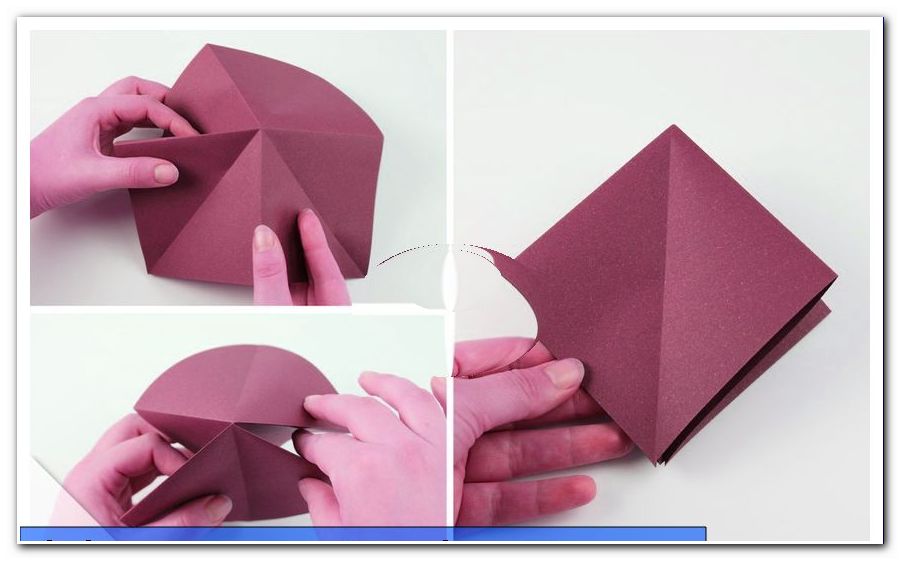
When you reach a marker in an increase round, knit the following:
Take an envelope in front of the marker, mark on the right needle, three stitches on the left, one cover.

It continues as usual with right stitches . It is important to always work the first envelope before the marking.

Otherwise, the marker moves to the side.

Between the Zunahmerunden knit the envelopes just right. The three left-hand stitches between the envelopes knit on the left. The result is a pretty raglan slope, which is lined on the left and right of a row of holes.
The hole pattern
On the one hand our sweater has a white stripe pattern, on the other hand a hole pattern. For the stripe pattern, simply continue knitting in another color from the beginning of the round . Sew end and end threads on the inside of the sweater at the end.
The lace pattern between the two white stripes fits very well with the raglan slopes and is easy to knit. Every third row is a "row of holes". The three adjacent holes are formed by making an envelope three turns at a time and knitting two stitches together to the right. The distance between the holes is six stitches.

In the next row of holes knit the three holes exactly in these six stitches. The envelopes knit in the next round just right.

Now we wish you lots of success and joy knitting the raglan from the top !