Sewing for Advent and Christmas - 4 quick ideas for Christmas decorations

- Tea Coaster
- Fabric bag for little things
- Angel wings for hanging
- Christmas trees
Soon, the advent season begins again and so that you can adjust to it and then decorate your house according to the season, I show you today four different ways how the right equipment can produce according to your own wishes. How to bring your personal touch in every room!
Who does not know: every year, the shops run on decoration offers and of course people who want to buy them. But often you do not find exactly what you are looking for. That's why I show you today how you can easily design your own Christmas decorations. The majority of the necessary materials you have already determined at home, because these small pieces are ideal for the residual use.
Difficulty level 1/5
(suitable for beginners)
Material costs 1/5
(between EUR 0, - from the remainder utilization up to EUR 5, - per workpiece)
Time expenditure 1/5
(variable depending on motif selection and quantity)
First of all, a little tip to read: In these tutorials, the ladder or magic seam is always recommended. You can find out how to implement these best here: //www.zhonyingli.com/dinkelkissen-selber-machen/
Tea Coaster
Now it starts again, the season of running noses and cold feet - but also the season for tea. What could be more appropriate than to sew a matching saucer for your teacup to create something suitable decoration and at the same time to protect your table ">

After cutting, fold the fabric you want to use (reinforce webbing with non-woven fabric - or finish after cutting), lay your template and draw the edge.

Then remove the template and insert a pin through both layers so that it does not slip when cutting. Now cut both layers along your marked line.
 Now place both circles right to right (ie with the "nice" sides to each other) and put them back together with one or more pins. Now sew around with a straight stitch and leave out a few centimeters for the turn-around opening.

Then cut around every half centimeter around the seam so that the seam allowance does not warp after turning.

Then turn and iron your coaster. Now you can either close the turning opening by hand (using a ladder or magic seam) or sew it around with a single or a decorative stitching. I have used - matching the advent season - a decorative stitching with stars in a contrasting color.

Fabric bag for little things
Not only as a gift, but also as a decoration or as an element of an advent calendar, you can score with self-sewn fabric bags. To do this, draw a template with the dimensions as described in the picture for a small sack.

Of course you can adjust the dimensions individually - enlarge or reduce - according to your needs. Important is: In my template, the seam allowances are already included! 
Which material and which design you use is up to you. I opted for a nice, robust cotton fabric that I reinforced with non-woven fabric. If you work without an ironing fleece, remember to finish your fabric pieces after cutting. Now place the template directly on your desired fabric and mark it, then cut the fabrics.
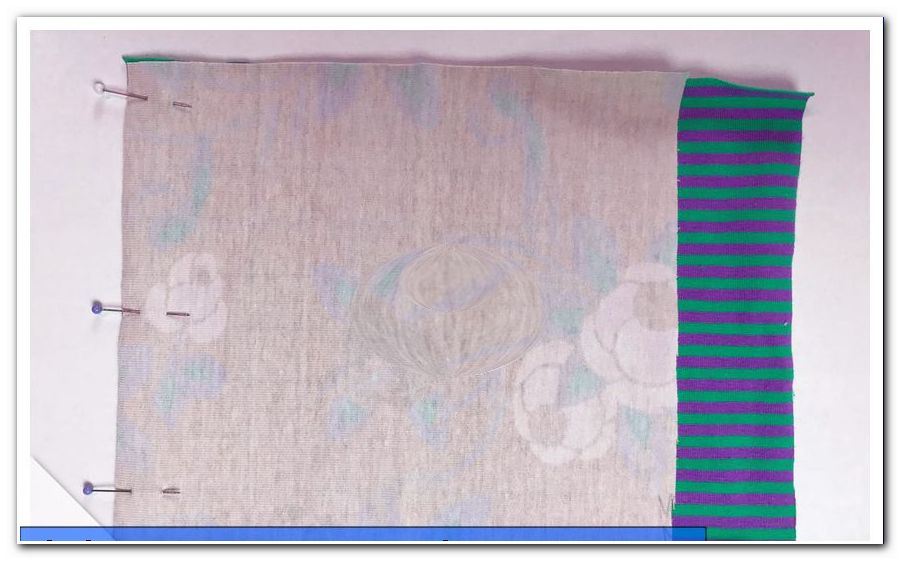
Of course, also inside and outside pocket can be made of different materials. Fold your fabric parts in the middle right to right and pin the edges, which you stitch together with a simple straight stitch (sew at the beginning and end!). Then unfold the seam allowances and pinch the lower transverse edges, which you also sew (and sew!).

In the next step, you turn one of your resulting bags and put in the other bag so that they are again right to right (ie the "beautiful" fabric sides to each other). Sew with straight stitch parallel to the top edge and save a few centimeters turning opening. Then turn your workpiece, fold the edges of the turning hole inwards (beginners can also iron them in) and pin tight. Then close the turning opening either by hand with a ladder or magic stitch or staple with the machine around again just short edged with a simple straight stitch or a decorative stitching.

Finally, you fill your bag and seal it with a band of your choice.

Angel wings for hanging
A beautiful idea for wall, door or window decoration are these charming angel wings: Fold a piece of paper in the middle and record half of the desired shape. The wings can be feather-shaped, with points and edges or round - as in my example - be. Cut out the drawn line and unfold the paper and you'll see how your wings will look when you're done.

Paint this pattern now on your desired fabric and cut two pieces of fabric, which you put right on the right (ie the "nice" sides to each other) and fix with pins, so that when sewing nothing slips.
In the case of heavily fraying fabrics, I recommend to finish both pieces of fabric one at a time. Now stitch parallel to the edge all around with a simple straight stitch and save a turning opening of a few centimeters. Now turn your wings and iron out the coarsest folds.
Now fill your workpiece with filling wadding. Depending on the size of your wings you will need more or less of it. I used about two handfuls for my wings.

After filling, close the turning orifice by hand with a ladder or magic seam. Now decorate your work as desired and attach a tape to hang. I opted for a rough band and a blue-green wood bead.

Christmas trees
Now that your windows and doors are beautifully decorated, I show you one more way to sew a simple but effective ornament: Small Christmas trees to set up / lean against. To do this, draw a triangle in the desired shape and cut it out. I have drawn a very simple triangle, but you can also add pips laterally, so it looks more like Christmas tree. I opted for rough linen with sheet design.

The thicker fabric makes it look more plastic and the print is perfect for this Christmas theme. Now use this template to cut two triangles from the fabric of your choice, put them right to the right (ie with the "nice" sides facing each other) and sew them all the way around. Save at the bottom in the middle of the turning opening. Turn your tree and gently sculpt all corners. Depending on the fabric selection, you should now iron again.

Close the turning opening by hand with a ladder or magic seam. Decorate the tree according to your wishes. I have cut rough Bastgarn, threaded red wooden beads and wrapped around my tree. The two ends of the band I knotted at the bottom (on which the tree comes to stand).

Have fun sewing!
The twisted pirate