Make the fireplace lighter yourself - Lifehack: DIY grill lighter

- 3 ideas for fireplace lighter
- sawdust
- Pine cones and brushwood
- Cones and sawdust
- Grill lighter make yourself
- Wooden sticks and wood wool
- nutshells
- advantages
Are you tired of spending a lot of money on barbecue and fireplace lighters and harming the environment ">
Grill and fireplace lighters from the trade are often small (or large) chemical bombs. Often they are composed of petroleum by-products such as kerosene or petroleum. This is anything but environmentally friendly. Therefore it is recommended to make the lighters yourself. Apart from the fact that the effort is manageable, you also save money. Most variants cost next to nothing except a little time in beautiful nature. We will introduce you to different ways of creating barbecue and fireplace lighters on your own, which will ignite a blazing fire.
3 ideas for fireplace lighter
sawdust
First, we would like to introduce you to the classic among the DIY fireplace lighters. You only need a few materials that you can purchase at the hardware store as cheaply as possible.
Required items:
- sawdust
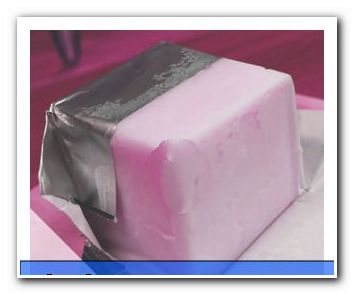
- wax residue
- baking dish
- knife
- Pot of water
- deep pan
- Disposable gloves

Manual:
Step 1: Fill the baking dish completely with sawdust.
Step 2: Melt wax residue in a water bath on the stove. Over the pot of boiling water, hold the deepest possible pan with the wax pieces in it. So the wax gradually becomes liquid.
Tip: For safety reasons, do not heat the wax directly, but use a water bath as mentioned. Use as much wax as possible!
Step 3: Pour about two-thirds of the hot, liquid wax over the sawdust. Pay attention to an even distribution.
Step 4: Strip disposable gloves made of latex or vinyl (depending on compatibility) and knead the sawdust thoroughly with the wax.
Step 5: Again melt the remaining wax in the pan, which has probably become solid again, and then distribute it again over the sawdust and wax mixture.
Step 6: Compact the mass carefully with your hands (do not forget gloves) so that there are no holes or leaks.
Step 7: Allow your work to cool and dry for at least 24 hours.
Tip: The mass must really be completely dry in order to serve as an efficient fireplace lighter.
Step 8: Cut a small piece out of the solid mixture with a sharp knife.
Already the fireplace lighter is finished. It burns for about ten minutes. Even a big campfire can be kindled with the piece.
Tip: The remaining mass in the casserole dish should then be stored in an airy and dry place. This ensures that the practical fireplace lighters are always ready when they are needed.
Pine cones and brushwood
The second and third instructions of our guide lead you straight into nature. There you will find the basic materials you need to make your fireplace lighter. And the other things you might already have in stock at home.
utensils:
- pinecone
- brushwood
- cotton yarn
- Pruning shears
- scissors

Tip: Pine cones are very dry. They also contain flammable resins. These properties ensure a fast and especially hot fire.
Manual:
Step 1: Bring the twigs to a uniform length. To do this, use a garden knife.
Tip: The branches should be so long that they cover about two thirds of the pin.
Important: Note that the branches must be completely dry. If so, wait a few more days to make your fireplace lighter and store the brushwood in a dry and airy place.
Step 2: Arrange the twigs around the spigot.
Step 3: Wrap the "package" with cotton yarn. Just do not be too frugal, after all, you want to make a sturdy fireplace lighter.
4th step: If the whole thing is tidy, cut off the yarn with the scissors and fix the end energetically in the fabric rows.
That's it - the environmentally friendly lighter is ready and ready to use.
Cones and sawdust
For our third idea you need a pinecone again, but no brushwood. Instead, "ingredients" from the first manual are needed: sawdust and wax. There are also other materials that you are guaranteed to own.
Required items:
- pinecone
- sawdust
- wax residue
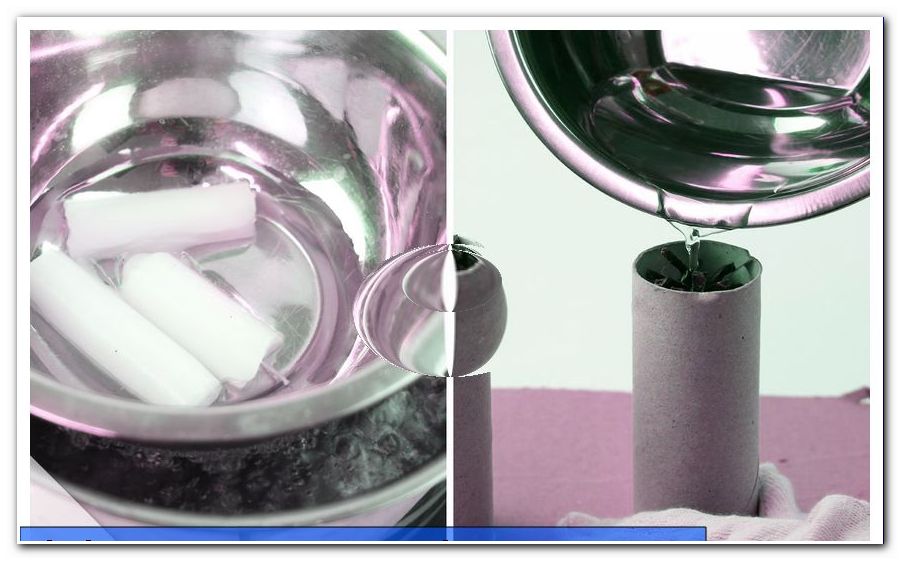
- Cardboard roll (eg from toilet paper)
- solid paper
- Pot of water
- deep pan
Manual:
Step 1: Burst tight paper together.
Step 2: Put the crumpled paper in one end of the cardboard roll so that one side is tightly closed.
Step 3: Fill the cardboard roll one third with sawdust over the open side.
Step 4: Insert the pine cone.

Step 5: Melt wax residues (using water bath, see instruction 1).
Step 6: Pour the liquid wax through the spigot into the interior of the cardboard roller. Let dry.
And already this fireplace lighter is ready. It is especially recommended for large fireplaces, where considerable logs are burned. The lighter is able to ignite a huge fire. You can also burn lignite directly in this way.

Grill lighter make yourself
When a grill lighter are in comparison to the fireplace lighter a few more points to consider. In essence, it is important that the materials used
a) do not bring a strong smell of their own and
b) do not release any aroma to the charcoal (exception: nutshells, see idea 2 below).
Otherwise, your grilled delights would not taste as they should taste.
As a result, wax and (printed) paper are unsuitable "ingredients" for the grill lighter. Pine cones should literally be treated with caution. Only if they do not have too much adherence of resin, they come into question. Whether this is the case or not, as a layman but unfortunately can hardly find out. Thus, you are better advised to refrain from cones, if you want to make a grill lighter - unless the changed taste does not bother you. In any case, we have two alternatives for you that you can safely implement.
Wooden sticks and wood wool
Our first idea for a grill lighter is absolutely odorless. That is, the ingredients do not alter the taste of the grilled foods in any form.
You need this:
- Chopsticks made of very dry wood (eg fir or spruce)
- excelsior
- Hemp or sisal cords
- scissors
- Pruning shears

Info: Wood wool has the property of optimally igniting charcoal. It burns very well - but also quickly. That's why you need extra dry wood as well as hemp or sisal cords. These are important elements, otherwise the thing does not work as desired.
Manual:
Step 1: Pick up three sticks of very dry wood.
Tip: If necessary, trim the fir or spruce wood (recommended wood) with a sharp garden knife so that you get three fine sticks.
Step 2: Wrap the woodwool between the three rods and around them. Go quietly doing something extravagant, after all, a proper fire should arise.
Step 3: Finally, tie the string together with a string of sisal or hemp.
The first grill lighter is already finished. Now create two more packages. The threesome manages to make several kilograms of charcoal glow.
nutshells
Now comes the big exception to the requirements that we at the very beginning of the section called grill lighter. By using nutshells, the aroma of the grilled food is indeed changed - but in a positive sense. The traditional spiciness of this method is accompanied by a fine nutty note, which can be sweet to tart, depending on which peel you use.
You need this:
- Nutshells (eg hazelnut, walnut or coconut)
- sawdust
- two 10 to 15 cm thick plates (diameter about 5 cm) of dry wood (eg spruce or fir)
- excelsior
- Sisal or hemp cords
- Holzbohrer
- adze
- wood rasp
- hammer

Manual:
Step 1: Pick up one of the thick sheets of dry wood and hollow it out about five inches deep. Wood drills, adze and wood rasp will help you with this. The work does not have to be accurate. It is only important that a cavity is created in the wooden plate, in which you can later accommodate the nutshells and sawdust.
Step 2: Break the nutshells with a hammer. Be sure to use many bowls.
Step 3: Put the "chopped" shells into the "wooden cave".
Step 4: Add sawdust to the shell crumbs until the cave is full. Mix the ingredients with your hands a bit.
Tip: Wear thick gloves to avoid injury to the wood.
Step 5: Place the second, intact wood panel on the first one.
Step 6: Wrap the boards generously with wood wool and a hemp or sisal cord. Tie the whole thing tightly last.
Ready is the flavoring grill lighter. It is best to use two packages per load of charcoal.
Note: nutshells burn very well and clean, they produce a strong and long glow. In addition, the aroma they give off is delicious, but not over the top.
advantages
... homemade grill and fireplace lighter
You can now choose from different variants and make your own grill and fireplace lighter. At the end of this article, we would like to make clear to you once again why the DIY variants make perfect sense. Here are the many advantages at a glance:
+ natural materials instead of "chemical bombs"
+ environmentally friendly instead of harmful to the environment
+ almost free instead of sinfully expensive
+ enormous creativity instead of pure comfort
+ intense embers instead of short fires
The last point is also one of the most important. In fact, the self-made grill and fireplace lighters burn longer and longer than the finished products from the trade. This increases efficiency and in turn has a positive impact on the environment. As you can see, there is every reason to make the lighters in DIY mode!