Tinker Christmas bags yourself - DIY gift bag

- Make DIY gift bag
- material
- manual
- Make Christmas bag
- material
- manual
Christmas is upon us and it's time again to "wrap up presents!" We'll show you two simple, yet great ways to wrap gifts at Christmas. So you can tinker Christmas bags yourself - fast, cheap and beautiful.
You want to quickly wrap a Christmas present "> DIY gift bag tinker
Make this gift bag out of a piece of paper. The paper should not be too thin as the gift bag also has to carry the gift. Therefore, this Christmas bag is best for a slightly thicker cardboard. For a real eye-catcher you can use Christmas pattern paper or a box with glitter effect. But also monochromatic bags look noble and high-quality with the necessary decoration.
material
- a sheet of cardboard (A4 size)
- Pencil and ruler
- Decorative clips
- Christmas decoration material

manual
Step 1: At the beginning, lay the paper across and draw the appropriate lines. Starting from the top and bottom edges, draw one line at a time of 4 cm . Starting from the left and right side, draw one line each after 12 cm . The format of the gift bag is determined according to these dimensions. The 4 cm determine the width of the bag and the 12 cm the size of the basket. The dimensions can be adjusted as desired.

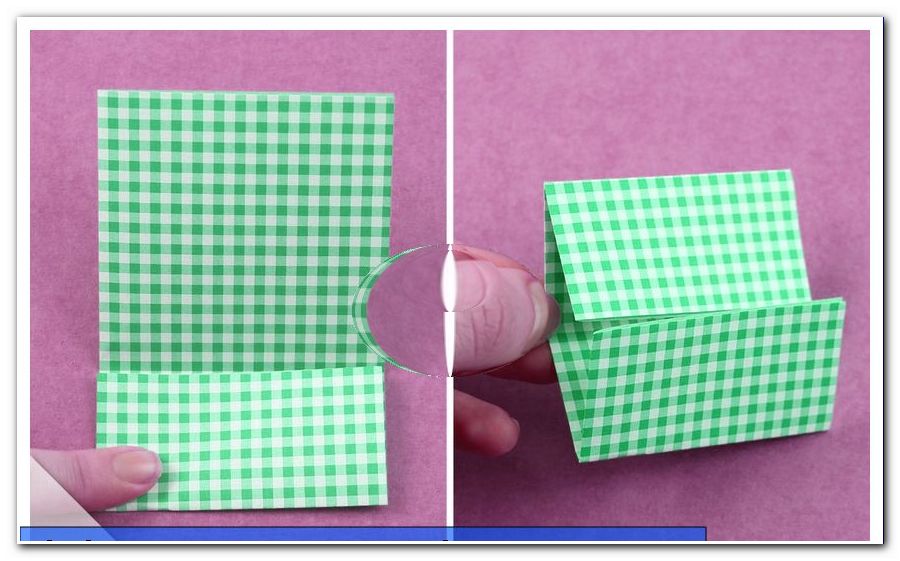
Step 2: Then fold the two horizontal lines downwards or upwards.

Step 3: Then fold over the vertical lines. The narrow strips are now hit exactly along this fold. For this, run the inner edge of the strip outwards and form a small triangle - this is flattened and then the lines are drawn with your fingers. Repeat this at the other three points where the folds from steps 2 and 3 touch.

4th step: The gift bag is almost finished. Just put the long outside together. The folds from the previous step then form two small sidewalls and the bag is done.

With the matching Christmas decoration, the gift bag can now be spiced up. For example, lock the DIY gift bag with clothes or staples. Let your creativity run wild or leave the bag completely neutral and simple - even that can be enough.
Make Christmas bag
Another great variant for a DIY gift bag is this simple paper bag - this packaging idea is very popular for crafting advent calendars. The Christmas bag can be completely closed. So nobody can secretly lunchtime. Equally great, you do not even need a pen for writing, nor a ruler.

material
- a sheet of paper (A4 size)
- glue
- Christmas decoration material
manual
Step 1: Place the sheet of paper in front of you on the table in front of you. Move the left outer edge to the right - but leave a space of about 2 cm to the right edge. Fold the paper exactly at this point. Then fold the right edge to the left and trace the fold with your fingers. Then the flap is glued with glue.

2nd step: Now the bottom of the gift bag is folded. Flip the bottom edge up about 5 cm . This distance determines the size of the soil. The larger the dimension, the larger the bottom surface of the bag becomes. The height of the bag decreases but for it. Then fold the left and right corner up to the just folded line. Now the floor is unlocked - pull apart the two layers in the middle between the two corners and press the floor flat.

Step 3: Now the bottom of the Christmas bag is closed. Fold the upper and lower outer edge downwards or upwards. These edges should overlap one piece so that the bottom does not have a hole later. Now glue the tabs firmly together. The bag is already finished. One last trick that makes the bag look even more elegant is the folding of the outside. Fold left and right the bag 1 - 2 cm high.
 The folds are then pressed inwards. Done is the Christmas bag

Now the DIY gift bag needs only a little decoration. With tapes, knit or staples, the bag can be closed. Whether as a single gift or in the advent calendar - this DIY Christmas bag is easy to tinker and visually a real eye-catcher.


