Connecting the washing machine - instructions for inlet / outlet

- What does the washing machine need "> Extension possible
- Choose site
- Check drum and release transport lock
- Connect the washing machine
- 1. Create water drainage
- 2. Connect the water inlet
- Hot or cold water connection?
- 3. Connect power
- 4. Bring the washing machine into the working position
Connecting a washing machine is not as complicated as you might think. Such a machine just belongs in every household. The own washing machine is simply more practical, as his dirty laundry by car - or even suburban train - to go to the next laundromat and wait there for hours for his clean laundry. Washing machines are available today in all price ranges and sizes. When connecting but the cheapest single washing machine is not different from a high-end comfort device. In this guide, we show you how you can easily connect your own washing machine.
What does the washing machine need?
A washing machine needs three things to operate:
- Intake
- procedure
- power connection
The inlet to a washing machine is done by a separate washing machine connection or by a normal tap. Washing machines are operated with normal drinking water. A cold water connection is sufficient. Energy-conscious consumers can also connect the washing machine to the hot water. Read more in the last chapter.
During the process, the washing machines are equally undemanding. You can connect the washing machine to the siphon of a sink or equip it with a separate drain. It is only important that access to a drainpipe is near the site. A third possibility is to hang the drain hose during washing in a sink or a bathtub. In this case, however, the basin must be cleaned after each wash.
The power connection must be suitable for the washing machine. A simple 220V outlet is not enough. It must be a wet room outlet. These can be easily recognized by the flap, which protects an unused outlet against moisture penetration.

Extension possible
If the desired installation location is too far away from the power and water connection, you can help yourself with extensions. Inlet and drain hose can also be extended to some extent. However, each connection always increases the risk of leaks and leaks. Therefore, it should be checked before an extension if a one-piece, longer tube is available.
The trade offers inlet hoses from 1.5 to 5 meters. However, the most important thing about the inlet hose is that there is always a connection hose with Aquastop mounted at least on the connection side of the tap. An aquastop closes the hose automatically in the event of a defect and thus prevents water damage. However, the Aquastop only works on its own hose. Ideally, connected extensions are therefore only used if they are also equipped with an Aquastop. To extend you need appropriate couplings. These are made of brass and cost 3-5 euros apiece.
Drain hoses are also offered up to 5 meters in the trade. They can also be renewed. For this purpose, an adapter made of plastic or brass is used, which is additionally fixed with a pipe clamp. For safety reasons, you should not connect more than one extension to the washing machine. Inlets and drains have large pressure fluctuations, which allows them to move with each wash. Each movement in turn can favor a detachment of the compounds.
If the power connection is to be extended, it is important to lay the power cable above the washing machine. The cable should never be placed behind the washing machine on the floor. If there is an escape of water, it prevents the power cable from being in the water. However, to be on the safe side, only a cable approved for use in wet rooms should be used to extend the power connection.
Choose site
In addition to the proximity of inlet, outlet and power connection, the site must meet other criteria:
Level ground
The floor must be absolutely flat. This is often a problem especially in older laundry rooms, as they have very sloped floors with a central inlet. In order to set up a washing machine safely here, a suitable wedge board or a separate foundation must be made. Slight inclinations are corrected by leveling out at the rotating feet of the washing machine.
Tiled floor
A tiled floor is ideal for the washing machine. Sooner or later, every washing machine will leak water easily. Then it is important to be able to absorb the moisture easily and without consequential damage. With a parquet, laminate or carpet this is not possible. PVC floors are too sensitive to the permanent load of a washing machine and quickly wear away pressure and scratch marks. 
noise protection
A washing machine inevitably generates noise during operation. Although this can be reduced by suitable measures, but not completely prevented. Washing machines vibrate very much during operation. That's why there should be a hand's breadth of space around the machine to the nearest wall. This greatly reduces structure-borne noise. A wall-mounted washing machine is audible throughout the house.
For the decoupling of the washing machine from the load-bearing walls of the house, therefore, the use of an anti-vibration mat is recommended. It costs between 8 and 20 euros and gives the machine additional security against the dreaded "hiking". As an alternative to the anti-vibration mat, the trade also offers vibration dampers, which are attached directly to the screw feet of the washing machine. However, these have the disadvantage that they can build up very high and in the case of "hiking" with strong imbalances, the entire washing machine can cause tilting.
The installation site of the washing machine must be frost-proof. A washing machine with freezing damage is usually irreparably damaged.
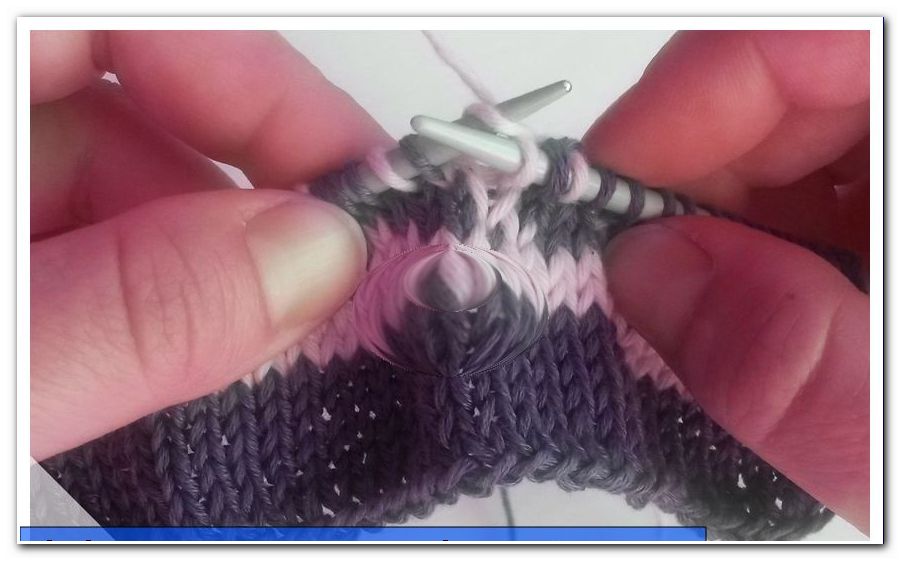
Check drum and release transport lock
If the washing machine is already at the place of installation, the transport lock must be loosened. The transport safety device is to prevent the drum of the washing machine from hanging during wear. The drum is mounted on four strong steel springs. The breakpoints on the drum and on the housing are relatively large. In a lying or tilted transported washing machine, one or more springs can hang out quickly. You can see a suspended washing drum because it hangs awkwardly or generates a grinding noise when manually spinning. If the drum has been moved without transport lock and is unhooked, it must be replaced before placing the washing machine. 
Hang the drum
To do this, loosen the lid on the two screws on the back of the washing machine. The drum is hooked on the springs again. You must also make sure that the drive belt from the engine is correctly applied to the flywheel. This dissolves very easily with a suspended drum.
The construction of the transport lock can vary depending on the type. How it is solved, is in the manual. If the manual can no longer be found, you can download it from the manufacturer on the Internet.
Connect the washing machine
The transport lock is released, the drum rotates flawlessly, the washing machine is on the anti-vibration mat, supply and drain hose are ready - now you can start.
1. Create water drainage
The water drain is technically the safest step and can therefore be done first. The drain hose is firmly connected to most washing machines.
The best opportunity to completely replace the siphon of the nearest washbasin. The trade offers sink siphons with two additional drain adapters from 10 euros. The assembly is very simple. Except for a small screwdriver to tighten the drain screen you need no tools. The plastic elements of the siphon are only hand-tightened. It is important that you forget no seal. The drain hose of the washing machine is screwed to the drain pipe with the help of a small screwed pipe clamp. 
On delivery, these connection siphons have locks on the outlet connection! When connecting the washing machine, the small plastic disc must be removed. It is important that the lock remains installed in the second nozzle. Otherwise, the pumped wastewater from the washing machine through the second, usually provided for the dishwasher drain outlet, runs out again. If the plastic threads pinch, you can do it with a little detergent.
The waste water from the washing machine, however, can be recycled in two ways. First of all, the recovery of heat is relatively easy to implement. If the house has a heater with buffer storage, the warm wastewater of the washing machine can give off part of its heat energy for the heating of the house via a heat exchanger. In addition, with a service water tank, the waste water of the washing machine can be readily used for toilet flushing. The technical effort for this is quite large, but is a meaningful contribution to the responsible use of resources.
2. Connect the water inlet
The inflow from the water takes place via the pressurized water line. If necessary, an existing tap can be diverted through a Y-piece. Then the sink remains in its function and the washing machine still gets the desired water anyway. However, the inlet to the washing machine must always be shut off, so be equipped with a tap. A Y-piece costs about 5-8 euros, a separate tap for the washing machine about 8-12 euros. It is simply mounted with sealing tape or hemp and tightened with a pipe wrench.
For the washing machine comes as a supply hose only one version with Aquastop in question. A simple pressure hose is a much too big risk. In the case of a burst hose you do not put the whole house under water with an Aquastop. 
The washing machine has a nozzle made of plastic, to which the water inlet is connected. Inside is a small plastic sieve . When installing a used washing machine, this sieve can be removed with a pair of needle nose pliers and checked for dirt. If it is calcified, you get it clean with vinegar essence again. Then the washing machine should also be treated with a descaler.
The connection hose is equipped at the side of the washing machine with a 90 ° angle. It is very important that you do not exert too much tension on the connection after connecting. Otherwise the hose may break off.
Hot or cold water connection "> 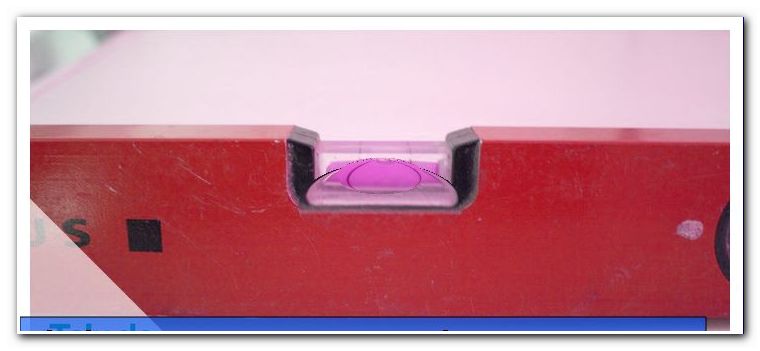
Align with the spirit level 3. Connect power

As mentioned in the first chapter, the power cord should not be on the ground. With the help of wall hooks or wire, the power cable is tied so high that it can not be in a puddle of water under any circumstances.
4. Bring the washing machine into the working position
When all connections are in place, push the washing machine with the anti-vibration mat into its intended position. With the help of a spirit level now the absolutely straight state is checked. Then you can start a test run. The washing machine is run once without loading completely and all connections are checked for leaks.