Sewing Table Runners - Free Instructions for a Table Ribbon

- Material and preparation
- Sewing instructions - Sew table runner
- Instructions for quick readers
Sew a table-cloth yourself ">
Material and preparation
You need this:
- sewing machine
- matter
- Yarn and scissors
- Pins and / or paper clips
- Iron
- Fabric marker or tailor's chalk

The sewing machine
For your project, your sewing machine does not need anything special. A simple straight stitch is more than sufficient here. Even working with a cheap hand sewing machine would be quite conceivable. Our sewing machine used here is a device of SilverCrest and costs about 99, - Euro.
The fabrics
Here you can choose fabrics that are quite flexible and can be ironed well. Cotton is best suited for beginners. Cotton fabrics are the easiest to work with because they do not warp so easily and are relatively strong. A running meter of cotton you get from 5, - Euro.
The fabric marker or tailor's chalk
To mark the cut parts on the fabrics, we used a fabric marker. This one uses like a conventional felt-tip pen. The difference: The lines can be removed with a few drops of water. You can then simply put your finished table-top in the washing machine and remove any lines that may still be visible. You will receive a fabric marker from just 3, - Euro. As an alternative to the fabric marker, you can also use a tailor's chalk or a soft pencil.
Now you have all the materials ready, so you can work in peace and then you can start already.
Important: First, read through the complete instructions from the beginning to the end, so the sequence of the individual steps seems more logical and you will find it easier to work.
Sewing instructions - Sew table runner
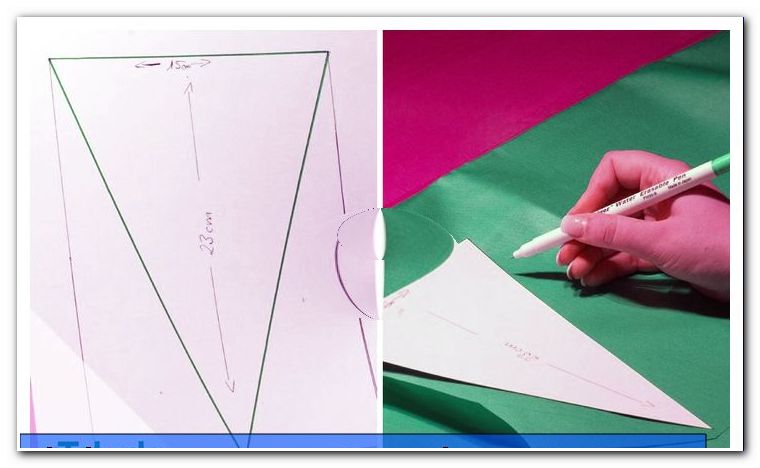
1. We first need our two cutting parts. The sizes depend on your table or what you want to use the table runner. We chose the dimensions 117 x 33 cm for the basic part and 117 x 19 cm for the sample fabric. So, draw the measurements on the fabrics with your fabric marker or the tailor's chalk and cut them. The more carefully you work in this step, the better the result.

2. Lay the two cut pieces right to right. That is, the two "beautiful" pages look at each other. One of the long sides must be exactly on top of each other. Stick it all tight.

3. Now sew the long side together.

Important: Do not forget to lock every seam. This means that at the beginning of the seam you sew back 3 to 4 stitches after a few stitches and continue working as usual. Locking is also required at the end of each seam. This will prevent your seams from loosening.
4. Now the other long side is sewn together as well. Slide the long side of the narrower fabric to the long side of the base fabric. The fabrics are still right to the right. Put everything well here too. Sew the page together.

5. Apply the work.
6. Iron the whole thing. Make sure that the sample fabric is centered and that the gaps on the sides are the same.

7. Fold the table runner lengthwise so that the pattern fabric is facing outward. The seams should be on top of each other. Stick this tight. Repeat on the other side as well.
8. Now sew the just stuck sides together with a simple straight seam. Please do not forget to lock here too.
9. Apply the corners to create a point. You can use a pencil or a crochet hook to work out the tip.

10. Quilt the upper edge of the tip with a short edge. We worked this seam with a straight stitch. Of course you can also choose a decorative stitch here. Even yarn in a contrasting color can look very decorative here.

Two cut pieces and six seams later you are now finished and can use your personal table band. The design options here are virtually limitless. For example, you can work with applications, buttons or bows. Such a table runner is certainly a nice gift for your loved ones, the homemade is in and always goes down well.
We wish you a lot of fun and enjoy the rework of our manual.

Instructions for quick readers
- Cut fabrics: 1 x 117 x 33 cm & 1 x 117 x 19 cm
- Place fabrics right to right and fix a long side with a straight seam
- also sew along the other long side of both fabrics
- turn
- iron
- Fold the work lengthwise and sew the short sides together
- invert short sides so that a point is formed
- Top off the lace with a narrow edging