Clay terracotta: this is how you repair old terracotta pots

- Glue terracotta
- Materials and tools
- Stick terracotta | manual
- Alternative | plant
Terracotta pots are a popular variant and alternative to ceramic, stone or plastic pots. They allow a decades-long husbandry of plants, as they can be used with proper care and attention more and more. Since terracotta is a sensitive material at the same time, it can break when the pots fall over. Here's how to glue and reuse terracotta pots.
Plants are often kept in terracotta pots. The natural look and the good properties for keeping different plants make terracotta pots so popular. With proper care, they will allow you to maintain a long stance for decades and bring much joy in the garden, on the balcony or inside premises. Due to the manufacturing process of terracotta, the material is quite prone to cracking or cracking because it is not glazed.
Glue terracotta
For example, accidental dragging over the ground or impact can cause break points or cracks . Especially older terracotta pots suffer from it. Fortunately, it is easy to glue terracotta on your own.
Materials and tools
First of all, if you have patience and the right material, every pot of terracotta can be stuck. Since terracotta is fired clay, it can be put together again very easily, as long as the breakages are not too much removed or changed in shape.

Even heavy pots can be repaired in this way because the adhesive used adheres strongly enough and holds the sections together after application. The following list gives you an overview of the materials and utensils needed to repair the terracotta pots.
- Brush (fine)
- Adhesive (two-component), eight to ten euros for about 30 grams
- duct tape
- knife
- waterproof clearcoat, four to five euros per 100 milliliters
- Protective gloves

Two component adhesive
The two-component adhesive is recommended for the pots due to the strong adhesive effect . However, since these are irritating to the skin, you should never forget the gloves, so you do not hurt yourself. If you are particularly sensitive to vapors, it is also advisable to use protective goggles . Why you have to use the two-component adhesive despite these negative properties "> 
Even frost keeps this glue, which makes it perfect to stick to the terracotta. Alternatively, you could use tile adhesive, but this is much harder to apply. At the same time, the two-component adhesive fills in gaps that can no longer be glued. That makes it even more effective for your project. When choosing the brush, you should bet on a fine model, so that you do not damage the terracotta. The breakage of the pot can be sensitive and be removed, which can have a negative effect on the adhesive performance.

Tip: Superglue is also recommended if you need to repair small terracotta pots. Since the break points of smaller pots are also significantly smaller, superglue is often sufficient if you apply this thoroughly.
Stick terracotta | manual
Sticking terra cotta is not difficult, but depending on the size of the pot and severity of the break it can be quite time consuming . Since you need to treat all breakages with glue, larger pots sometimes can devour a lot of time, which you should definitely keep in mind. If several pots have been damaged, a helping hand can significantly reduce the time required. However, you should only conditionally involve children in the process.
Terracotta can be sharp at the break points and the glue should generally not get into the hands of children. Here it can come very quickly to poisoning. Once you have all the necessary utensils and materials together, follow this guide to glue your terracotta pots.

1. Begin by removing the plants or plant pots from the terracotta pots. While you are repairing the terracotta pots, do not put any weight on the material, otherwise the glue will not dry properly. If you have terracotta pots whose top layer is chipped off, you do not need to remove the plants because they can easily stick to them.
2. Begin by using the brush to edit each break. If the brush is badly dried, moisten it and dry it again to make the bristles softer. Carefully drive it over the cracks to remove excess dust that has accumulated after rupture. Also use the brush on all cracks as dust can accumulate there as well. Do this very thoroughly, because the dust can greatly reduce the effect of the adhesive.

3. Start with the cracks. These are easier to repair like whole fragments, because you do not have to assemble something or fix it. Put on the gloves and start filling the glue in the cracks .
Do not use too much glue as it will be hard to remove after drying. The filling requires a bit of tact, but is done pretty quickly. If the crack has already progressed so far that a fragment threatens, fix it as a precaution with sufficient adhesive tape.
4. Fragments should not be stuck immediately, but checked for the appropriate break points . Especially with a large pile of shards, it is important that you first put all shards together and get a picture of the damage. In this way, you do not accidentally glue the broken pieces together.
5. Once you have large or few fragments, it is sufficient to first apply the glue. Apply adhesive to the breakage point, press on the shard and fix it additionally with adhesive tape . The tape holds the shard when drying in place. So this does not slip and you do not even have to hold the fragment until it is dried. Continue this way with the other shards.

6. If the shards or fragments are small or large in number, use a different method. Lay the individual pieces on a flat surface and put them together correctly. Here you have to proceed exactly. Now stretch the tape over all the broken pieces. The stretched tape keeps the pieces in the right place, without you having to use glue until now.

Now turn the sections over and bend the tape slightly. The break points should now be exposed and can be provided with the adhesive . If the glue has been applied to all breakages, bend the tape back and let the glue dry. Fix this again with tape.
7. If you had to use step 6, remove the tape after drying . You now have a larger shard of numerous small shards that you can connect to the pot as described in step 5. Be careful not to accidentally break the assembled shard.
8. If all breakages have dried completely, the pot is ready and theoretically can be used again. Now it goes to the post, because excess adhesive is still visible after drying. Remove excess adhesive with the knife, which should be sharp.
Since the glue is very strong, this step can be done without much trouble. Be careful not to damage the terracotta with the knife, just the glue. Above all, never pierce the pot or glue, as the risk of breakage is significantly higher in this way.
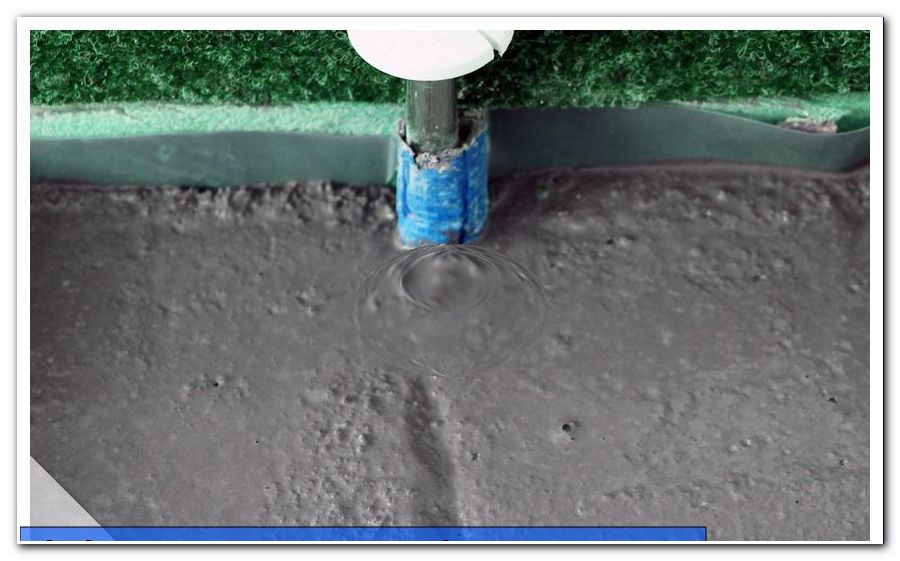
9. Finally, to make the pot weatherproof and resistant to moisture, apply the clear coat . Here is enough for a little bit. If you have pots of glazed terracotta, you'll need to help out with a little glaze that's the same color as the pot. Let it dry and you are ready to stick with the terracotta.
Tip: If you do not like the cracks on the pots visible after gluing, you can decorate them to beautify them. For this purpose, tesserae, stones, acrylic paint, paint or other decorative elements, which you can fix with the help of an adhesive.
Alternative | plant
In rare cases, your terracotta pots may be irreparable . Reasons for this can be, for example, very large pieces that fall out of the pot and then on the ground and break into numerous, small pieces. If this is the case, you would first have to glue the small pieces back together and glue the finished piece to the pot or glue the individual pieces one after the other to the terracotta pots. This is a lot of work and, unfortunately, does not guarantee much safety, as the structure of the pot has suffered greatly from the breakage.
In this case, another variant is available: planting. If you have a rock garden, Mediterranean concepts or a natural green oasis, you can plant broken terracotta pots with the following plants.
- cacti
- succulents

These work great in the pots, even if a large piece of them is broken. The color of the pots harmonizes with these plants and so you can in addition to numerous species of cactus on plants such as rosette-thick leaves (bot. Aeonium), Echeveria (bot. Echeveria), the true aloe (bot. Aloe Vera) and Fetthennen (bot Sedum) who wake up decoratively from the pot.

The design possibilities are limitless and in combination with ornamental gravel they fit even better into the natural ambience. As a precaution, you should only treat the breakages with a bit of sandpaper so that you do not cut your sharp edges when caring for the plants.
Tip: You can also plant the broken pots with herbs or ground cover and arrange them as in a "fairy garden". In this way, even the smallest pots can continue to be used without problems.