Tannenbaum made of paper - instructions and ideas

- Fast 3D fir tree
- Origami fir-tree
- Standing fir-tree for plugging
- Bonus: Crochet fir tree
"Oh Christmas tree, oh Christmas tree, how green are your leaves ..." Especially at Christmas time the singing of traditional Christmas carols is a nice thing. The same applies however also to handicrafts. In this article, we introduce you to five variants to create a beautiful Christmas tree made of paper. The spectrum ranges from simple trees to spectacular 3D variants.
The Christmas tree is an integral part of Christmas. As a rule, however, he reveals his splendor only on Christmas Eve itself, at the earliest on the 23rd of December. As a preparation for the big festival with the real tree, it is recommended to produce different Christmas trees from paper. With kids this is a lot of fun. The finished trees can be used as decorative elements.
Fast 3D fir tree
There is a simple way to make an attractive 3D Christmas tree as a table, window sill or shelf decoration. Thanks to our template you do not need half an hour to finish the tree.
You need to craft:
- Craft paper (classic in green and / or other colors)
- our template
- printer
- scissors
- tesa
- Ruler and pencil
- Decorative articles (such as crayons, stickers, glitter, bows et cetera)
- craft glue
- punch
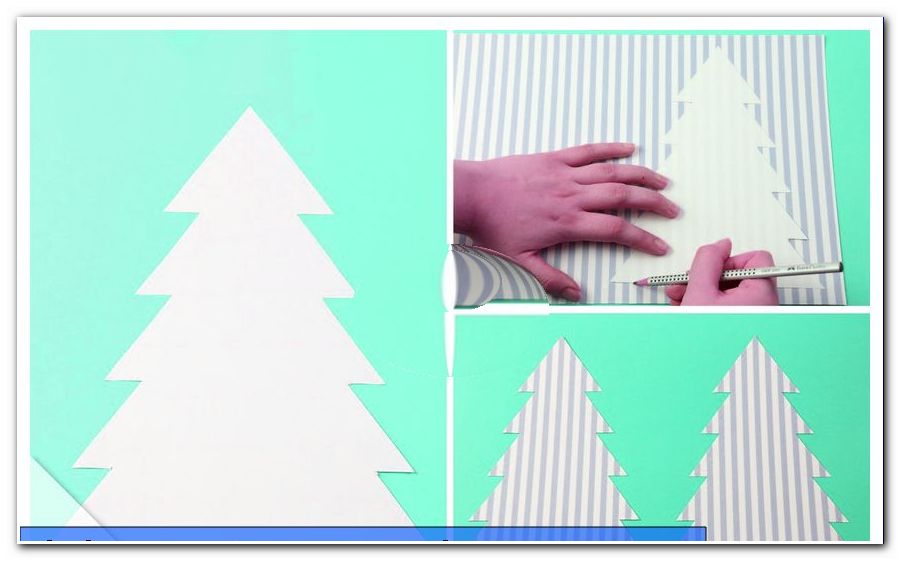
Step 1: Print our template:
Click here: Download the craft template
Step 2: Select a tree size. Cut the tree along the respective markings.
Step 3: Transfer the outlines to the craft carton - the whole thing twice. Cut out the trees again.
Step 5: Use the ruler and pencil to draw the vertical center line on both trees.
Step 6: Cut these lines from the top for one tree and the bottom for the other tree. Cut each one over the middle of the tree.
Step 7: Use the resulting slots to push the trees into each other.
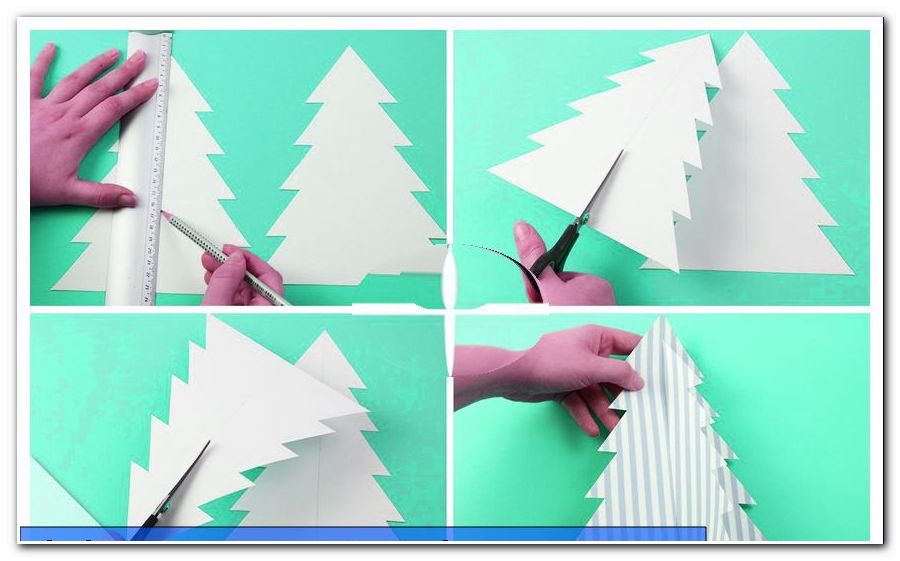
Step 8: Fix the two tree parts at the top and bottom with some Tesastreifen. So the Christmas tree remains stable and can be easily placed at the end.
Step 9: Decorate the tree with crayons of your choice, such as stickers, glitter or other "accessories". Your creativity knows no limits.
Tip: With a punch, colorful paper and craft glue, you can cut out confetti-like tree decorations and stick them on the tree. In addition, you have the opportunity to paint a larger star on separate paper, cut and stick as a tree top.
Step 10: Place the finished fir-tree in a nice place.

Origami fir-tree
Materials for crafting:
- 3 or 4 sheets of origami paper (depending on how big the tree should be)
- bonefolder
- scissors
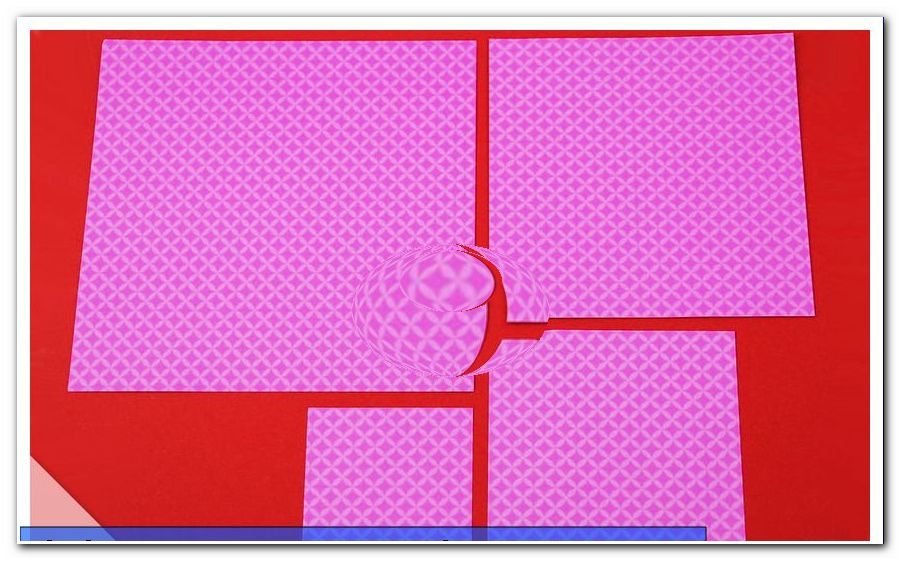
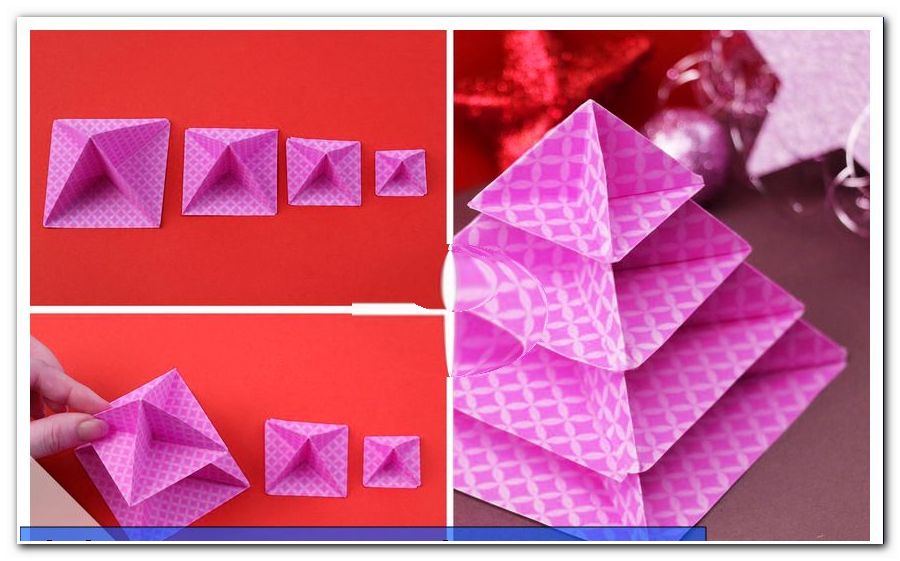
Step 1: At the beginning, the individual elements of the origami tree have to be cut to size. Cut the 4 sheets of origami paper so that they all have a different long edge length, such as: a 15 cm square, 12 cm one, the third 9 cm, and the last 6 cm square .
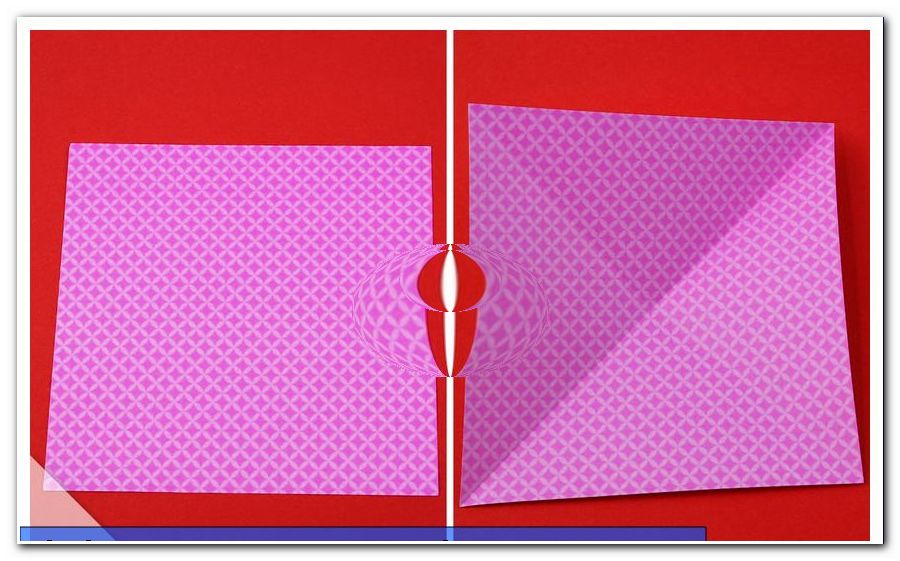
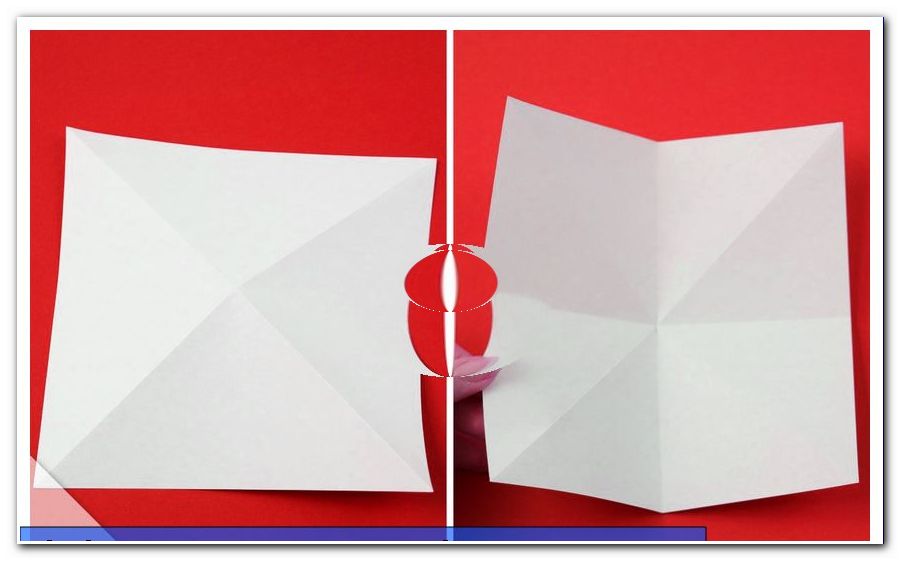
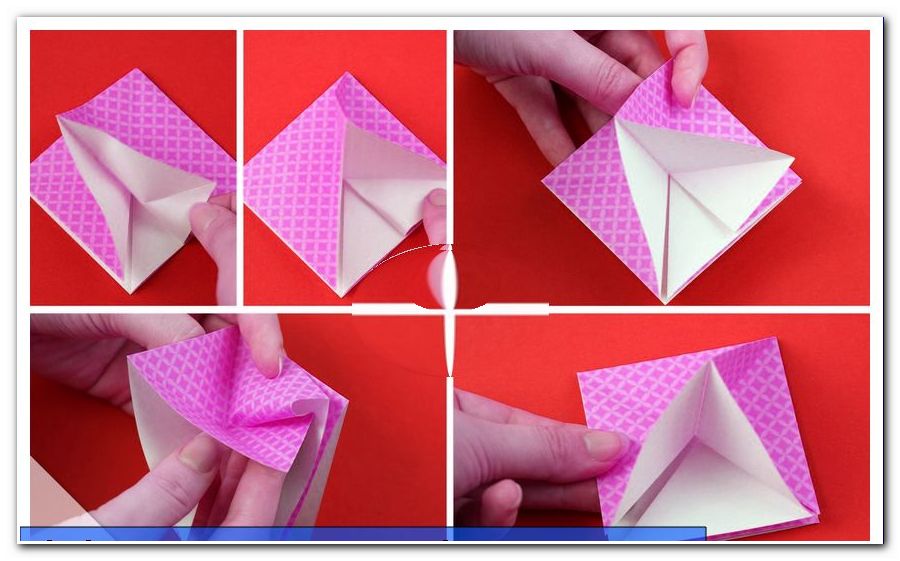
Step 2: Now start folding. Start with the biggest hand. So you can practice wrinkles first. The other elements are getting smaller and therefore more difficult. The paper lies with the beautiful outside up in front of you. First, fold the two diagonals of the square. Open the paper again.
Step 3: Apply the paper to the back. Then fold the two of the paper on the vertical and horizontal center line. Open this again.
Step 4: Apply the paper to the back and fold as shown in the pictures. The open side then points down.
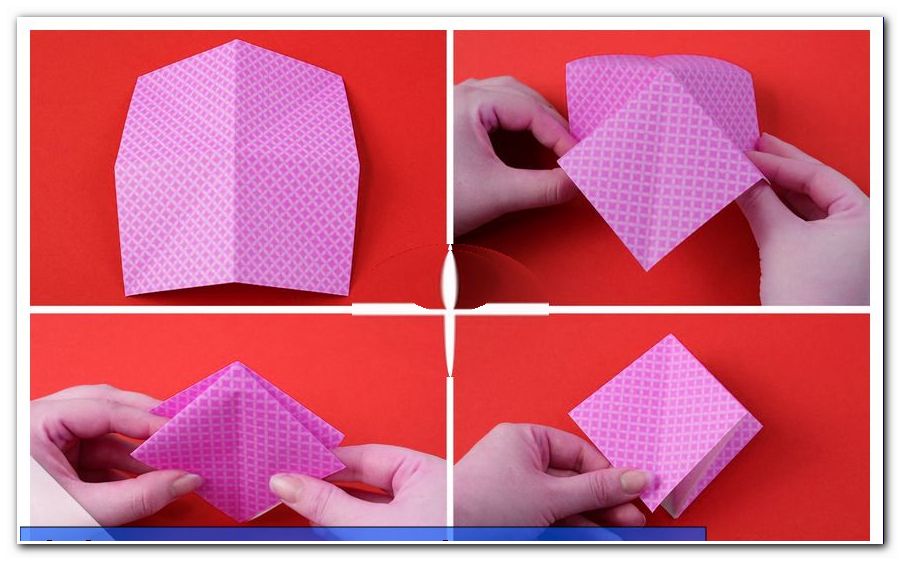
Step 5: Then fold up the top layer of the down-facing tip. Now turn the right-pointing tip to the left.
Step 6: Repeat step 5 on all other three pages. Open all folds so that the paper is in front of you again as in step 4.
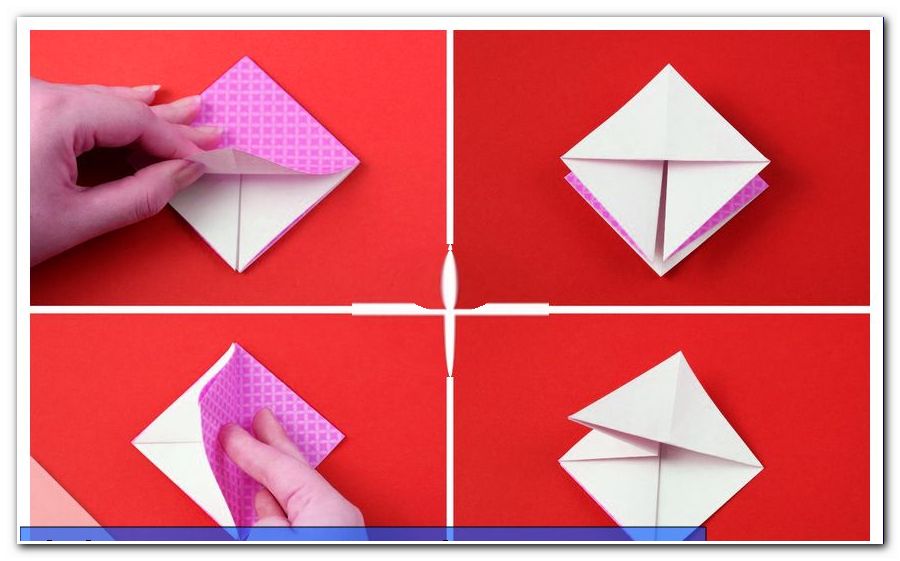
Step 7: Take the top layer of the down-facing tip and flip it to the right on the point that points to the right. This should be the left side up. Slide the newly created folding triangle inwards under the right tip.
Step 8: Repeat step 7 on all other three pages.
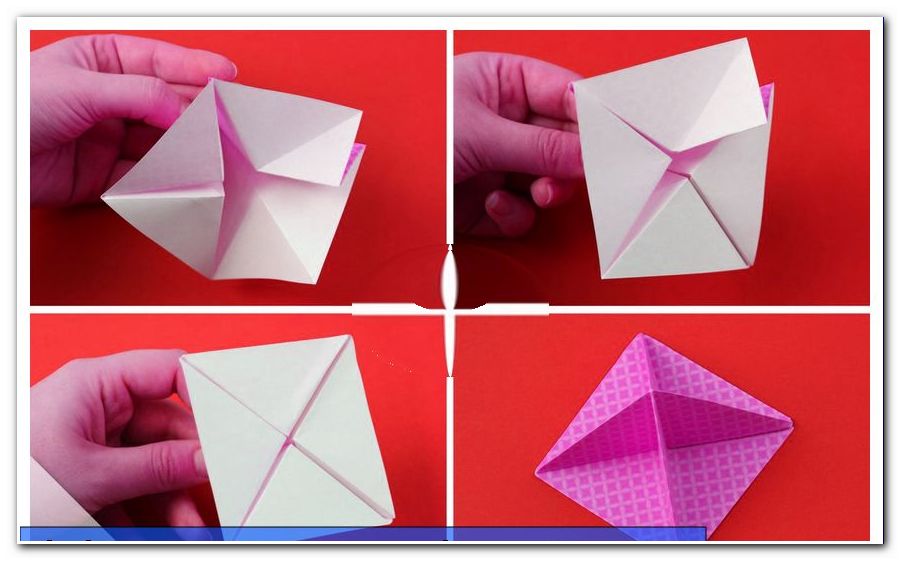
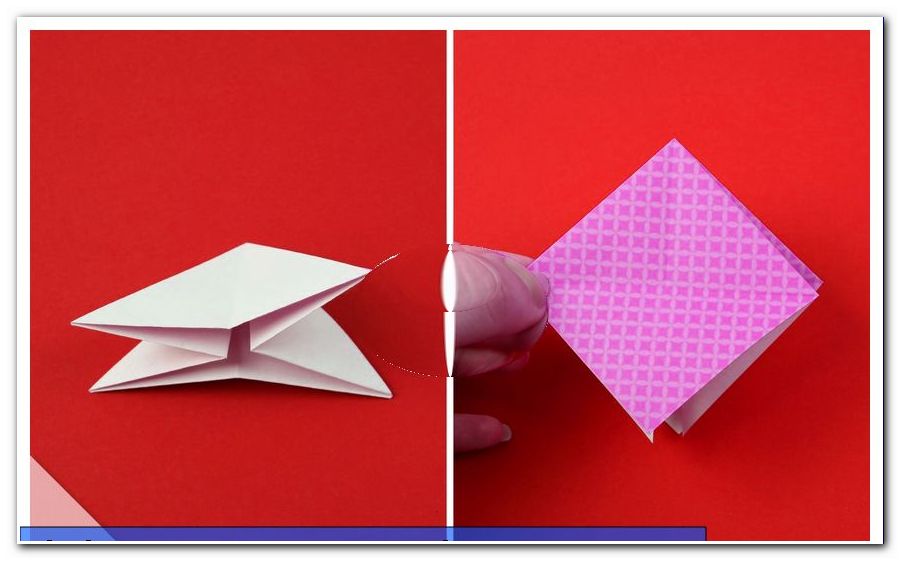
Note: Now the paper has to be taken for folding.
Done is the first element of the Christmas tree. Now fold the next three sheets of paper in the same way. Subsequently, the elements are plugged into each other. Done is the origami fir tree!
Did you like origami "> Origami manuals
Standing fir-tree for plugging
Finally, we provide you with a very simple guide to folding and sticking a fir-tree. The version can also be tinkered well with children.
You need this for crafting:
- green and brown paper
- scissors
Step 1: Trim three rectangular pieces of paper in green color. The three elements should be different in size but not too different. Our recommendation: Always make the next smaller rectangle smaller by two centimeters in length and width.

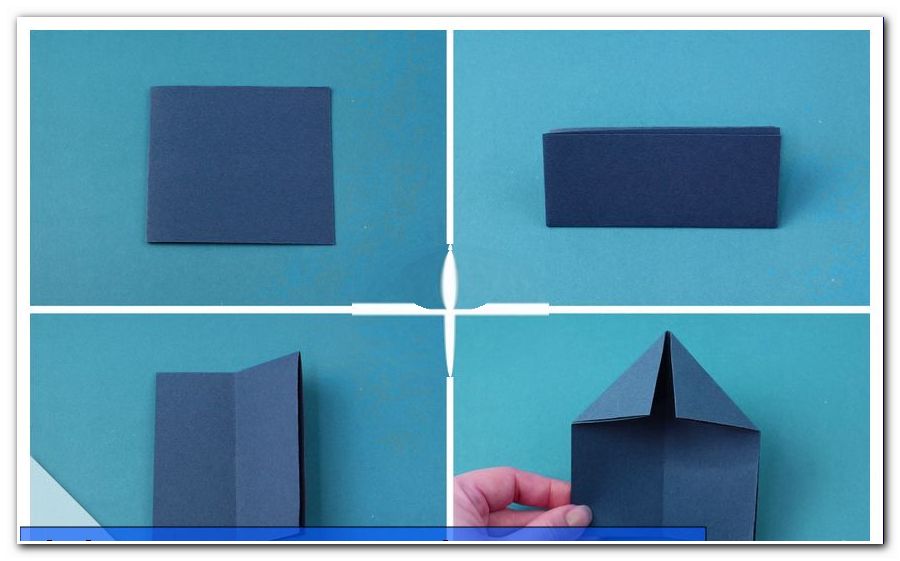
Step 2: Pick up the first rectangle and lay it in portrait orientation.
Step 3: Fold the top to the bottom edge.
Step 4: Turn the paper 90 degrees clockwise (when folded!).
Step 5: Fold the lower edge to the upper edge.
Step 6: Resolve the last step.
Step 7: Place the paper with the closed edge facing up and the open facing down.
Step 8: Flip the upper right corner to the middle.
Step 9: Fold the upper left corner to the middle.
Step 10: Fold the top paper layer of the lower edge up on the front.
Step 11: Fold up the bottom paper layer on the bottom edge on the back. You now have a kind of paper hat.
Step 12: Fold the two front corners of the paper sheets that you have folded straight up along the triangle edge.
Step 13: Fold the two back corners of the paper layers over the triangle edge to fix the whole.
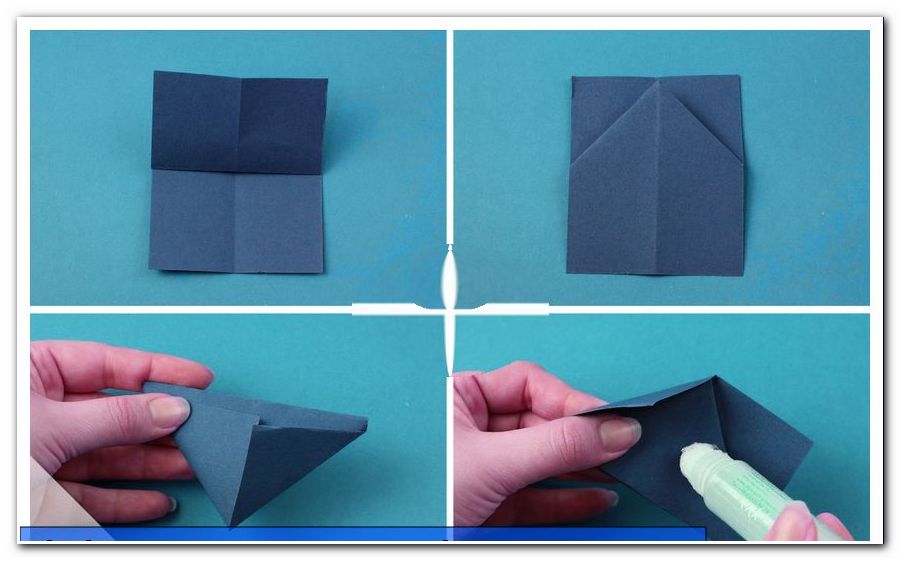
Note: If the envelopes have become too long, you can attach them as we do with a small dab of glue.
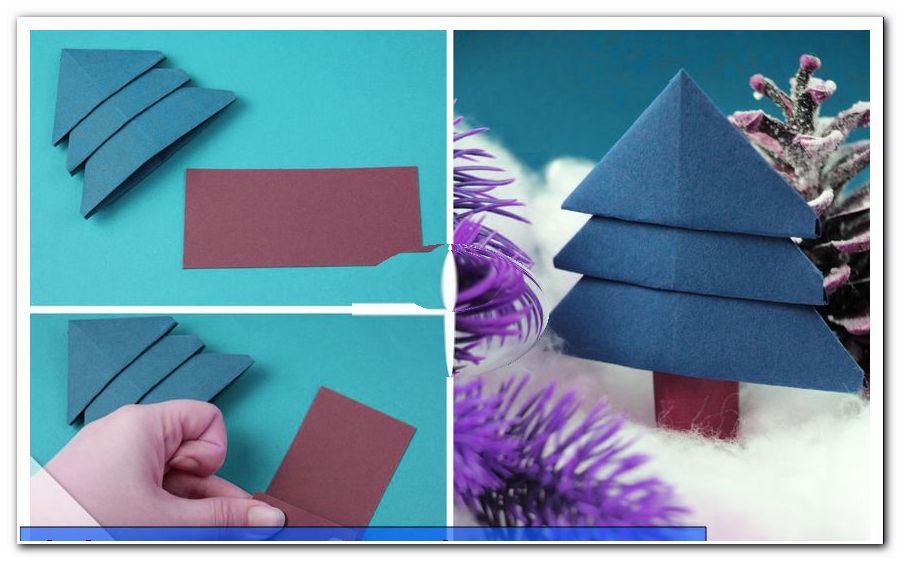
Step 14: Repeat steps 2 to 13 with the remaining rectangles.
Step 15: Insert the three "hats" in size (the largest element all the way down, the smallest one all the way up).
Step 16: Cut out of brown paper a rectangle that matches the size of the fir branches.
Step 17: Roll up the brown rectangle and put it in the bottom "hat". Finished is the fir tree made of paper, which can even stand if you adjust the trunk a bit if necessary.
Bonus: Crochet fir tree
For the crochet among you we have this creative idea ready - why not just crochet a Christmas tree "> Crochet Christmas tree

Christmas is the time of crafting - that's for sure. Here we show you a variety of other, creative ideas for crafting at Christmas: Christmas crafting ideas