Knitting warmer by yourself - instructions + dimensions / size

- Material and preparation
- Knit warmer
- pattern
- hole pattern
- Measure before knitting
- Completion of the knitting work
The Soul Warmer is probably one of the simplest knitting works. If you have attributed it to the grandfather or the conservative aunt years ago, today it is part of the fashionable outfit of course. The special feature of the Soul Warmer is that it can be knitted by anyone, including beginners, without much prior knowledge. In this guide, we reveal how to knit a Soul Warmer yourself.
A Soul Warmer is the easiest way to protect your shoulders and back from the cold. The season does not matter. The Soul Warmer is justified in winter and summer. His task is simply to donate warmth. Wool, knitting needles and a little patience suffice to knit a warmer. Our featured shoulderwarmer is designed for spring or cool summer evenings. The instructions are so simple that even beginners can dare to use this light hole pattern.
Vary slightly with size
Our size is for the dress sizes 40 - 44 wearable. Other sizes are very easy to vary. Because such a warmer is just a rectangular knitted part. Depending on your measurements, you simply hit more or less stitches. And who wants to wear the Soul Warmer as a long-necked, just knits him higher than our instructions indicate. You see, a rectangle is enough to warm your back.
For the Armausschnitt only a few centimeters are stitched together on the right and the left side of the rectangle. Finished. And who wants to work a jacket out of the rectangle, that too can work. For this purpose, only cuffs are knitted on the sleeve cutouts and the rest is crocheted. The Soulwarmers do not need to knit separate sleeves. He warms in one part.
Material and preparation
With which yarn or wool you knit the Soul Warmer, the season in which you will wear it will decide.
For the cooler time of spring or summer, we recommend a stronger cotton blended yarn.
For the cold season you are always right with a merino wool. But for allergy sufferers, there are wonderfully fluffy and soft flowing yarns made of high-quality synthetic fiber. Look for something about baby wool. You will be surprised what wonderful yarns for allergy sufferers can be found on the shelves for baby wool.
We chose a yarn similar to the yarn Rico Design Fashion Flow by Wolle Roedel. It is a very pleasant cotton blend with a soft and flowing texture. The yarn has a running length of 250 meters / 100 grams. The manufacturer recommends the needle size 4-5 mm. However, we knitted with a needle size of 6 mm. Our Soul Warmer is very casual.
According to our instructions you need for size 40-44:
- 350 grams of cotton blended yarn 250 meters run length / 100 grams
- 1 Circular needle Needle size 6 mm (The rope of the circular needle should be at least 80 centimeters long.)
- 1 tape measure
- Needle for sewing
If you want to knit short legwarmers, you still need:
- 1 needle play 6 mm
- Maybe a crochet hook for hemming

Knit warmer
pattern
The Soul Warmer is knitted in rows. The pattern consists of six rows. Of these, two rows of lace patterns, the remaining four rows are knitted in smooth right. That means: right row on the left, back row on the left.
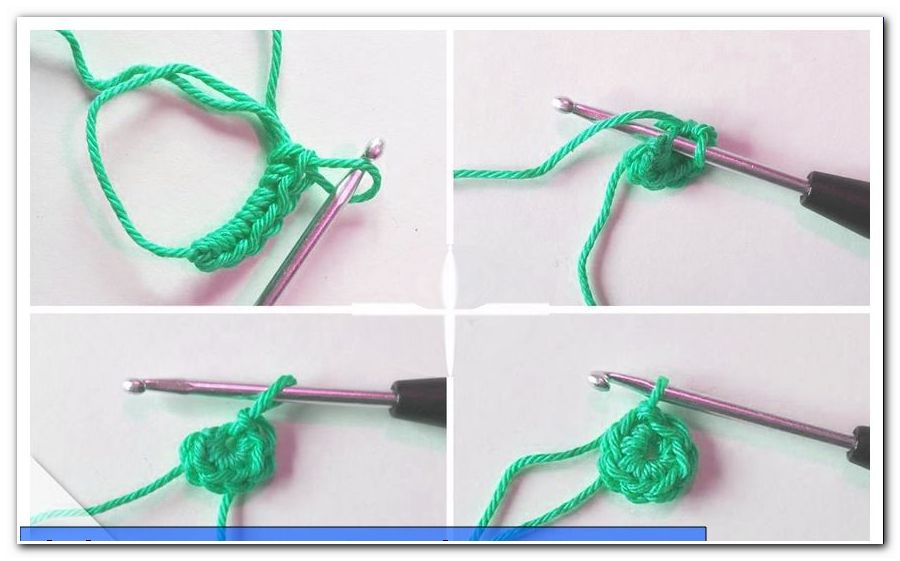
hole pattern
Also the hole pattern is knitted only with right and left stitches. The hole consists of only one envelope, which is placed on the needle in front of two knitted stitches. In the next row this envelope is dropped. To replace the missing stitch again, two stitches are knitted from a stitch.
We still knit a completely independent stitch in front of the edge stitches. In the rows, this stitch is knit on the right, in the back rows on the left. This stitch should only serve as a small stabilization of the edge stitches. It is therefore not part of the pattern directly. The stitch stop for the hole pattern set must always be divisible by 2.
1st row
- edge stitch
- Knit all stitches to the right.
- edge stitch
- Turn to work.
2nd row
- edge stitch
- 1 stitch left
- 1 envelope
- Knit 2 stitches together to the right
- 1 envelope
- Knit 2 stitches together to the right
- Finish the row in this episode, it ends with 1 envelope.
- Knit the last stitch on the normal left side
- edge stitch

3rd row
- edge stitch
- Knit 1 stitch on the right.
- Slip the envelope off the needle.
- Knit the next stitch on the right but keep it on the needle.
- Knit same stitch as left stitch.
- That is, you knit the same stitch twice, once as the right stitch and once as the left stitch.
- Then drop the envelope again.
- Knit the next stitch on the right and once on the left.
- In this order, knit the entire needle.
- Knit the last stitch on the right.
- edge stitch
- Turn to work

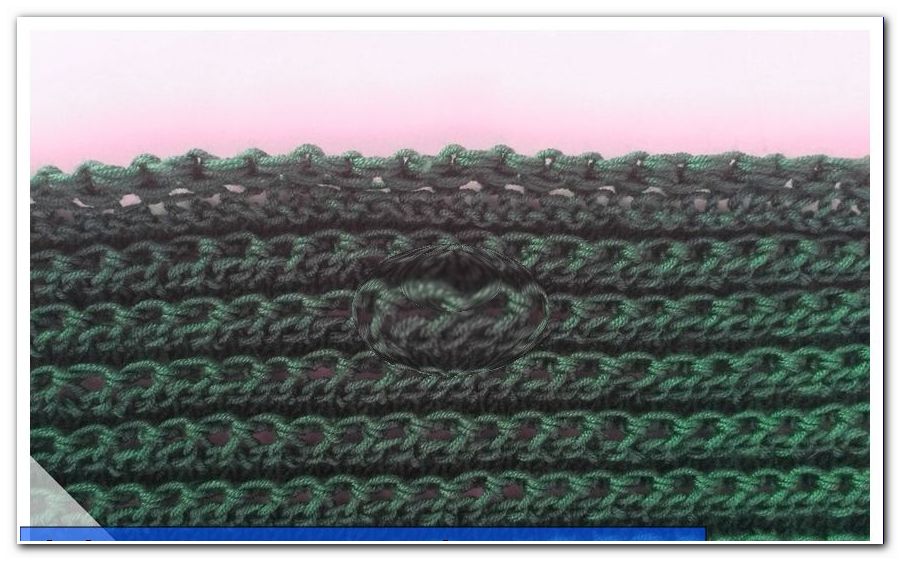
On the picture below it is easy to see that this stitch was knit once as a right-hand stitch and once as a left-hand stitch.

4th row
- edge stitch
- Knit all stitches on the left.
- edge stitch
5th row
- edge stitch
- Knit all stitches to the right.
- edge stitch
6th row
- edge stitch
- Knit all stitches on the left.
- edge stitch
- End of the pattern set.
7th row = 1st row of the sample set
- edge stitch
- Knit all stitches to the right.
- edge stitch
- With this 7th row you started the first row again.
8th row = 2nd row of the pattern set
- edge stitch
- 1 stitch left
- 1 envelope
- Knit 2 stitches together on the right.
- 1 envelope
- Knit 2 stitches together on the right.
- Finish the row in this episode, it ends with 1 envelope.
- Knit the last stitch on the normal left side.
- edge stitch
Knitt all the rows in this 6-row hole pattern set.

Tip: If two stitches on the left side of a knitting work are knitted together on the right side, this is a bit difficult.
This is how it works:
Insert the right-hand stylus from the right into these two stitches and pull these stitches slightly forward.
Now you have loosened the two stitches. You can easily knit these two stitches together as usual.
Measure before knitting
Before you start knitting, you need to measure. A warmer is individually knitted for the person to be carried.
We worked the Soul Warmer across. It was also important to us that the back warmer not only cover the shoulders and upper arms. We wanted a back warmer, which reaches to the middle of the middle. Our measure ranges from Elle to Elle. Take the measure of how wide your soul warmer should be. Then knit a stitch with your wool or yarn. This stitch sample must be knit with the lace pattern as you will also knit the Soul Warmer.
Then count the stitches of your stitch sample and measure them accurately with the tape measure. Now you can work out how many stitches you need to apply to your warmblouse yarn and needles.
Tip: Each yarn banderole shows how many stitches are needed for a stitch test. However, if you work with a larger needle, you can not rely on these numbers of the given mesh test. Therefore, a self-made pattern is essential.
The length of the back warmer, that is, how far he should fall over your back, you can determine during knitting. For this you simply have to measure the knitting work in height from time to time.
Tip: Our proposed hole pattern falls very loose down. Therefore, it is important to measure the height more often. Otherwise it can quickly get too long.
attack
Our Soul Warmer is 110 inches wide. For this we have struck 180 stitches + 2 edge stitches.
The stopper was knitted with double thread. We wanted a stable mesh stop. With such a stitch, you no longer need to crochet the Soul Warmer. There is enough stability to stay that way.
In turn, the mesh stop
In the first row after the stop knit all stitches left. Turn to work.
From the 2nd row begins the hole pattern set. From this row, knit the pattern set from row 1 to row 6. Repeat this sequence until you reach the size you want. The last row is bound with double thread. It hardly differs then from the stop series. We knitted our soul warmer 70 centimeters high.

Completion of the knitting work
Before you start sewing, sew all work threads. You have now knitted a very large rectangle. Put this on the table and put it in the middle. You now have the short openings right and left.
These sew together from the lower edge upwards. You determine the width of your sleeve edge yourself. Simply pull the back warmer under the sewing again and again, so that you can determine the right sleeve width for you. We sewed together only 14 centimeters. Thus, our sleeve neck loosely over the forearm.

You can still work on this sleeve neck in a variety of ways.
You can crochet it with Knittmaschen or fixed stitches.
Maybe knit in with a cuff.
If you want to knit a cuff, use a pair of needles to pick up the appropriate stitches and knit a short cuff, alternating between right and left stitches.
The Soul Warmer is now finished. But you can still change it.
Maybe with a border of several rows of solid mesh or half sticks. This will make your back warmer a little bigger. He even gets a small collar. The front part can then be closed with a large decorative needle like a jacket.

Experiment a bit on how your Soulwarmer looks best.