Make the bias binding yourself and sew it on properly - DIY instructions

- material selection
- amount of material
- patterns
- Denomination and ironing
- Sew on bias binding
- variations
Set accents and give your self-sewn pieces clean edges and edges - with a bias binding, dirty edges can be concealed and beautified at the same time. In this guide, we will show you how to sew and process a bias binding.
Difficulty 1.5 / 5
(suitable for beginners)
Material costs 1/5
(depending on the fabric selection between € 0, - from the remaining utilization and € 10, -)
Time expenditure 1/5
(including attachment depending on the exercise)
Why do you need a bias tape at all ">
Why is it called bias tape?
When fabricating the bias binding, the fabric is cut obliquely (ie at a 45 ° angle), so that even with largely non-stretchy fabric types such as woven fabric, the highest possible "extensibility" is created, which is given in the diagonal. This also curves and other curves can be bordered beautiful and wrinkle-free. In addition, the fabric cut parts are longer due to the oblique cutting and less piecing is required.
In principle, bias bands are made of non-stretchy cotton fabrics. If the phrase "elastic biasing tape" is recommended in the pattern, however, it is mostly bias tape made of jersey fabric or other stretchy materials meant.
material selection

In this tutorial, I work with cotton (woven fabric) as the base material and explain the procedure step by step. Elastic bias tapes are made in the same way, except that for example jersey fabric is used. This is somewhat more difficult to process due to its elasticity. It is also not easy to attach creases and some jersey fabrics roll after cutting.
The oblique cut mitigates this problem, but it is not completely eliminated. For beginners therefore cotton is recommended.
amount of material
The bandwidth must always be four times the desired visible width on the garment or workpiece. If you want to achieve a border with a width of 1 cm, you have to calculate 4 cm in width per strip. Bias bands with a final width of one cm are rather uncommon and due to the more difficult processing also not suitable for beginners. However, if you want to include a large ceiling, for example, the band can be much wider. The factor four is retained.
The tape length should be slightly more than the desired length or slightly more than the circumference. In addition, the seam allowances of the respective denominations in the band must be included. Therefore, ideally, once you've stitched together the individual webs, measure your tape once again to see if it's long enough before you start processing.
patterns
There are no patterns in this sense. The fabric of your choice is cut at a 45 ° angle to the fabric edge in the desired width (factor 4!). If you do not have a triangular triangle at hand, fold the fabric so that the side edge is at the edge of the fabric and iron over the resulting fold - you already have a guideline at a 45 ° angle.

From there, use your ruler to draw your bias ribbons at the appropriate intervals and cut them with the rotary cutter.
Tip: If you do not have a cutter ruler at hand, you can also use a folding rule or another straight and hard object to record the corresponding lines. Instead of the rotary cutter, of course, a scissors can be used. I write cloth scissors, because you should not use your scissors, with which you cut your fabrics, for other materials, since it dulls in this way.
An end of the substance is not necessary in this case due to the further processing.
Denomination and ironing
To join the individual panels into a long band, lay them one over the other at a 90 ° angle and sew from one intersection to the other. As an aid to the angle, place your triangle under the two panels.

Tip: Instead of the triangle, any object can be used that has a right angle, such as a book or a book.
Now the seam allowance is ironed out and then the protruding fabric corners are simply cut off.

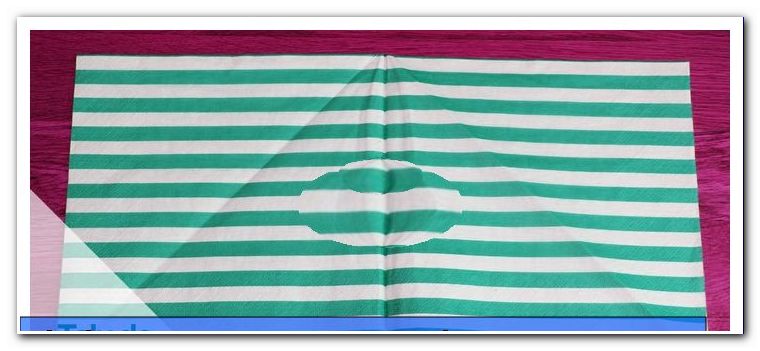
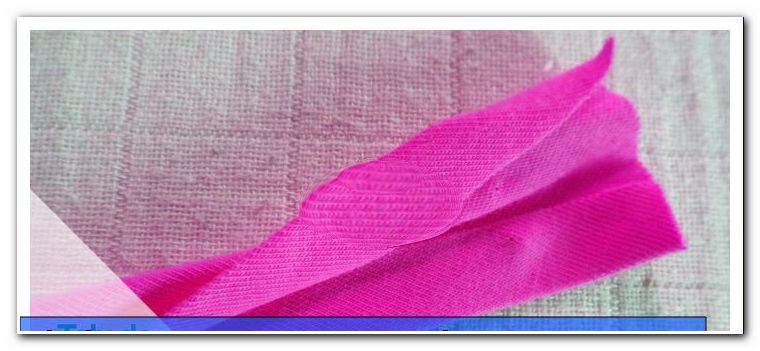
This tape is then folded and ironed longitudinally, creating a slight crease. Then open the fabric again and fold first one, then the other side towards the middle so that the edges rest on the crease. Now the tape is again folded in the middle and ironed well. The fabric is now four layers.

Either wrap the finished bias tape over a bobbin or continue to process it right away.
Tip: If you create bias ribbons for later use and do not have a spool at hand, you can also wrap an empty kitchen roll or piece of cardboard and secure the end with a pin.

Sew on bias binding
Now you can start somewhere on the edge, but preferably not in a corner, but ideally on a straight edge. You fold one side twice and place edge to edge on the right side of the bottom fabric.

Depending on how thick your garment or work piece is, now sew a little to the right of the first crease with a simple straight stitch - the distance should be at least 1mm. But you will start to sew after 2-3cm of your bias tape beginning.
If you also want to enclose a corner, sew so until your sewing machine foot is at a height with the transverse edge at the front (the needle is 1-1.5 cm in front of the edge) and sew.

Tip: The thicker your garment or work piece is, the farther to the right should be sewn from the crease.
Now remove your workpiece from the machine and turn it 90 degrees so that it is in front of you with the corner on the top right. Then fold the hem band up 90 degrees and fold it back down at the top edge.

For thicker workpieces, now hold the fabric of the bias binding at the top right and carefully pull out the excess fabric to the left. If you are still unsure, fix the corner with a pin.

Begin sewing the next side length so that the presser foot rests flat in front of the "fabric bead" (about 1.5-2 cm from the edge) and continue sewing. Do the same with all the following corners.
When you come back to the beginning of your hem band, beat it down 1-2cm, put the open end over it, and continue sewing until the seams overlap.

Now fold the hem band once, turn your workpiece, hit it and sew again at the same distance on the other side. Make sure the middle crease stays straight. The corners are now also sewn easily:

A few inches before you come to a corner, stop the machine (presser foot and needle are lowered). Now take out your pins and pull the edge down. Then push your finger into the corner and then straighten the fabric and push it into the bag that has just been created so that the "fold" is at a 45-degree angle.

Then sew up to just before this fold (needle in fabric, presser foot up), lift up the corner and check the bottom (if necessary still read), turn your workpiece by 45 degrees and sew out to the corner. Turn it over just before the end (needle in fabric, presser foot high, 180 degrees) and sew back to the starting point. Then turn your workpiece until the outer edge is to the right and continue sewing the next length.

Finally, sew over the starting point of the hem band and sew.

And done!
variations
In principle, it works the same way for round clothing parts and workpieces. However, you must stretch your bias binding so that it lies in the curves and curves wrinkle-free. The end can be a bit fizzy here, but you will save yourself from sewing corners.

Quick Guide - Bias binding:
1. Mark the fabric and cut the bias ribbons at a 45 ° angle (factor 4)
2. Cut strips at a 90 ° angle, iron on seam allowances and trim edges
3. Check final length again before processing
4. Fold the bias binding in the middle and iron
5. Open again, fold both edges to the middle crease and iron again
6. fold again (4-ply) and iron well
7. Wind up or continue to use - done!
Quick Start - sew on bias binding:
1. Sew on a straight edge (not in the corner) after 2-3cm
2. Sew at least 1mm to the right of the first crease with straight stitch
(the thicker the workpiece, the further to the right)
3. At corners:
Sew according to thickness at least 1cm before the edge
Turn workpiece (corner top right)
Lay the tape up, then fold down at the edge
Continue sewing at least 1cm away from the top edge
4. Sew to 2cm before beginning
5. Fold the beginning, put the end over it and sew on, sew
6. When bending, apply bias binding just as well, stretch with feeling - done.
The twisted pirate