Scarf knit for babies - free instructions for beginners

- Material and preparation
- Basic pattern for scarf cap
- Half Patent pattern
- Pattern smooth right
- Pattern right-left
- Knit hat for babies
- headboard
- The cap
- face cuffs
- Variant of a scarf cap
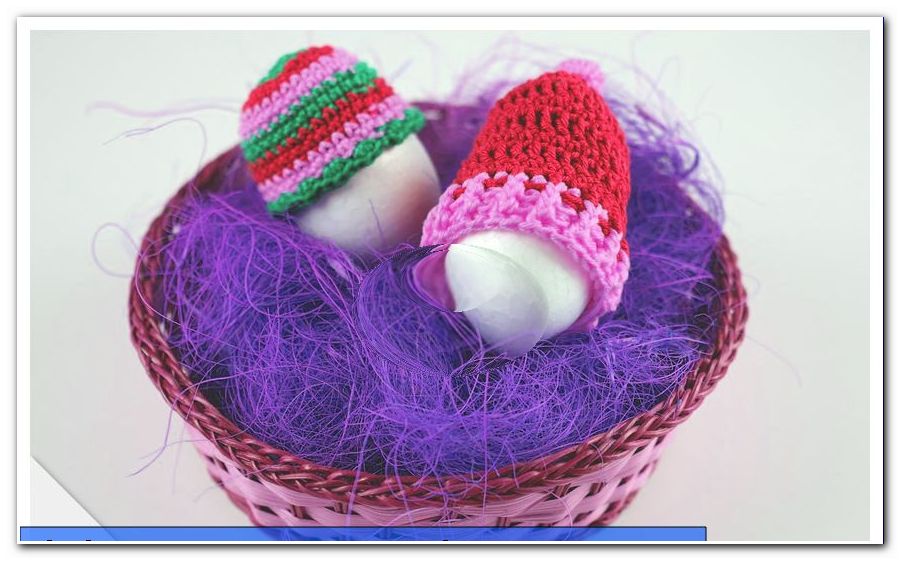
A scarf hat for babies keeps the little head warm and is also very practical. Due to the knitted neck, the little cap can not slip and always sits in the right place. Knitting a scarf hat is easy, so even beginners will be fine with our instructions.
A knitted hat or hat consists of a headboard to which a short neck is knitted. The hat is pulled over the head and keeps your head and neck warm. We also offer a special version of a scarf cap in our free guide for beginners. Not every baby likes to be pulled over the head. For her we present you a scarf cap for buttoning. Both parts are warm, practical and an absolute must for the cold season.
Our knitting instructions for this hat or scarf cap can be resized at any time. The principle of knitting is always the same. For a larger head only more stitches are struck at the neck and the headboard is knitted a little longer. But the style itself always remains the same.
Material and preparation
Also for a scarf cap: Do not save on the material. Use a yarn that is comfortable to wear on the skin. For babies, the wool should be especially soft.
Wool manufacturers create extra soft wool for babies. Partly from Merino sheep, partly also synthetic yarns. Both are acceptable for baby's skin.
We have knitted a hat for the hat that matches the Fine Colore of Wolle Rödel. It is a merino wool, extra fine and equipped with superwash. That is, the cap can be safely washed in the washing machine.
For babies' wools but also particularly soft and delicate yarns made of polyacrylic and polyamide, there is the ideal yarn for a scarf cap. For example the yarn Rico Baby Classic.
Both yarns are knitted with a needle size of 4 mm. Larger children's scarf hats can also be knitted very well with a sports or stocking yarn, 6-fold. Also this yarn has a perfect heat protection and is very hard-wearing.
According to our instructions you need:
- 50 grams of baby wool
- a needle game of thickness 3 mm
- a needles game of 4 mm or a very short circular needle, also in the thicknesses 3 and 4 mm
- tape measure
- darning needle
- scissors

It is always important to distinguish between rows and rounds when knitting. When knitting in rows, the row always consists of a back and a back row. That is, the knitting work has edge stitches, after which the work is turned.
When knitting in rounds, there is usually no beginning and no final stitch, so no edge stitch. It is knitted with a double needle or a circular needle and the stitches are closed in a circle.
Basic pattern for scarf cap
We knitted both variants in the same basic patterns. We knitted the neck in the half patent pattern. The head in the pattern smooth right. The face border in the pattern right-left.
Half Patent pattern
The neck band we knitted in the half patent pattern. Simply because it can stretch wonderfully and nowhere constrained. It is perfect for fitting garments.
The half-patent pattern in rounds consists of two rounds. The stitch stop must consist of a straight mesh.
Tip: You can set a stitch marker at the beginning of a turn. So you can quickly see when a new round begins.
attack
Make the necessary straight stitch.
1st round - basic round
- 1 stitch on the right
- 1 stitch left
Knit the entire round in this order.
2nd round
- Take off 1 right st with an envelope
- 1 stitch left
- Take off 1 right st with an envelope
- 1 stitch left
Continue the entire round in this order.
3rd round
- knit the stitch with the envelope on the right
- Knit off the left st in normal left
- Knit 1 st. With the envelope on the right
- Knit 1 st. Left
Continue the whole round like this.
The half-patent pattern consists of rounds 2 and 3. These two rounds are always repeated continuously.
Pattern smooth right
- Knit all stitches in the back row on the right
- knit all stitches in the back row on the left
Pattern right-left
- 1 stitch on the right
- 1 stitch left
- 1 stitch on the right
- 1 stitch left
Continuously knit the entire row or round alternating right and left stitches.
Knit hat for babies
The instructions correspond to the size of a baby of about 0-3 months. But not all babies have the same head size. Therefore, our manual is only an indication of size. In order to knit a larger hat, it is often sufficient to work with a thicker wool or to hit a few stitches more and to work the headboard a bit higher. The principle of knitting technology does not change.
Our wool is designed for needle size 4.
However, we knitted the collar with the needle size 3, so that the half-patent pattern achieves a certain stability.
1st row - stop
Cast on 70 stitches on a long knitting needle, needle size 3 mm.
2nd row
Knitting the basic row of the half-godfather pattern.
- 1 stitch on the right
- 1 stitch left
In this second row, the 70 stitches are split on a double needle, needle size 3 mm. We split the mesh like this:
- 1st and 4th needle each 17 stitches
- 2nd and 3rd needle each 18 stitches
The 1st and 4th needles (the beginning thread hangs between them) are the needles that reopen after the neck cuff for the face. In other words, stitches are later chained to these stitches.

3rd row
From this 3rd row, the neck begins. They now knit the halfpatent pattern in rounds. You can knit the neck as high as you would like. We knitted the neck 6 cm high.
Last lap from neckband
After this neckband in half patents pattern in rounds, change the knitting needles. Now knit the hat with the needle size 4 mm. To make this easy for you, when knitting the knitting needles, just knit a whole round with right stitches. This is the last lap of the neckline.
headboard
The headboard you knit now no longer in rounds. Through the decrease in the field of vision, the rounds are opened and you knit now in back and forth rows. The pattern is smooth right. That is, you knit right stitches in the back row and left stitches in the back row.
Headboard - 1st row
Needle 1
Bind off the first four stitches of the first needle. Knit the remaining stitches of this needle on the right. Then knit needle 2 and 3 as normal with right stitch.

Needle 4
Knit off the needle with the right stitches. The last stitch = edge stitch. The four stitches for the face are only chained off in the back row.
Headboard - 1st rear row
Bind off the first 4 stitches of this 4th needle. Knit the remaining stitches of this needle with left stitches. Knit all other pins in the back row as normal with left stitches.

2nd row
Knit all stitches in the back row on the right side.
- Needle 1: Bind off the first 2 stitches. Spread 2 x 2 stitches on the needle. There are 11 stitches left on the needle.
- Needle 2: Knit 3 x 2 stitches over the entire needle. There are 15 stitches left on the needle.
- Needle 3: Knit exactly like needle 2 = 15 stitches
- Needle 4: Knit 2 x 2 stitches together on the needle = 13 stitches
2nd back row
Knit all stitches in the back row on the left. The back row starts with the 4th needle. Bind off the first 2 stitches of this 4th needle. There are 11 stitches left on the needle.
3rd row
All stitches are knitted on the right.
- Needle 1: Bind off the first 2 stitches. Knit the remaining stitches to the right (= 9 stitches).
- Needle 2 and 3: Knit all stitches on the right = 15 stitches / needle
- Needle 4: Knit all stitches on the right = 11 stitches
3rd back row
Bind off the first two stitches of needle 4 (= 9 stitches).
Needle 3, 2 and 1: Knit all stitches to the right

From this back row you can split the stitches on three needles.
- Needle 1: 17 stitches
- Needle 2: 14 stitches
- Needle 3: 17 stitches
With this stitching you now knit the entire headboard 11.5 high. With the collar you have now reached 17.5 centimeters.

The headboard is now closed. To make the hat close at the top, knit a simple coping.
Tip: Do not be afraid to knit the coping. Do not necessarily read the description before. That can unsettle.
Read a number, knit a number, read, knit. If you do this every row, there are no problems with knitting. You will be amazed at your result.
The cap
There are now 17-14-17 stitches on the needles. A coping is always knitted on the middle needle (14 stitches). That means: The mesh size on the middle needle (14) always stays the same. It only changes the mesh size of the first and third needle.
1st row copings
30 stitches right (= 1st and 2nd needle)
Knitt the last stitch of the 2nd (middle) needle with the first stitch of the 3rd needle right folded. To do this, lift the last stitch of needle 2, knit the first stitch of the third needle on the right and pull the lifted stitch over the knitted stitch.
Turn to work
Simply lift off this knitted stitch. They always stay on the middle needle for knitting. There are still 14 meshes. Continue this second needle with left stitches. Knitt the last stitch of this second needle together with the first stitch of needle 1 on the left.
Turn to work.
Simply lift off this stitch knitted on the left. Do not knit. Now you have arrived on the right side and knit this middle needle again with right stitches.
Until the last stitch, just lift it off, knit the next stitch on the next needle to the right and pull the lifted stitch over this knitted stitch.
Turn to work
Take off the knitted stitch again. Continue with left stitch. Knitt the last left stitch of the middle needle back together with the first stitch of the next needle on the left.
In this order, knit the entire stitches of needle 1 and needle 3. The needle 2 always keeps its 14 stitches.

The cap is ready and so almost the whole hat. After the last removal, you may need to knit a back row with left stitches to pick up the side cuffs for the face band on the right side.
face cuffs
Take back the whole needle game and pick up new stitches on the needles of the side edge stitches and the stitches of the chin. At the end you have a closed loop of stitches on the knitting needles.
We have more stitches than edge stitches available. That is, we have often taken two stitches from one edge stitch. Just so that this cuff does not contract too much. Spread the stitches so that they have the same amount of stitches on each needle.
Now knit this face cuff in the right-left pattern.
- 1 stitch on the right
- 1 stitch left
We knitted 2 centimeter cuffs. In the last row you tie off all the stitches. Finally sew all threads, the hat for babies is ready.

Variant of a scarf cap
We present you a special variant of a "scarf cap". It is not pulled over the head, but dressed normally and closed at the neck with two buttons. So nothing can slip even with this scarf cap. The head and neck are well warmed.
In this scarf cap, only the neck cuff changes. The knit in rows in the half-patent.
Basic pattern half-patent in rows
1st row
- 76 stitches + 2 edge stitches = 78 stitches
2nd row - back row
- edge stitch
- 1 stitch on the right
- Take off 1 stitch with the flap on the left
Knit all stitches in this order, the row ends with a border stitch.
3rd row - back row
- edge stitch
- All stitches knit as they appear.
- Knit the stitch with the envelope on the right.
- Knit the left stitch on the left.
- The row ends with a border stitch.
Repeat 2nd and 3rd rows for the entire neck band.
Instructions - Knit buttonholes
After 2 centimeters cuffs basic pattern in half patent we knitted the first buttonhole.
RS row:
- Knit 2 stitches
- Bind off 2 stitches
- Continue the series normally in the basic pattern.
Back row:
- Knit in the basic pattern to the chipped stitches.
- Place 2 thread loops on the needle.
- Knit the row ready.
In the forthcoming row, these thread loops are knitted as right and left stitch. Only in the following series will these new stitches be integrated into the halfpatent pattern as normal. The second buttonhole we worked 1.5 centimeters after the first buttonhole. Then knit two centimeters in the halfpatent pattern in rows again.
Instructions - Headboard of the variant
For the head part of this variant, 8 stitches are chained off on both sides in the first two rounds and chained off 4 stitches in the next row. The rest of the headboard is knit in exactly the same way as in the first featured baby hat.

Instructions - Face band at the scarf cap
Also, the cuffs that framed the face, is knitted from the recorded side stitches.

This cuff for the face is sewn to the cervical collar after the last row has been removed. After sewing the work threads, you will surely find two pretty buttons that you still need to sew on for the buttonholes of the scarf cap.