Rainbow Loom Ribbons - DIY Guide

- Material and preparation
- Instructions - Loom Bands
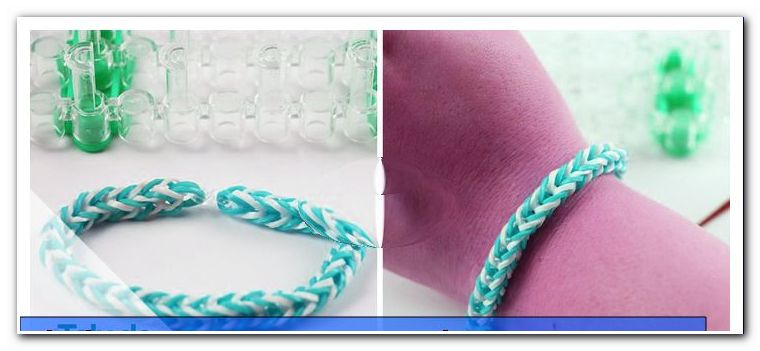
- Simple herringbone bracelet
- Loom patterns
- Finish loom bracelet
- Sweet Rainbow Loom Bracelet
- Loom patterns
- Attach lock
- Bracelet extension loom
- Simple herringbone bracelet
Have you ever seen these colorful rubber bands ">
Of course, the small, colorful Looms at first glance only seem to be for children - that's not the case. Both teenagers and adults can spend time with the tapes. In the following we explain the basics and the use of the weaving frame in two instructions.
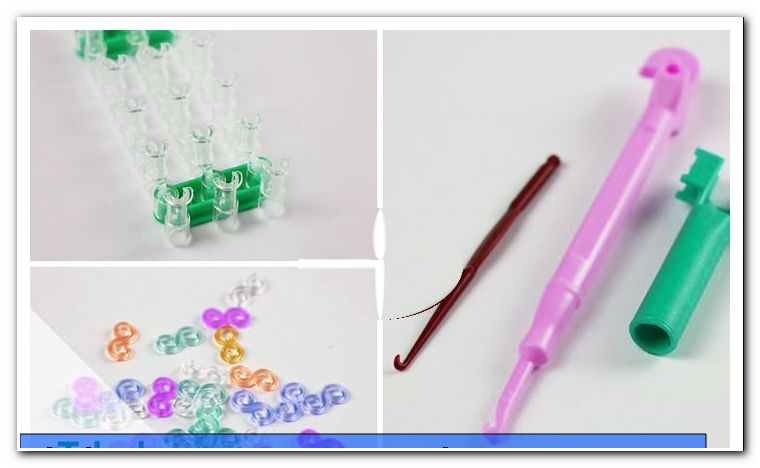
Material and preparation
Loom rubber bands are available in many, different, colorful colors to buy - individually or in a set with the necessary closures, the hook and the loom. The latter and also the small hook are not necessarily necessary, but make it much easier to knot. So you can tie Rainbow Loom bands with your bare fingers or a fork. Due to the low price of many sets, we recommend that you get the complete package. This makes the knotting very easy.

The Loom bands are made of elastic rubber, which has the advantage that it can not break so fast. Of course, the loom bands should not be overused when knotting. The original under the rubber bands is called "Rainbow Loom ®". These bands are characterized by the following properties: they are lead-free, latex-free, BPA-free and phthalate-free: //www.rainbowloom.de/service/wissenswertes.html Numerous tests have shown that this harmless product is particularly soft, flexible and is supple.
Make sure when working with your children that the rubber bands can be quickly swallowed - it is therefore recommended an age group from 7 to 8 years. Nevertheless, you should always keep an eye on your children while crafting.
Instructions - Loom Bands
The colorful Loom bracelets are great friend gifts, but also ideal as a key chain.
Simple herringbone bracelet
The herringbone bracelet is particularly easy and quick to hand. This basic technique will be used more often in further crafting with the Loom Bands. This is how it's done.
You need:
- Looms
- hook
- Loom Bandz in the desired colors
- Closure (so-called C-clip)
Loom patterns
Step 1: For a bicolor herringbone tape you only need two pins of the weave frame. Take a Loom Band in the color A in the fingers. Pull it apart with both index fingers and turn one finger around so that the loom band has the shape of an eight. Now clamp this band on the two pins of the weaving frame. Then slide the loom band down.
 Step 2: Then take a ribbon of the second color B and stretch it over the two pins as usual.
 Step 3: Now stretch a band in color A as well as in step 2 over the last band. The web frame should now look like this:

Step 4: Next, use the hook to lift the first rubber band over the following two bands and the right end of the pencil. Repeat this with the other pen as well. Then slide all straps down with the hook.

5th step: Now put a Loom ribbon in color B over the pins and repeat step 4 again with the lowest rubber band.
Repeat this sequence until the Loom bracelet has reached the desired length.

Tip: Do not forget to repeatedly press the bands down and pull on the bracelet while knotting. Otherwise the Loom band could become irregular.
Finish loom bracelet
Step 1: Take a clasp clip to hand. Clamp the first rubber band around your finger and attach the clip

Step 2: Take the hook and also lift the penultimate rubber band on both sides over the last rubber band and the pins.
Step 3: Pass the other end of the clip around the last rubber band, but around both ends. These ends are merged, closing the end of the bracelet. For this, the bracelet must be pulled from the pins.

Finished is the simple herringbone bracelet from Loom Bandz.
 Sweet Rainbow Loom Bracelet
 Sweet Rainbow Loom Bracelet
 This loom bracelet in rainbow colors is sugar sweet and perfect for best friends. However, the pattern is slightly more complex than the simple herringbone look.
You need:
- Looms
- hook
- Loom Bandz in seven rainbow colors and one basic color (here white)
- C-Clip

Loom patterns
Place the loom frames on the table in front of you so that the openings of the pins point away from you.
Step 1: Take two Loom Bandz of the base color and stretch both over the first two adjacent pins.
Step 2: Then stretch two bands of the first color of your rainbow over the left, first pencil (there are already two rubber bands) and guide the bands diagonally to the pencil of the second row.
Step 3: Now take two Loom Bandz of the base color again and put them over the just edited pen and lead them to the left to the adjacent pen.
Continue this zigzag way to the end of the weave frame - always change the base and rainbow colors.

Step 4: Now the looming starts - turn the loom around once, with the end of the bracelet facing you. Put a Loom in the base color twice over the last pin, where the tape just ended.

Step 5: Take the Loom hook. Hook this into the lower double rubber band, for this the hook is inserted into the opening of the pin from above. Pull the pair of rubber bands upwards from the pen and guide it straight up to the pen above. Now insert the hook on the left side into the adjacent pin and lead the lower rubber band (here in blue) also upwards to the overlying pin.

Repeat this alternately from white to rainbow color and from right to left until you reach the bottom of the frame. Always pick up the lowest pair with the hook and put it over the overlying pin. The frame should now look like this:

The end is designed this way. The last pair of rubber bands in the base color is slipped over the neighboring pin:

Tip: The pens on the right outside always have the rubber bands in the base color (here in white) on top and the ones on the middle row in rainbow colors.
Attach lock
Now that you have reached the end of the frame, the Loom bracelet is almost finished. Now take another Loom in the base color and run it through all the Loom Bandz that have accumulated on the last pen. At this Loom now a C-clip is attached.
 Now you can pull all loom bands off the loom. The Loom bracelet is still a bit short so we need an extension.

Of course you can also put together two web frames for a long rainbow bracelet.
Bracelet extension loom
If you only have a web frame, an extension is the solution. They do this as follows:
Step 1: The loom is placed back on the table with the openings away from you. Start again with two Loom bands in the basic color of your bracelet. In zig-zags, always put two bands on top of each other. This extension consists of 5 Loom pairs.
Step 2: Then take your finished bracelet and put the last Loom without clip over the last pin.

Step 3: Then insert the lower rubber band pair with the hook upwards and diagonally over the previous pin. Tighten all the other Looms to the end.

Step 4: The C-clip is now attached to the last pair of rubber bands brought up. The Rainbow Loom Bracelet is now closed and ready!

Of course, if you want to lengthen your Loom bracelet, you can use more or less Looms at will, depending on how small your wrist is.