Knit poncho itself - free instructions for beginners

- Material and preparation
- take measure
- Create Template
- Knit a stitch
- Knit poncho
- The last steps
- Two make one
- The right yarn
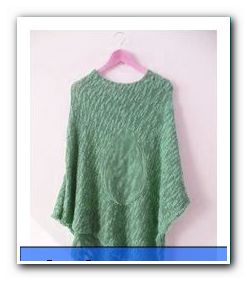
Some call him a blanket-like jack-of-all-trades, for the others he is a warming cloak that comes across as very stylish. In one point, however, everyone agrees: A poncho must be! It is part of every fashionable trend and therefore fits the flower child look as well as haute couture.
A fashionable start with a self-made poncho
The poncho is trendy, looks really good and is extremely comfortable. For knitters the perfect stitch to knit such a fashionable piece itself. Even beginners can dare to such a fashionable throw. We'll show you how to knit a chic poncho yourself. Quick and easy, you'll need your own cloak for every season. You'll be surprised what a knit artist is in you.
Material and preparation
We decided on a summer poncho and therefore chose a yarn that adapts to the summer temperatures. It is a cotton-polyacrylic blended yarn in the boucle effect, which gives this wool a special character. We wanted to knit a light and lively summer poncho.
You need this:
- 500 g cotton blended yarn
- Strength 5 knitting needles
- crochet hook
- darning needle
- tape measure
- maybe a sheet for the pattern

Tip: We knitted the poncho with a circular needle, so that the entire knitting work loosely on the rope and at the same time easily in the hand.

Before you start knitting, make a few preparations:
- take exact body measurement
- create a template
- knit a knit 10 x 10 cm
Tip: Do not be afraid of this preliminary work. Only so you can be sure that your poncho really fits you and does not get too small or too big. Our poncho is not a short poncho, which usually covers only the shoulders and the chest, our example poncho is a longer part that falls loosely over the hips.
 take measure
To take the right body measure, measure the length from the shoulder to the wrist and then the length across the entire body from the shoulder to the opposite middle of the hand. Or, you measure the desired length of the neckline and add this length to the measured arm length.
Our measures for size 38 with a height of 165 cm:
- 60 cm wide
- 85 cm long
Create Template
If you want to be sure that your measurements are exactly what you expect from the size of your poncho, cut a quick sample cut. For this pattern, it is best to take an old linen sheet.
Cut out of the fabric two rectangles, both of which have exactly the measured dimensions. Our model had a rectangular width of 60 cm and a length of 85 cm. In the picture you can see this example exactly.

After cutting both parts, they are sewn together, just like in the picture. It is sufficient if you take a stitching thread and sew together the two rectangles with large stitches.
Place both rectangles in L-shape in front of you on a large table or on the floor and sew the shorter side to the longer side.

Now connect the two parts exactly as in the picture.
The exposed inside is your neckline.
Tip: It is worth to make this pattern part. Only then will you have a very clear idea of how big your finished poncho will be. And at the same time you have a perfect knitting pattern with this pattern. With this knitting pattern you can also knit a matching winter poncho with really thick wool.
Knit a stitch
Knitting a knit sample is also part of the preparation of a knitting project. Each wool knits differently, every knitting needle strength changes the measure and each knitter has a different knitting technique, which immediately affects the knitting size. Every knitting pattern has a big influence on the measure.

1. Be sure to make this stitch from the wool used to knit your poncho. On each Wollbanderole stands for the mesh sample a number of stitches, on which you can orient yourself.
2. Hit more stitches than indicated.
3. Knitting more than 10 cm in height.
4. At this stitch, measure 10 cm in width and 10 cm in height from the center.
5. Count the stitches you knit in a row.
6. You now know how many stitches you need to make with this wool to a width of 10 cm. Multiply this number by the desired width in centimeters and divide by 10.
7. For our poncho we struck 112 stitches after this calculation.
Knit poncho
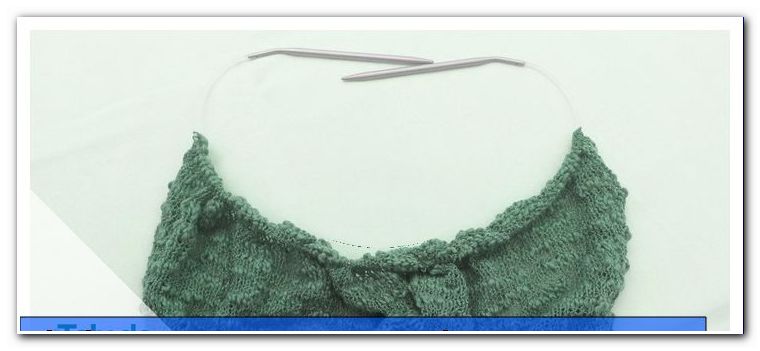
On a circular needle in the cross-stitch stop, hit the calculated number of stitches for your poncho size. This attack is not too firm and not too loose, just right for the baseline of the poncho.

If you always knit tight, choose a stronger knitting needle for the stitching. When knitting the row of stitches, you can continue to knit with the matching knitting needle. But your set of strokes will not be that tight and you'll be able to knit the first row more easily. We posted 112 stitches.
The entire poncho is knitted in a smooth-right pattern. That is, the back row is knitted on the right and the back row is knitted with left stitches.

Tip: Of course you can also knit a knitting pattern depending on your suitability. You decide according to your abilities and your preferences. For beginners, however, we recommend to buy a fancy yarn that speaks for itself and you can do without a complicated pattern. If you love colors, you can also knit the poncho in bright colors. Many yarns are already dyed so that the yarn creates an interesting color gradient.
The edge stitches should be knitted so that the edge does not curl and is a nice finish. For this, the edge stitch is also knitted on the right side of the row. Turn over the work and simply lift the first stitch and place it on the right needle.
In the back row the last stitch is only lifted off to the left, not knitted. After finishing the work knit this edge stitch as the right stitch, but at the same time prick the needle in the back.
In this episode knit both rectangles the same length. A rectangle of our poncho size has the length of 85 cm.

When the desired poncho length has been reached, all stitches begin to be tied off. To do this, knit two right stitches and lift the first stitch over the second stitch on the right. At the last stitch the thread is cut to a length of about 20 cm and pulled through the stitch.
The last steps
After both knitted pieces are finished knit, all wool threads must be sewn. Knot the two wool threads together and then sew each thread for itself on the left side of the knitted part in the weaving technique well and cut off the remaining threads.
Depending on which yarn was used for knitting, each rectangular piece can be stretched and moistened. With some wool or with very irregular knit stitches, the moistening of the knit piece makes the entire stitch pattern a little more even. This is also true if the edges curl up slightly and that is not necessarily desirable.
Before moistening, lay the knitwear on a large bath towel and fasten it with thin pins at a short distance. Lightly spray with a plant sprayer or moisten each part with the steam of the steam iron. However, the steam iron must not touch the knitted part.
Allow the two pony parts to dry well overnight.
Two make one
Now the most exciting part begins with the completion of the self-made poncho. The sewing together.

For this, the two rectangles, as already discussed in the knitting preparation, are laid on the floor or a large table as an L-shape. The connection of the "L" can now be sewn together. It is recommended to sew the knitted parts with the so-called mattress stitch. Sewing is done on the right side.
Now that the "L" has gotten its shape, only the two parts have to be connected to form a round poncho. Sew the knitted parts together as on the sample.

For our pattern poncho we used a smooth yarn in a similar color for sewing together. The fancy yarn with which our poncho was knitted is less suitable because the yarn is very different in strength and a clean seam would not have been possible. Also, we have taken the thread twice, so the seam is guaranteed to hold together well.
Sew on the last thread and the self-made poncho is ready for its first exit!
Tip: When sewing together, it is helpful if the individual parts are held together before sewing with a pin or a safety pin.
It depends on the taste of the wearer and on the wool with which a poncho is knitted. Because as a crowning conclusion the whole cloak can still be crocheted around its edges with fixed stitches. However, it should be ensured that these strong stitches are not too tightly crocheted, otherwise the edge contracts sharply, losing its loose momentum.
Tip: Crochet this border with a different colored wool, which gives your poncho an extra charm.
 The right yarn
If you want to knit a poncho for the cold season, you should take a warm and well entangled wool for it. A soft merino yarn, which is knitted with thick needles, fulfills all requirements for a winter poncho. Merino wool keeps you warm, dirt-repellent, breathable and very soft. If the merino wool is still provided with a synthetic fiber, for example polyacrylic, then it remains dimensionally stable and is easy to care for.
A very interesting yarn for a touch of a poncho is the lace yarn. Lace yarns are very thin and perfect for very light and delicate knitwear. They are knitted with thick needles, so they fall very loose. Lace yarn is available in a variety of yarn blends, giving you plenty of choice in terms of material.
Quick start Guide:
1. Material: 500 g cotton effect yarn 125 m / 50 g
2. Cast on 112 stitches
3. Knit on the right side for approx. 85 cm - bind off
4. Knit the second rectangle as well
5. Sew all threads
6. If necessary, clamp the individual knitted parts
7. Sew both parts of the original together
8. Crochet the border


 take measure
  The right yarn

