Sew poncho itself - instructions + free sewing pattern

- material
- The sewing machine
- The fabric
- To mark
- To stare
- Sewing instructions for a poncho
- Cut fabric
- Sew poncho
Autumn is coming and temperatures are getting fresher. Anyone who likes to spend his free time out there needs one thing in addition to a sensible jacket: a fashionable poncho! Here we show you how to sew a poncho yourself.
We have here a super easy and quick guide, as well as you can conjure a cuddly poncho easily yourself. This project is also suitable for beginners, because basically it's just two blanks and two seams.
We made our poncho from a fleece blanket. These are available in countless colors, patterns and quality levels.
Tip: First, read through the complete guide and get all the materials ready before you start sewing.
material
You need this:

- sewing machine
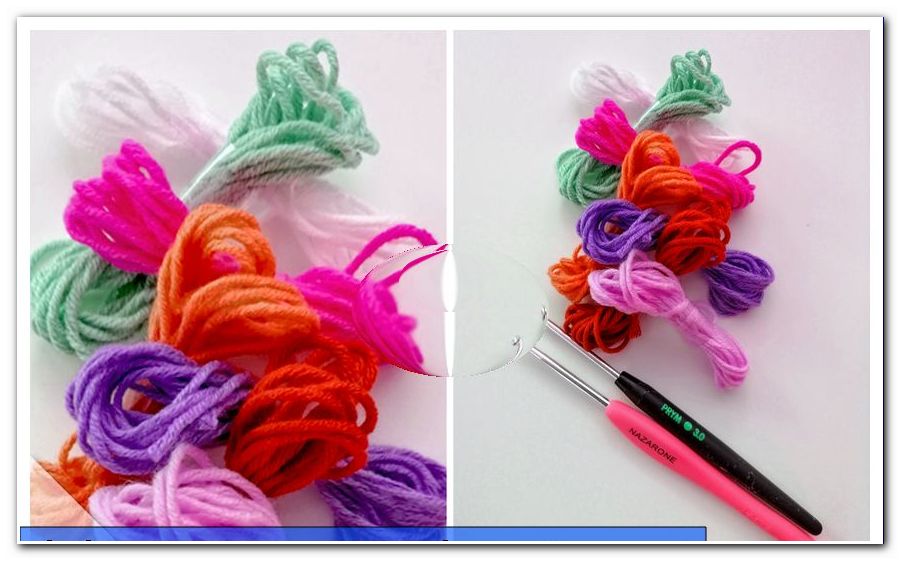
- Fleece blanket in 1-2 colors
- tape measure
- scissors
- yarn
- Marking pen or tailor's chalk
- Pins or paper clips
The sewing machine
You do not need a special machine for this simple poncho. Simple stitch types, such as straight stitch or zig zag stitch, are quite sufficient. Our machine used here is available from Silvercrest and already for 99, - Euro in the trade.
The fabric
Of course you can use almost all fabrics for this tutorial. To make it extra simple, we have chosen a standard fleece blanket that you can get wherever there is home decoration. The advantage of this substance is that it does not fray. This means that you do not have to be re-skinned. Simply crop and process without further ado. Our blanket is from a Euro shop and cost 2.99 euros. The size of this blanket is 130 cm x 170 cm. We used 2 different colors. However, the size of a blanket is sufficient. Of course you could also conjure up a modern patchwork look from different fleece blankets.
To mark
Experienced seamstresses and seamstresses do not necessarily need something to mark in this project. For all others, we recommend a piece of tailor's chalk, which is usually available in blue, white or gray, or a water-soluble marker. The chalk you get from about 4, - Euro and the pin from 5, - Euro.
To stare
For staking simple pins can be used. A tip from us: just use paper clips for this project, which you will see in the following pictures. These are usually available in every stationery department, cost about 1.50 euros for 20 pieces and are easier to handle in this case.
Sewing instructions for a poncho
Now it can start. You'll be surprised how fast it goes and you hold your poncho in your hands.
Cut fabric
1. Spread out your blanket completely. It is best if you put these on the floor, otherwise it could possibly be inaccurate.
2. Now take one of the corners and lead it to the opposite edge, creating a triangle.
3. At the bottom of the ceiling, a protruding rectangular strip has been created. Then cut it off.
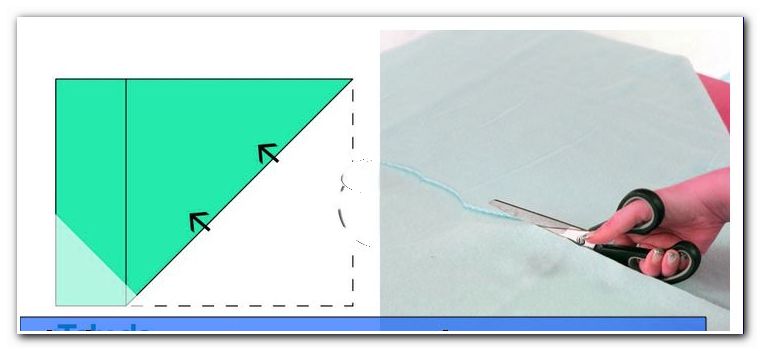
4. Now your ceiling should have become a square. You can use the truncated strip for the loop, or later choose a different color for it. Put the square back into a triangle. Then make one of the more pointed corners to the opposite. This creates a smaller triangle.

5. Pick up your measuring tape or ruler and measure about 17 cm at the top corner. This will be the cutout for the head. The dimensions can vary depending on the head size and taste.
6. Draw the points.

7. Join the dots together afterwards.
Tip: If you combine the points with a slight curve, you will get a better result, but not a must.
8. Then cut along the line through all overlapping panels. The section is no longer needed.
9. Spread the fabric again. Now, a corresponding neckline would have arisen.

10. Now measure the circumference of the cutout. It's best to use a tape measure instead of a ruler. For us, the circumference is about 79 cm.

11. Now we cut the fabric for the loop. We measure a length of 79 cm (of course you take your measurements.) And a width of 45 cm. Also this size can vary quite to taste. If you prefer wider loops, choose a bit more width and vice versa. The dimensions are marked on the fabric and then cut to size.
12. Lay the cut piece in front of you and fold it once in length. If you want, you can peg the fabric. The advantage with Fleece: The fabric does not slip so fast, so that the pinning is not absolutely necessary.

Sew poncho
13. Now close the side opposite the break with a zig zag seam.

Important: Do not forget to "lock" each of your seams. Here you sew some stitches as usual. Then the back button located on the front of your sewing machine is pressed and stitched back 3-5 stitches. Release the button and continue with the seam. This prevents loosening of the seam. Also at the end every seam should be locked.
14. Now the loop is sewn to the poncho. Insert the fabric pieces just sewn into the neckline of the poncho. Make sure that the edges are flush with each other.
15. Then plug in the whole thing.

Tip: We recommend fixing paper clips as shown in the photo. With these you can just fix and the substances can not move.
16. Now work the second and final seam of this project. Proceed slowly and carefully push down on the fabric below. Again, do not forget the locking at the beginning and end of the seam.

17. Finally, the whole thing is turned around, the loop is turned over and you hold your new favorite piece in your hands.
This poncho is made really easy. The next poncho is sewn in just a few minutes, because here only 2 cut pieces and 2 seams are used.

Suggestions for your poncho:
* Patchwork for the remainder utilization
* Sew on the pockets
* Integrate hood
* Reversible poncho made of 2 different fabrics
Instructions for fast readers:
* Bring the ceiling into a square shape
* Fold the square across to form a triangle
* Fold the triangle again to make one again
* Mark and cut out the neckline
* Cut the fabric piece for the loop and close the side
* Insert the loop into the poncho and sew it on
* turn and DONE