Origami Butterfly Tinker - 90 Second Instructions to Fold

- Origami instructions
- Instructional Video
Spring is here and summer is not far off. What definitely should not be missing are colorful butterflies. Whether in your own outfit or in your home decoration, these fluttering men should be an integral part. For the right mood at home, we have a craft idea for you. You do not have to spend a lot of money doing that. In this origami folding guide we show you how to fold a beautiful origami butterfly with lightning speed and with just a single sheet of paper.
The butterfly symbolizing the transformation is the bearer of the warm time. It can be found in all shapes and colors in nature as early as spring - that's the way it should be in one's own four walls.
All you need for the paper butterfly is a square sheet of paper. The size of the paper is crucial to the size of the butterfly. Origami paper can be purchased in well-stocked craft shops - this does not necessarily have to be the case, because you can also make a butterfly with simple craft paper or even a cardboard box.
Origami instructions


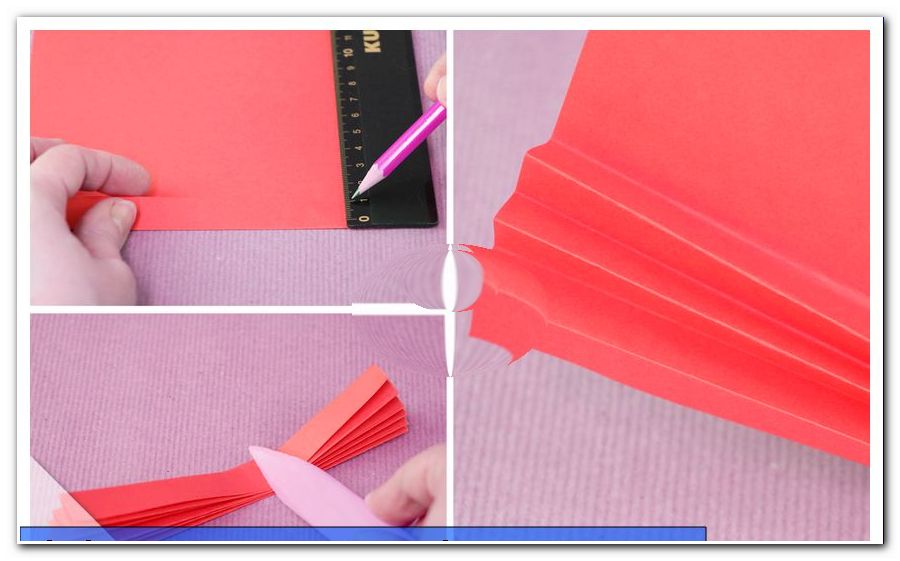
Step 1: Take a square sheet of paper in the desired color. For butterflies are especially friendly and bright colors that bring a touch of spring in your apartment.
Step 2: Fold the two diagonals of the leaf. These folds then intersect at the center of the square.
Step 3: Now turn the sheet on the back and fold the bottom center on top. This fold is opened again.
Step 4: Now turn the paper on the back again and fold the left one on the right side. This fold will also be opened.

Step 5: Now fold the paper into a triangle. To do this, lift the paper and make a point from the center.

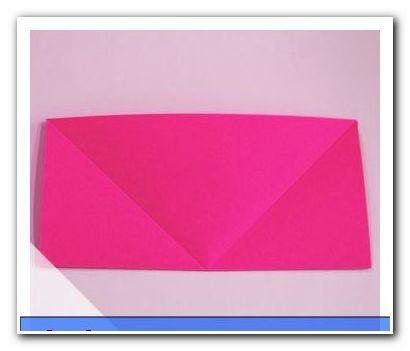
Step 6: Now fold the wings of the butterfly. To do this, fold the two above, flying corners along the midline and toward the top. This creates a small square.

Step 7: Now fold the actual tip of the triangle on the back towards the lower, open edge so that it overlaps slightly. The paper bends by something, but what is wanted. The overlapping tip fold back and into the open edge.

Step 8: The last step looks like this: the butterfly is collapsed, with the small tip of step 7 on the outside of the butterfly. If you have done everything right, get the wings by this folding a slight momentum.

Done is the origami butterfly!
Instructional Video
The finished paper butterfly can now be placed anywhere in the home. You can tape it to hard surfaces, sew it to the curtains with one or two stitches, or simply hang it on a piece of twine. It becomes especially decorative when you fold several butterflies. These can then be hung at different heights on a branch that you have attached to the ceiling. Then use different colors and sizes of these folded butterflies, the construct looks even more impressive.
 A springlike wreath of willow branches is also a wonderful idea to skillfully stage origami butterflies.
As you can see, folding origami can not only be fun, the butterflies are also very nice to look at. So just fold and let spring come to the apartment.