Paint MDF panels - DIY instructions in 5 steps

- MDF boards - purpose determines the paint job
- Pre-painting - primer - filler
- Costs and material prices
- Manufacturer and color systems
- grinders
- Paint MDF boards in 5 steps
- 1. Clean and remove dust
- 2. Primer - Primer
- 3. Grinding
- 4. Painting
- 5. Apply clearcoat
MDF panels have a decisive advantage over other wood-based panels - they can be sanded particularly smoothly and even be extremely glossy with the right paint. This is how you can easily build your expensive high-gloss furniture yourself with these medium-density fibreboards. We will show you how to paint MDF after the furniture construction in just five steps.
Whether matt or high gloss, the medium-density fiberboard does not show any wood structure later. This is mainly due to the fine surface of the fiberboard. But since the plates are made from the smallest shredded fibers, they also absorb a lot of color. Above all, the cut edges of the MDF boards should be specially pretreated, as otherwise the color completely disappears. The homogeneous surface of these fibers simultaneously allows many uses in almost every room of the house. It even has a higher density than normal boards. Here we show you in the manual how to professionally paint MDF fibreboard.
You need this:
- brush
- paint roller
- lacquer bowl
- sander
- Random Orbit Sander
- abrasive paper
- polishing sponge
- spatula
- toothpick
- Duster especially for paint work
- MDF board
- Synthetic enamel
- acrylic paint
- Car paint / spray cans
- Isolierfüller / Isoliergrund
- Resin dilution
- primer
- clearcoat
MDF boards - purpose determines the paint job
The purpose of the plate depends on how it should be painted. For example, if the plate is used as a kitchen front, it should be completely sealed in several layers. For the construction of loudspeakers, which are used only in the living room, a sealing of the inside is not so absolutely necessary. For great high-gloss furniture that you can even use on the terrace, car paint is suitable, which you can spray on with a paint sprayer or buy in spray cans. This makes the plate resistant to moisture and water spots at the same time. Because MDF usually has a disadvantage, it swells easily when it gets wet. Then such a plate is only bulky waste, because it does not get its shape even after drying back.
- kitchen cabinets
- Speakers
- Furniture and shelves
- interior
Pre-painting - primer - filler
To seal the fine capillaries of the fiberboard, you need a paint filler. Because, just as the fiberboard absorb moisture, the paint is completely absorbed by them. Some do-it-yourselfers have already wasted whole cans of good paint and have not even left a shade of the desired color on the fiberboard. It is therefore imperative to previously seal these fine fiberboard. This is not possible with a normal primer, but only with Isoliergrund or Isofiller, as this quickly closes the fine capillaries. So the capillaries can absorb no more color or moisture. However, the Isogrund usually has to be applied in about three layers.

Costs and material prices
The fiberboard itself is not overly expensive. However, you should use a high-quality paint. In addition, the Filler or Isogrund is quite a cost factor. A can of 750 ml already costs around 25 euros. To make matters worse, you need to apply up to three layers of it for a high-gloss fiberboard.
- MDF board - 800 x 500 x 16 mm - 25 euros
- Isogrund / Isofiller from 25 Euro / 750 ml
- Color coat from 15 euros / 750 ml
- Clearcoat from 10 Euro / 750 ml
Manufacturer and color systems
Most manufacturers offer whole series of matched products. Often, these paint systems even exist as acrylic paints that can be diluted with water. So you can apply the individual layers even finer and thinner. These color systems also include special effect coatings that provide certain optical effects with glitter in the last color layer. There are also metallic paints, which, however, as well as the effect varnish require additional additional operations. In addition to the primer then the usual about three layers of paint must be applied. Only then usually come the metallic or effect coatings on the surface. These also usually have to be applied twice and are then protected by one or two layers of clearcoat. So much work, but the look of a shiny metallic loudspeaker box, for example, in red makes the effort certainly again.

Tip: In any case, you should stay with the purchase of each product in a range and buy all the necessary paints from the same manufacturer. This prevents repulsions and ensures a uniform surface without ugly bubbles.
grinders
Without an electric grinder, painting an MDF board to a high gloss is hardly possible. There are simply too many sanding cycles necessary. Many recommend an eccentric sander for this work. But if you as a beginner want to sand the MDF boards, the orbital sander can be a bit difficult to handle. When placing it can easily create an ugly sanding plate in the surface. It is easier to handle an orbital sander because it is not quite as fast. Of course, the workload is a bit bigger.
Paint MDF boards in 5 steps
In this manual we want to paint the MDF boards with high gloss. You will have a little less work if you want to achieve a semi-gloss finish without high gloss. Nevertheless, you should still apply a clear coat as a finishing touch, which can not only bring the surface of the fiberboard to a high gloss, but also protect it. Of course, the clear coat should also be semi-glossy.
1. Clean and remove dust
In fact, it is not necessary to sand the surface prior to treatment on MDF boards because the fiberboard is receptive anyway. But the plate must be dust-free and clean. If the plate has already been used, it must be briefly cleaned with a grease remover. It is recommended, however, if you want to paint a plate, only to use new plates. The side edges of the plate should be slightly sanded. Any dust must be thoroughly removed with a special microfibre cloth.

Tip: Although the fiberboard should not be sanded, it makes sense to break the edges of the fiberboard very easily. Of course this does not mean breaking, but only the light sanding of the corners of a fiberboard. If the corners remain sharp-edged, it will be easy to peel off the paint later in this area.
2. Primer - Primer
The paint filler or insulating paint is a filling primer that seals the pores of the fiberboard. So the plate is prevented from absorbing more paint and literally soak up. The paint filler usually dries very fast. However, as a precaution, read the manufacturer's instructions. You can not use a normal primer for this primer, as it is simply absorbed just like the paint.

Tip: You can save some of the work with the filler if you use foiled fibreboards. So only the open edges and cuts have to be sealed three times with the filler before painting.
The surfaces on which foil is, however, still have to be painted with Isogrund for a high-gloss result. However, these plates are a bit more expensive. If profiles are to be cut into the fiberboard, it is better to use the normal fiberboard, because the grooves in the profile patterns would otherwise have a slightly different surface.

Also the Isogrund exists like the high-gloss varnish in different colors. Usually, however, only the colors are white or black in the hardware stores. Then adjust the primer to the later color of the fiberboard. If, for example, this turns bright red, a primer with a white background is optimal. For a dark plate in dark blue or anthracite, the black Isogrund is the right choice.
3. Grinding

 When the Isogrund has thoroughly dried, the fiberboard should be ground lightly. You can start with a 240 grit sandpaper. If the surface is very rough, it may be necessary to grind with a 180 grit. The primer with the paint filler and the first sanding cycles should be carried out alternately. Use a slightly finer sandpaper after each cycle. To achieve true high gloss, you should end up with a 400 grit sandpaper after the last coat of paint.
After every sanding or polishing process, the fiberboard must be made completely dust-free again. You can use a special microfibre cloth. Often there are also good specialty towels in the hardware stores. If you can not find what you are looking for here, you can look at the car accessories, because the car painters take such cloths for small jobs.
4. Painting
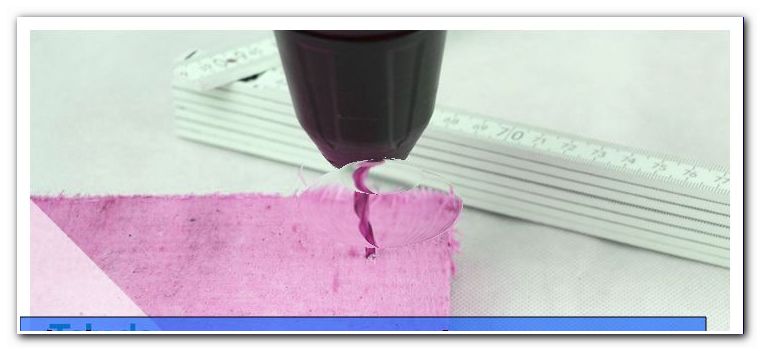
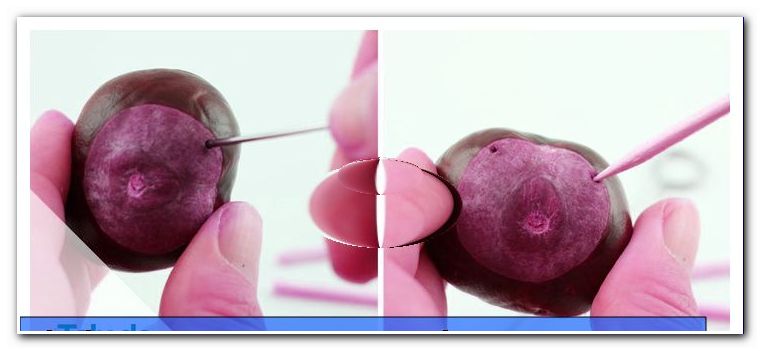
For the coating of the fiberboard fine foam rollers are suitable. If possible, apply the varnish to the varnish shell for some time before painting. By decanting are often some air bubbles in the liquid paint. These should first sit down, so you do not apply the air bubbles. The paint would otherwise look more like a bubble bath and a high-gloss surface would not be achieved. You can also puncture the bubbles in the paint bowl with a toothpick if they are too big. If bubbles appear on the fiberboard during painting, they should also be crushed immediately.

Important: You should always paint the plate in one direction with the foam roller using long strokes. Never ride sideways, as the surface will become restless and uneven.
After each stroke, the paint must be thoroughly dry and then sanded very finely. A rich color scheme is usually achieved with three layers of paint. After the third layer you should only sharpen very fine. If, however, bumps still develop, they should be removed before applying the clear coat.

Tip: If you just want to paint some very small MDF boards with a high gloss, then spray cans with car paint are very good. There is also the matching primer and a good clearcoat.
So you can achieve great colors in a high-gloss look. For speaker cabinets or picture frames, this method is well suited. However, if you want to paint the entire fronts of a kitchen with a high-gloss finish, you should rather buy the paint in cans.
5. Apply clearcoat
If an effect or a noble Metalliclackierung is to be applied, this is usually applied before the clear lacquer according to the manufacturer. With a high-gloss surface, the clear coat is not only responsible for the gloss, it also protects the paint layers from scratches and moisture. Apply the clearcoat as quickly as possible. The paint should, however, rest a little before applying in the paint shell, so that no air bubbles are applied. A polishing pad or a polishing sponge removes small blemishes after drying, which may appear in the clear coat. Apply at least two coats of clear coat with the foam roller for a brilliant high gloss. Of course you can also work with paint spray, but always stay in the same paint system.
Tips for quick readers
- Dust the plates and break the edges
- Apply Isogrund and let it dry
- three layers Isogrund on the edges
- a layer of Isogrund on foiled surfaces
- Grind MDF boards with a fine grain
- Sand edges and apply Isogrund if necessary
- Paint fiberboard and edges
- Break bubbles in the paint immediately
- Sand fiberboard after drying time
- Apply another coat of paint and polish
- possibly repeat the application of paint and polishing
- If desired, apply effect varnish or metallic varnish
- If necessary, also sand the effect varnish again
- Apply clear coat, allow to dry and polish