Crochet Long Beanie - Free Beginner's Guide

- Material and preparation
- Crochet Pattern - Long Beanie
- cuffs
- midsection
- top
Homemade, warm winter clothes do not always have to be knitted. Just as well can be very many accessories for the snowy and frosty months with the crochet hook produced. For beginners in the world of needlework, crocheting is also easier, because you only work with a needle and a stitch. Read here how to crochet a cuddly long beanie yourself with very little prior knowledge.
In contrast to the often confusing knitting with the needle game or the circular needle, circular shapes crochet very easily. If you lose a mesh as a beginner, that's not a big deal, as she's quickly found when crocheting. In this tutorial, we'll introduce you to a long beanie that, like most of her knitted fellows, is crocheted from cuff to lace. On the way she gets a stylish striped pattern. On the head, the upper part of the long beanie then casually falls on the neck or you can gather your long hair underneath.
Material and preparation
You need:
- 100 - 150 g of wool (nothing scratchy)
- Crochet hook in matching size to the wool
- wool needle

In principle, when crocheting a long beanie, any wool that likes is allowed. Make sure that you do not scratch too much when choosing. This is usually the case for wool with a high percentage of virgin wool. For example, merino wool or linen is particularly soft. Also, you should think in advance, whether it should be a lighter transitional cap or a thick winter cap. Beginners will be well advised to seek advice in the wool shop about which material is best for their purposes. When crochet needle size, follow the guidelines on the wool. If in doubt, a larger needle will provide a looser structure.
Prior knowledge:
- stitches
- chain stitches
- rod
- relief chopsticks
For some beginners, the relief sticks may deter you from attacking this long beanie. Follow the instructions, but are easy to crochet. In addition, this long beanie is a perfect exercise object, as very often relief sticks must be crocheted. Once you have worked through these instructions, you certainly will not be deterred by a crochet project with (relief) sticks.
The mesh sample
In order to determine the perfect number of stitches for your wool and head, there is no way around a small stitch sample. Crochet a chain of 20 mesh stitches. Crochet a back row with whole sticks on this chain. Measure the longer of your stitch sample rather generously. Wool is usually quite elastic and the long beanie should not slip into your face later. Use the head circumference to calculate how many stitches you need in a round. Always round to an even number.
In our example, the long beanie is crocheted with a yarn of 50% polyacrylic and 50% virgin wool. The barrel length is 380 m to 200 g. Crochet 76 stitches for a 56 cm circumference adult's head on a 5-piece crochet hook in the first round.
Crochet Pattern - Long Beanie
cuffs
Crochet an air chain with the number of stitches you have calculated. Close the chain with a chain stitch to the circle. Now make sure that the chain is not twisted in a spiral shape.
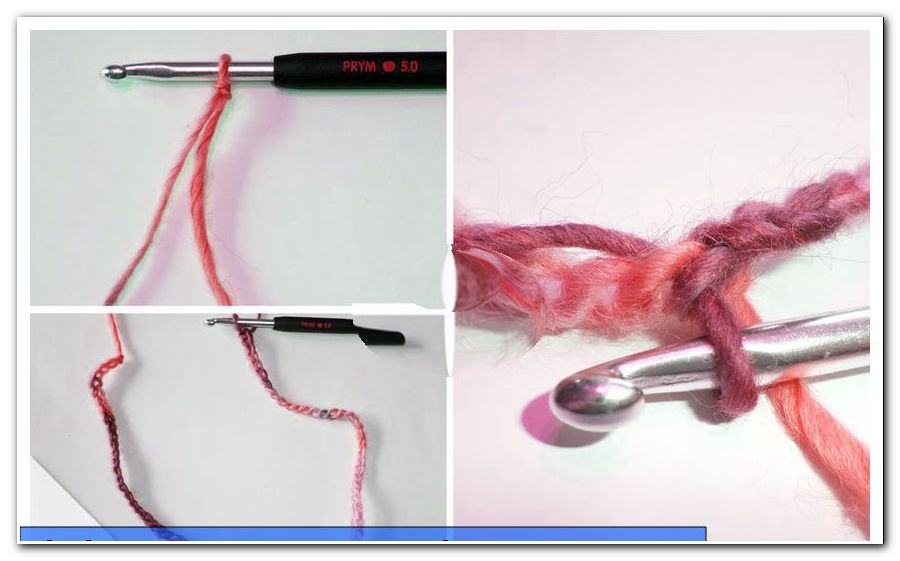
The next round you start with 3 air stitches for the first chopsticks. Crochet a chopsticks into each bubble for a full round. It is important to be very careful not to swap the top and bottom of the chain. Close the round in the hole between the first two sticks with an air mesh and a chain stitch.

From the next round, the procedure for the entire cuff will always be the same. And crochet at the beginning of the round again 3 air meshes. It is followed by a "front" relief stick, also called "barbed from the front" Reliefstäbchen. Beginners can see in the photo nicely how the crochet hook pierces the hole in front of the stick and comes back behind the stick again.
Here is the thread fetched. Then crochet the whole thing like an ordinary chopstick.

It is followed by a "back" Reliefstäbchen or "stabbed from behind" Reliefstäbchen. Here, the crochet hook is guided in the hole in front of the stick from back to front. The needle pushes the stick backward as it punctures backwards in the hole after the stick. Get the thread there and crochet the stick to the end.

Crochet these two relief sticks alternately. At the end of a round, crochet a mesh of air and a chain stitch into the hole between the first two sticks. The next round always starts with 3 airguns. The order of the relief sticks is retained. This means that you are crocheting a front relief stick into a front relief stick and vice versa. Crochet the cuff until it covers your ears. In our example it was 9 rounds.

midsection
From now on rounds alternate with ordinary sticks and rounds with relief sticks. This means that the first round after the cuff you crochet a round with regular chopsticks. The procedure for the beginning and end of a round remains the same as described above.

In the next round, crochet only back bones. This leads to the striking 3D pattern that you can see in the picture.

Change the two rounds until the cap covers the head well. Since it should be a long beanie, airtight completion at the apex is not our goal. Rather, the cap should protrude above the crown and casually bend backwards.

Tip: If you want the cap above the cuff to be really fluffy, take a crochet hook larger than the cuff for this part.
top
If the long beanie has reached the desired height, complete the work in 4 laps. After your last round with relief sticks, a round of pickups follows. For this you crochet alternately a normal stick and a decrease-stick. The latter means that you first get the thread through the next stitch as usual. Before you finish crocheting the stick, pull the thread through the next but one stitch again. Crochet so with a stick 2 consecutive stitches together. Now you should have 4 loops on the needle. Pull the thread through the first three at the same time and then through the remaining two loops as usual.

Continue switching between the normal and the dipstick all round.
This is followed by a round with back relief sticks. In the following round you crochet only acceptance sticks. Now joins a final round with back relief sticks. The top of your long beanie is almost done now.

Cut the thread generously and pull it through the last loop. With a wool needle you weave the thread now through the stitches of the last round. To do so, take turns in the stitches from below and from above. After about 5 to 6 stitches, tighten the thread. Once the last stitch has been threaded, put the hat on the left. Sew the thread so that the last little hole closes completely.
Tie the thread neatly. Now your cap is ready for use!

Tip: The cap is also very nice in two different colors. The one color is used in the rounds with the chopsticks. The other color is used in the relief sticks.
The hat also gives a nice picture on links.