Cleaning tile joints - this really helps with cleaning

The tile joint, in addition to the design of the tile, ensures the design effect of the floor or wall covering. While the smooth, glazed surface of the tiles can usually be cleaned without any problem, limescale, dirt and mildew quickly accumulate in the slight depression of the joint. Dirt particles are more of an optical problem, while mold can be harmful to health and should therefore be removed. With the right cleaning agents you get the tile joint again radiant clean, without roughening the surface of the joints and thus make even more susceptible to contamination.
Causes of fouling of the tile joint
Each time you wipe the flooring, a small amount of dirty water will remain in the tile joint and dry there. The dirt or lime particles contained in the water settle in the joint and make them look unsightly. Too hot or acidic cleaning agents when cleaning the tiles every week will do the trick, as they can roughen joints and even destroy them permanently. The gap gets dirty even faster and a vicious circle begins. Regular cleaning keeps the joints visually and hygienically clean and preserves the beauty of the tiled surface. With our cleaning tips you can enjoy bright, clean tile joints without much effort.
Mechanically clean tile joints
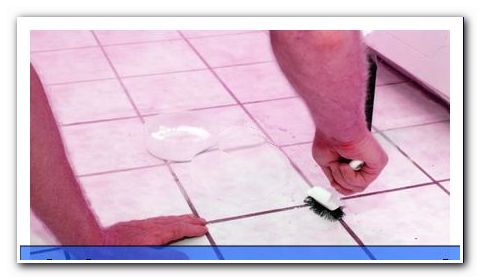
For a little scrubbing, you usually can not avoid cleaning the tile joint. The first weapon against the gray of the joint is an old toothbrush or a joint cleaning brush. The anatomically shaped handle of this household helper facilitates handling. The specially arranged bristles dissolve the dirt, so you can take this well with a microfibre or cotton cloth.
Before you start cleaning, you should take a close look at the joints. If the fugue only appears greyish brown, or has mold in some areas, it fills the fugue, which finds ideal living conditions in the humid and warm air of the bathroom "> 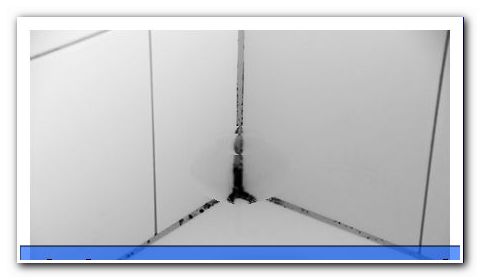
Fighting mold on the tile joints
You can deal with mild mold with a special cleaner yourself. Since the mold remover often contains chlorine, you should wear gloves and a respirator when cleaning the joint and open the windows wide during the exposure time of the agent. Brush the affected areas thoroughly with the fungicide and the joint brush until the last traces of the fungus have disappeared. To prevent mold, you can regularly clean the tiles and the joints with alcohol or sal ammoniac dilution.
Note: Chemical mildew cleaners interfere with the function of the biological wastewater treatment plant. Alternatively, fully biodegradable mold removers without chemicals (chlorine) are available commercially, which work harmlessly to humans, animals and the environment.
Effective cleaning with special cleaner and brush
Then you can tackle dirt deposits in the tile joint with a special cleaner for tile joints and the tile brush. The remedies contain lime and grease solvents, which do not attack the material of the joint. They are suitable for the entire living area and have a gentle and effective effect both in the hallway as well as in the bathroom and kitchen.
Follow these steps when cleaning:
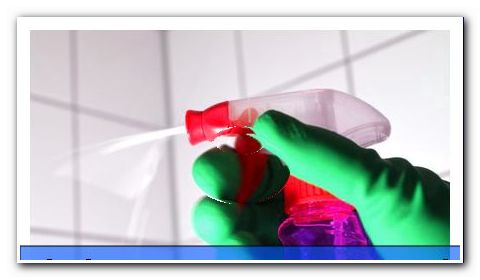
- Spray dilute cleaning agent on the joint as instructed
- Allow to soak for a few minutes
- Gently treat the joint with the brush
- Take up cleaning solution with a soft cloth
- Change water frequently to avoid new dirt in the joint
- For stubborn dirt, clean the joint again
Note: Please do not use joint cleaner with the ingredient Benzisothiazolinone if possible if you use a small sewage treatment plant. In addition, check the products for the presence of preservatives as these could kill the microorganisms required for cleaning.
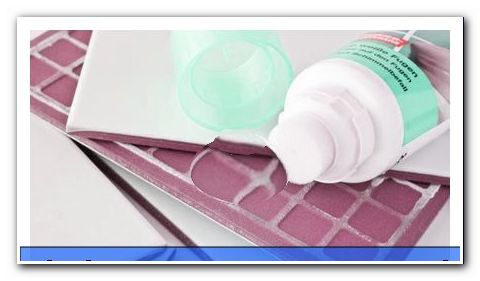
For small surfaces: toothpaste and dirt eraser
Spatially limited impurities, for example directly at the door, can be cleaned with toothpaste and a toothbrush. Apply the toothpaste to the joint and leave it on for about an hour. Even a dirt eraser removes deposited dirt particles on individual joints. This method is particularly useful for wall tiles, as most cleaning agents flow off immediately on the vertical surface. Swipe over the joint a few times with the moistened sponge and enjoy the great result.
Strong against limescale: rinse aid and vinegar cleaner
The cleaning of the tile joints with rinse aid for the dishwasher works surprisingly well. The applied with a brush on the joints product not only removes dirt particles very effectively, it also removes stubborn limescale in a dark groove. Apply the product pure and sparingly to the joint and brush it out with a brush. Then pick up the solution with a soft cloth and rinse several times with clear water. If the tile joint is heavily soiled, it may be necessary to clean it again.
A proven means of maintaining the tile joints is vinegar cleaner, which in addition to limescale also dissolves dirt out of the joint. Just put a little cleaner on the tile joint and rub in thoroughly with the joint brush. The dirt dissolves after a short time and can be removed with a cloth and clear water.
Again, check the products used for the presence of harmful substances for the small wastewater treatment plant.

Grandma's home remedy: whiting or baking soda
Whiting chalk is a pure natural product used to chalk houses and rooms fifty years ago. For gray tile joints, you can use whiting to clean the entire surface to give the joints their original, bright white appearance.
A thick cream of baking soda and water is very suitable for thorough cleaning of the joint. To do this, mix a few sachets of conventional baking soda with a little water until a viscous paste is formed. Distribute them evenly in the joints with the toothbrush and let it act for about an hour. If the joints are heavily soiled you can support the cleaning effect by vigorous brushing. Then wipe off the baking powder with a damp cloth. Thoroughly dry the joint to remove the last traces of the baking powder mixture and any moisture.
If you need to go fast: nail polish remover or ammonia
As an alternative to baking soda, you can use soda powder mixed with water or dilute ammonia to clean the joint. Ammonia is ammonium chloride dissolved in water. The product has an unpleasant odor and is slightly irritating to the skin and should therefore only be used diluted. Wear gloves when using. Just apply some ammonia with the toothbrush and work the joint for a short time, it will be brighter again and the dirt film will disappear. Individual stains in the tile joint can be remedied with nail polish remover. With a cotton swab moistened with paint remover, wipe over the stain several times until it has disappeared.
However, all these home remedies should be used wisely. Excessive use can damage tile joints, as most of them contain acids. On the other hand, the funds are excellent biodegradable and do not damage the micro-organisms of the biological treatment plant.
Fast and effective: joint cleaning with the steam cleaner

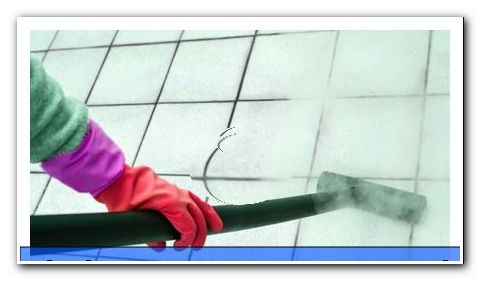
Steam cleaners are not only suitable for hygienic cleaning of floors and windows. By placing the point nozzle, the tile joints can be cleaned quickly and thoroughly with the steam at 150 to 300 degrees. Since you do not need any chemical cleaning agents, the devices also score in terms of environmental friendliness. Due to the hot water vapor that escapes with pressure, even solid dirt particles loosen and are literally flushed out of the tile joint. Steam cleaners are also very good for cleaning the entire tile floor. Unlike wiping with a mop or cloth, no moisture film remains in the joint, and even a white joint is much less dirty than other cleaning systems.
Problem case silicone joint
If dirt has settled in the silicone joint, it can usually hardly be removed. Even the use of special cleaners or bleaching agents often does not lead to the desired success. For this reason, especially remove silicone joints that have been covered with molds and insert fresh silicone compound into the joint.
Small pen with great effect
If all efforts do not help and the gray haze of the once radiantly beautiful joint can not be brushed off, you can brush it up with a joint marker. The varnish-like ink of the pens covers unsightly places permanently and reliably. The ink is also resistant to cleaning and prevents mildew. However, the method is not suitable for large areas, as it would be too tedious to trace each joint with the pen.
Prevent contamination of the joint in advance
So that the tile joints do not become soiled quickly, you should wring the cleaning rag very well during cleaning and only clean the tiles with a damp mist. If you frequently change the mop water, no dirty water can accumulate in the joint. If you wipe with a dry cloth, residual moisture in the joint is effectively avoided. Positive side effect: Excess detergent is absorbed by the cloth and there is no gray haze on porous or structured tiles.
Mold requires a warm and humid climate for growth. After showering or bathing, you should dry the tiles or remove them with a rubber lip so that moisture does not remain on the tiles for a longer period of time. Also wipe out the deeper joints.
If you would like to spare yourself the expense of cleaning joints twice or three times a year, you can protect the tile joints with a special sealant. The nano-agent is applied after thorough cleaning of the joint with a brush. After a short drying time, you can repeat the process and thus achieve a permanent protection against contamination.
Tips for quick readers:
- Tile joints can be maintained with special cleaner and a soft brush
- Even home remedies such as baking soda or whiting are good
- With the brush attachment of the steam cleaner, the joint cleaning becomes child's play
- When using molds, wear gloves and air well
- Cleaning with alcohol or ammonia prevents mold
- Joint pins cover unsightly areas
- Do not wipe the tiles until they are damp, so that no moisture gets in the joints
- By sealing the joints hardly ever stain