Tinker wooden angel - DIY wood angel with template

- Clothespin Angel
- Instructions 1
- Instructions 2
- Natural material Angel
- Branch Angel
- Ast Angel
- Templates for angel wings
- Wooden discs Angel
Angels are pretty typical of the Christmas decoration, whether as a pendant on the Christmas tree or as a candle holder in the window, as typically next to the miner in the Erzgebirge. Making angels yourself is not that difficult and wooden decorations are very beautiful.
Here are some ways to make wooden angels. From the fast and simple variant to the advanced-level angel that requires a bit more tools.
Clothespin Angel
You need:
- Wooden clothespin
- Drills (wood drills or universal drills)
- clamp
- Glue (wood glue or double-sided adhesive tape)
- Wing - template
- obligatory: decoration material
Also from a few old wooden clothespins you can make a nice Christmas angel. It does not matter if you have a whole bunch or just the rest of an old one.
Instructions 1
- with half clothespin -
The economy version of a clip half is not less pretty and even easier to copy.
All you need is a half-peg, a wooden bead, our free template for the wings, glue or a rice object and a little string. If you like you can also decorate the angel with color, pins or glitter.
Step 1:
Either drill a small hole in the top of the clip or glue the wooden bead with hot glue or glue. The pearl becomes the head of the angel and can also be decorated. Through the hole and the pearl, the thread is drawn, with which the angel of wood is then hung on the Christmas tree.

Step 2:
You are looking for the right one among our free templates Stencil - print - cut out - tinker wings and stick behind either to the clip ran or fasten with a rice purpose.

Instructions 2
- From whole clothespin -
But you can also tinker with a whole clothespin and tinker a beautiful angel made of wood from it.
Step 1:
Disassemble the clip into its three separate parts and glue the two halves of the clip back in the wrong direction.
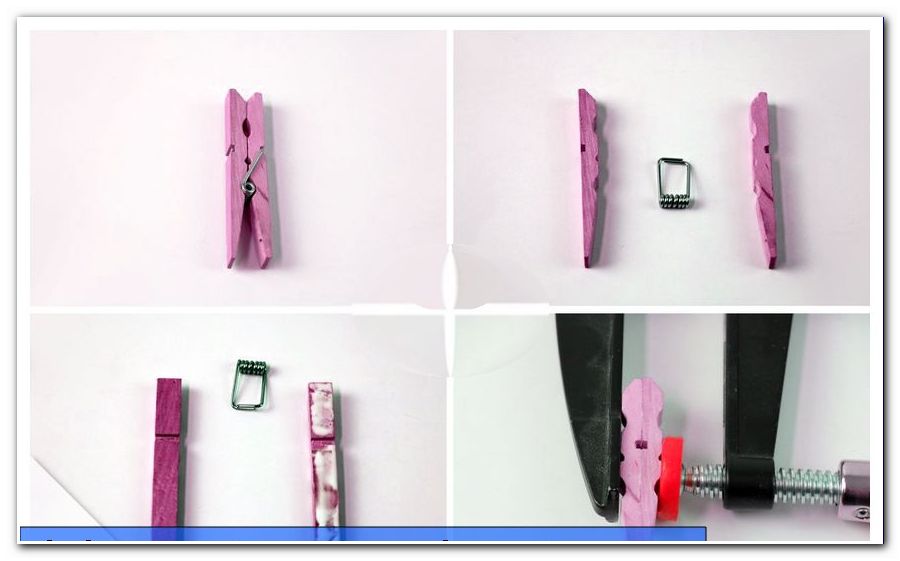
Step 2:
For the sacred glow, use a small drill to drill a hole right through your head. In this opening, the spring is then pushed in from the left and right.
Tip: Bend the two tips of the spring, preferably with a small pair of pliers, something in the direction of spiral. So the ends slip better into the hole.
At the same time, the bill serves as a hanger. You can either thread a thin thread through the spiral or simply hang the clip angel next to your Christmas tree.

Step 3:
Use our free angel wings template to find the right shape for your angel. Print the template, cut it out and glue it to the back of the angel.

Step 4:
If the angel looks too boring now, you can also paint hair, a dress, a face or shoes and decorate the clip angel to your liking.

Natural material Angel
In autumn, branches and branches are very often on the sidewalks. Or after the autumn cut in the garden often branches fall off, which can be used as a great craft material.
Branch Angel

Material:
- branch
- wooden ball
- pipe cleaners
- Thin string
- Our templates for angel wings
Tool:
- Drills (wood drills)
- saw
Step 1:
Find an appealing piece of branch and saw it to the desired length.
Step 2:
Take the pipe cleaners and turn a sacred glow.
Then pass it through the wooden bead.

Tip: If you use the pipe cleaner to thread a thin thread through the wooden bead, you can attach the angel to the Christmas tree later on.
Step 3:
Drill a hole in the branch. Put some glue in the hole and put the bottom end of the pipe cleaner (on which the wooden bead is located) in the opening. You can also first glue the pipe cleaner with the pearl in the branch and then bend the sacred glow. So you can customize the size even more. But pipe cleaner wire is patient and can be adjusted again and again.

Step 4:
While the glue dries, you can choose from our templates, the desired wing template and use it to make the right wing. These are then glued to the back of the angel or other appropriate attached.

Actually, the angel is already finished. You can now decorate the Astengel a bit more.
Ast Angel
If the little branch was too easy or too small, you will find the next step here. Make an angel out of a thick branch, log or even a piece of tree trunk.

Material:
- Branch or log
- Ball (Styrofoam)
- Shashlik skewer or long nail
- Small boards
- wood glue
- Screw or nail
- Our template for angel wings
Tool
- saw
- Drills (wood drills)
Step 1:
Whether you have chosen a log or a thick branch, the first thing you have to do is make sure your object stands straight. If the base is already level and the workpiece is free of wobbling, you can proceed to step 2.

Either saw, plane or grind your feet straight from the piece of wood so that it can stand straight and without tilting. You can also attach a base plate to the foot as a pedestal. This also increases the bearing surface and so the angel gets a secure stand later.
Step 2:
Drill a hole in the top end of the wood, here comes the "neck" that holds the head later. Depending on the size of your project, a simple kebab skewer may be enough, or a thick nail, broomstick or iron bar may be needed - the hole must be big and deep. In our project, a longer wooden spit is enough, because the angel's head consists of a light polystyrene ball.

Step 3:
Choose from our free templates the most attractive design and the desired size, print it out and use the stencil to make the cardboard, cardboard or plywood wings.

Depending on the size and weight of the wings, these are now attached to the back of the angel (glue, nail or screw).

Step 4:
The ball for the head must still be decorated accordingly or remains quite simple and is then plugged with the connector on the body.
Done is the angel made of wood.

Templates for angel wings
Here are our 4 free Angel Wings PDF templates. All motives are available in 5 different sizes to always find the right wing for his angel.
There are always only one wing, for the matching second wing simply turn the stencil.
- 1st template
- 2. Template
- 3. Template
- 4. Template
But you can also paint our template, put a colorful sticker on it or use a stencil to make a sheet from an old magazine or book (please think well before that !!!).
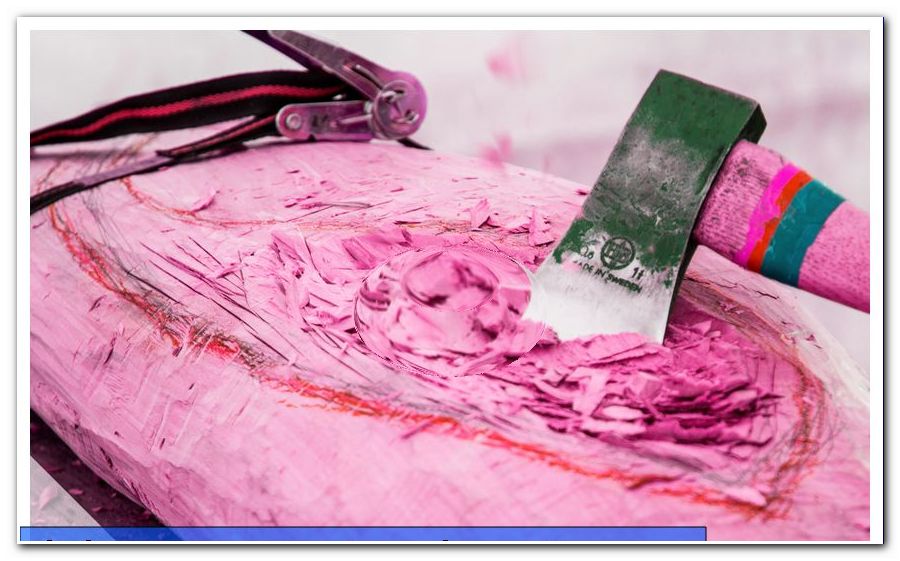
Wooden discs Angel
If you like it a bit more rustic and abstract, you can also make a wooden angel (or half) yourself.

You need:
- Holzscheibe
- Nails or screws
- Saw (table saw, embroidery saw, foxtail or ...)
- pencil
- Ruler, protractor
- appropriate occupational safety equipment
"Many roads lead to Rome."
We recommend the instructions first of all to read through and not parallel to build, because there are different ways to make his personal angel made of wood.
Step 1:
At least make a big sketch on the wooden disc to know where to lead your way. We halved a large slice of wood here (creating an angel with "thinner" wings - see step 4) and dividing the slice by about half. Thus, on the one hand, the angel body with head and from the other part with the rounding then the wings.

Step 2:
The body part is now cut off at the top and bottom at right angles, so that later nothing wobbles and the angel is stable. Then the head is drawn and sawed off a square piece, which is the angel's head.

Step 3:
You could now take the semicircular part and fix it at the back of the body (with the curve downwards), maybe saw a few notches in the rounding to indicate feathers. But we have decided on a different path. After stopping the wing (and a small attempt to fail) was sawed off at about 1/3 of the length a piece in the 45 degree angle.

Step 4:
Depending on how strong the disc is wood, there are several ways to attach the wings. For our angel we decided to fix the wings on the back. So that the wings do not become too heavy and the figure does not always threaten to tip over, we halve the wing again lengthwise.
We show you another way with the alternative.
Step 5:
Place the wings according to your taste on the back of the angel, tighten it with a screw clamp or similar. firmly and drill two to three holes for fixing.

Tip: As a result, the workpiece does not later run the risk of tearing or even splitting when screwing or nailing.
Step 6:
Take the angel's body and head and mark each one in the middle. Here you drill a hole where the neck (nail or wooden skewer) is inserted or glued.

Step 7:
Now only everything has to be built together. Fasten the wings to the angel's back and rest his head on his shoulders. If the wood angel looks wobbly or threatens to tip, put and secure the angel on a wooden board or a pedestal so that he does not become the "fallen angel".

Alternative:
You can also saw an angel out of a whole wooden disc. Here the body-head part is sawn from the middle and the semicircular parts left and right are available as wings. However, these wings are quite thick and are not really suitable for attachment to the back. Better you can screw these on the sides of the body or nail down. The figure is then in balance again and does not threaten to tilt backwards.
But if you would rather have something tender, here is a folding guide for angels: folding origami angels