Crochet egg warmer - free DIY tutorial

- material
- Instructions: egg warmer with pompom
- Crochet your hat
- Crochet pompom
- Instructions: Egg-warmer striped cap
- Instructions: Egg-warmer headscarf
Such a breakfast brunch on the beautifully laid table is a fine thing! Of course, a delicious breakfast egg should not be missing. And so that the egg does not cool down until it is consumed, we put a warm hat on it - of course even crocheted! So get crochet hook and wool out of the closet - we'll show you how to crochet egg warmer.
The crochet trend spreads and that in all areas of our everyday life. So you can decorate the breakfast table with small crochet pieces - crocheted egg warmer are practical and incredibly cute. In the following, we will explain step by step how to crochet three different egg warmer. Have fun!
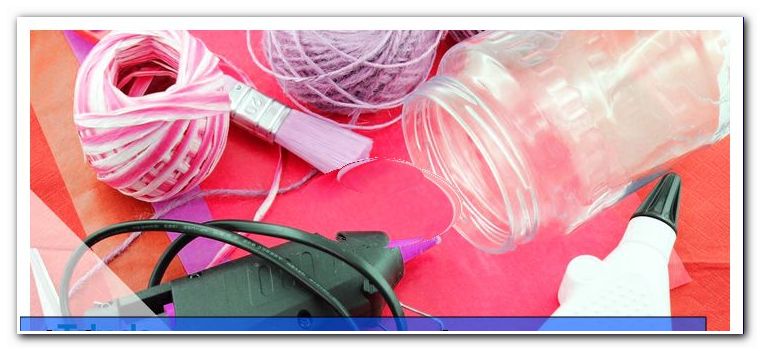
material
Cotton is best for the egg warmers. Fantastic yarns are for example:
- Sachenmayr, Catania, 125 m / 50 grams
- Lang Yarns, Quattro, 120 m / 50 grams
Of course, other cotton yarns that have approximately the same length of run, can be used.
The egg warmers in this manual are crocheted with a crochet hook No. 3.0!
Instructions: egg warmer with pompom
Like a big beanie hat, the egg-warming beanie is crocheted from top to bottom in rounds. Each round begins with the appropriate number of transition air making and ends with a chain stitch. The transitional air meshes are ignored during mesh counting.
Crochet your hat
Crochet 1: 8 sts in a string and finish with a slit stitch
Round 2: Crochet the crochet stitches and double the number of stitches (prick twice in each round 1) = 16 stitches

Round 3: Crochet the chopsticks and crochet every other piece twice = 24 stitches 
Round 4: Crochet crochet stitches and crochet every fourth stitch = 30 stitches
Now, the first careful try on the egg. If the diameter of the egg warmer is still too small, crochet another round with doubling.
Crochet the remaining rounds with the final number of stitches (30 stitches) without further doubling: one each  Chopsticks round and then a round of tight stitches.
from round 5: Crochet one round of chopsticks alternately and crochet the next single crochet
Round 11: Crochet chopsticks
To finish off the egg-warming beanie, crochet a little cuff with alternating relief sticks:
When changing the colors, bind off the warp stitch of the last normal row of sticks with the new color.

In the round you will crochet a relief stick from the front and a relief stick from the back.
To do this, place the working thread around the needle (as with a normal chopstick), insert the needle from the front through the chopstick of the preliminary round, retrieve the thread and then pull it through the chopstick. Now there are 3 threads on the needle.
 Finish the chopsticks as usual by pulling the thread through the first two loops and then through the remaining two loops. The result is a relief stick that wraps around the stick of the preliminary round from the front.

For the next stick like the one at the beginning lay the working thread around the needle and this time stick the needle from behind through the stick of the preliminary round. Again, get the thread and the stick - just like - finish. The result is a relief stick that wraps around the stick of the preliminary round from behind.

 A total of 4 rounds are crocheted with relief sticks.
Crochet pompom
The cap part is now finished and it follows the mini pompom:
The bobble is quickly crocheted in a few spiral turns. Crochet 6 stitches into a string and close this round 1 with a slit stitch. If necessary, mark the beginning of the round with a marking thread.
Round 2: Crochet 2 sts in each stitch of the initial round, doubling the number of stitches = 12 stitches
Round 3: Crochet the 12 fixed stitches without any increase and put the already formed coping over the finger so that the nicer side is on the outside.
Round 4: crochet crochet stitches and cut off 2 stitches together

Now the mini-pompom is ready and can be sewn on the egg-warming beanie. The initial thread can be curled up and simply inserted into the pompom as filling material.
Sew on the pompom and sew up all the remaining threads - voila - a cool egg warmer is ready.

Instructions: Egg-warmer striped cap
Similar to the beanie, of course, a sporty striped hat can also be crocheted as an egg warmer. The cap is made of strong stitches
Round 1: Crochet 8 sts in a string and finish with a slit stitch
Round 2: double the number of stitches (prick twice in each round 1) = 16 fixed stitches - change the color now and crochet the warp with the new color

Round 3: crochet every other stitch twice = 24 stitches
 Round 4: Crochet every fourth square stitch = 30 stitches - change color again
from round 5 onwards, crochet 30 sts each time and change the color every 2 rounds (crochet a total of 12 rows of stitches for the Egg-Warmer Striped Hat).
Round 13: 3 * Crochet the crochet stitches, make a stitch *, repeat the * sequence until the round is completed.

Instructions: Egg-warmer headscarf
All good things come in threes and therefore there is also a third tutorial for a warming egg headgear. The headscarf is similar to the striped cap:
Crochet 1: 6 sts in a string and finish with a slit stitch
Round 2: double the number of stitches (prick twice in each round 1) = 12 stitches
Round 3: Crochet every other stitch twice = 18 stitches
Round 4: Crochet every third piece of stitch twice = 24 stitches
Round 5: Crochet every fourth stitch = 30 stitches
Round 5 + Round 6: Crochet 30 solid loops each without doubling
The "cloth cover" is ready and it follows the part with the ties for the headscarf. It will continue to work in rows.

Row 7: Crochet 10 stitches. Crochet back to the cap along the chain of 9 stitches. Crochet 28 stitches along the edge of the cap (like round 5 + round 6), but do not finish this round but finish with 10 stitches. Crochet 9 stitches back to the cap along this second binding tape. Finish with a chain stitch at the edge of the cap and then cut off the thread (leave about 30 cm thread, so that the binding tapes will be wrapped).

Row 8: Reseal at the outer end of the first binding tape. Crochet the first set of stitches with double thread (do not loosen the thread end) and crochet along the tie, crocheting 18 stitches around the cap, then the outside of the second tie. Cut the thread. Now wrap the two binding tapes on the cap with the previously reserved thread rest. Sew all threads well.

If you are a knit lover, you can also knit egg warmer. Of course we also have instructions for it: //www.zhonyingli.com/eierwaermer-stricken/
Crochet egg warmer - Quick guide:
1. Crochet 6 - 8 stitches in a string
2. Crochet in rounds and increase the number of stitches to approx. 30 in the next rounds.
3. Continue crocheting in rounds with no further increases until a cap, hat, or beanie is formed
4. If necessary, apply cuffs, pompons, ties or other decorations