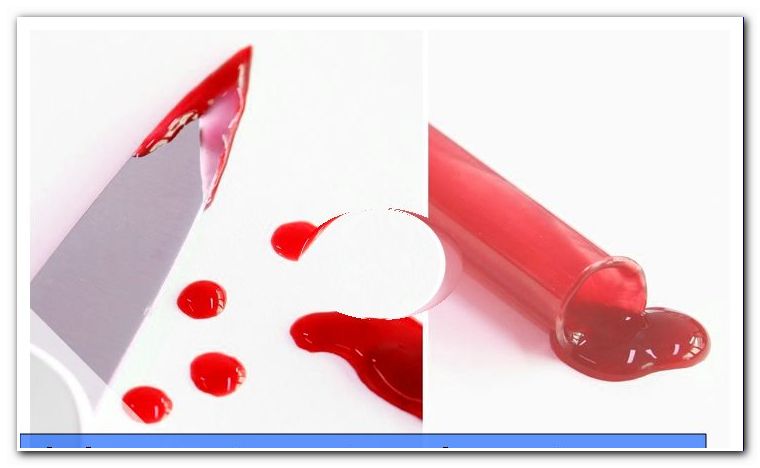
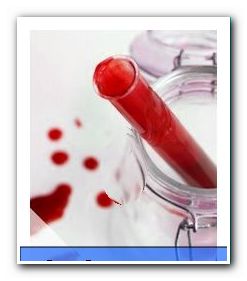
DIY: make fake blood yourself - made in 10 minutes

- Why fake blood "> DIY guide
- 1st recipe: make vegetable blood
- 2nd recipe: make dye blood
- Apply artificial blood
- Removal of fake blood
You want to make your next Halloween party extra scary or plan to make a horror movie? Perhaps you are also an activist who wants to demonstrate vividly against human and / or animal cruelty. In each case artificial blood is an important, because enormously expressive, element. At least if it looks deceptively similar to real blood. In our guide you will learn how to make artificial blood with little effort, but all the more authentic effect!
Of course, there are finished products in the trade with fake blood, which - depending on the quality - sometimes cheaper, sometimes expensive. However, own initiative does not cost you much money or time. And to be honest, is not it a wonderfully creative thing to make artificial blood yourself? We want to inform you comprehensively about this special work. For the purpose we have divided our detailed DIY guide into a small short and a big long chapter: the theoretical considerations and the practical implementation. Thus, we not only provide you with clear instructions for the production and proper use of artificial blood, but also give you tips and inspirations along the way, which show you what the imitated blood needs and what you can do with it. Join us on our exciting journey through the world of artistic bloodshed!
There are many different ways to make fake blood yourself. We have chosen two common and very easy to implement recipes: vegetable and dye blood. Before we give you the detailed instructions, you will receive some interesting theoretical information on artificial blood.
Why artificial blood?
What is the use of artificial blood in the private or "semi-private" sector? The most essential uses are the following:
- Halloween or other scary party
- own horror movie shoot or private theater show
- special activist demonstration
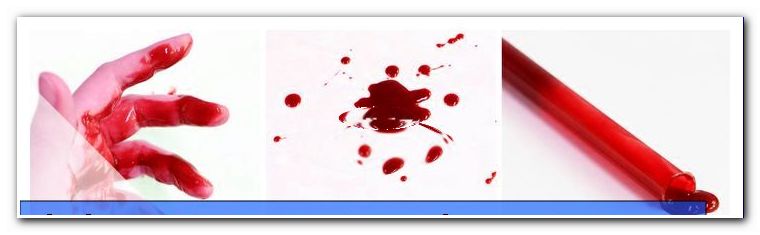
The artificial blood that can be produced according to our recipes can "decorate" different things. Some examples:
- People's faces and body
- Props like knives, traps and the like
- Furs and other substances
- Soil (blood pools etc.)
Tip: Blood is undoubtedly torture and torment. Since the artificial variant is no exception. So be very mindful with your homemade red liquid and think well where and how you want to use it. Too much of a good thing can either shock viewers or passersby so much that they have nothing to do with the event and want to retreat immediately, or act so ridiculous on them that their message may no longer be taken seriously. So be sure to make a meaningful use of your fake blood.
DIY instructions
Creating artificial blood yourself - two simple recipes
Now it's getting practical: We'll show you step by step how to create fake blood on your own - without having to dig deep into your pocket or completely restructure your schedule. Our two recipes are quick and easy. Find out what distinguishes vegetable and dye blood, what the different variants are mainly suitable for, what ingredients you need for production and how exactly this works!
 1st recipe: make vegetable blood
 1st recipe: make vegetable blood
 What distinguishes vegetable blood:
- Confusingly similar to real blood
- Low cost
- Durable for about two weeks
When the recipe is particularly suitable:
- To create lush quantities
- To make the blood look as convincing as possible
- To save money during production
What you need for vegetable blood:
- Beetroot or cherry juice
- food starch
- pot
- Whisk or other stirring utensil
- Food coloring, orange juice or soy sauce (optional, for refinement)
How to do it:
Step 1: Add the selected juice - beetroot or cherry - together with the cornstarch in a sufficiently large pot and mix the two ingredients well.
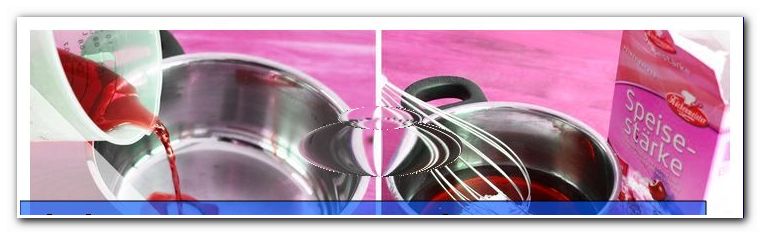
Tip: For each liter of juice, use about three tablespoons cornstarch. Depending on whether you want to make the blood thicker or thinner, add a little more or less cornflour. The only important thing is to stir in the starch before heating the vegetable blood. Only then can the juice absorb the strength properly and you do not have to be upset about just as unnecessary as annoying lumps.
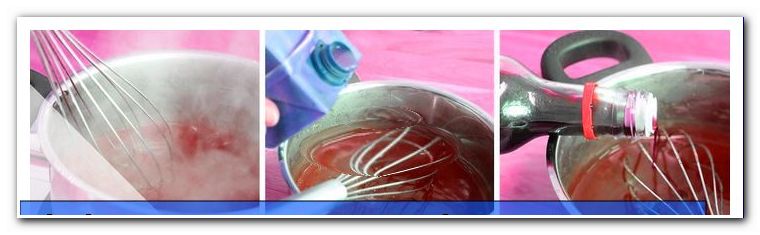
Step 2: Heat the mixture until it boils. Keep stirring vigorously.
Step 3: If you are not completely satisfied with the color, just help with orange juice or soy sauce. The best way to succeed is the red color with food coloring. Add a touch of the desired ingredient and heat it again briefly.
Step 4: Let the vegetable blood cool down.
Tip: If the consistency of the blood is still too thin for you, grab again cornflour and pour a little of it into your mixture, then boil it again.
Note: Do not add extra cornflour during cooking. Otherwise, lumps are guaranteed to form.
2nd recipe: make dye blood
What distinguishes dye blood:
a) Tendency viscous
b) A bit more expensive and time consuming than the vegetable variety
c) Stable for about three days
When the recipe is particularly suitable :
a) To make-up
b) Suitable for smaller quantities, since the amount of food color needs to spend a little more money.
What you need for dye blood:
a) 30 grams of instant flour or non-stick wheat flour
b) 1 liter of water
c) Food colors red, blue, yellow
d) pot
e) Whisk or other stirring utensil
How to make it:
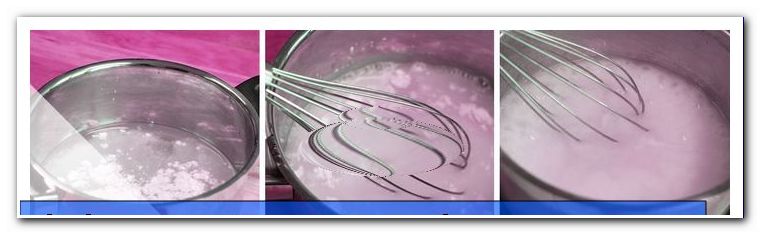
Step 1: Put the flour and water in a pot and mix the two ingredients well with the aid of a whisk or similar stirring utensil.
Step 2: Once the flour is well mixed, bring the whole thing to a boil.
Step 3: Allow the mix to simmer on a medium flame until approximately half of the liquid has evaporated. This can take 45 minutes.
Step 4: Now the mixture should cool open overnight to obtain a viscous consistency. Do not cover it during this time. If you are in a hurry, you can use the mixture shortly after it cools down - but then the blood is more fluid.
Step 5: Fill the mix into a bottle and then mix in the food colors.
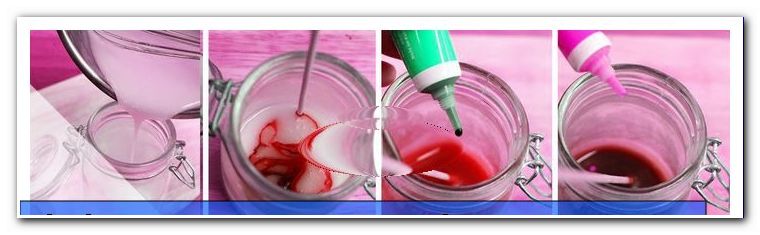
Tip: Depending on the manufacturer of the food colors, the best mixing ratio varies to obtain authentic blood. We recommend that you combine a tube of red with a splash of blue and very little yellow. Observe the coloring during the mixing process and add one or more of the colors if necessary.
Step 6: Screw the lid shut and shake the bottle vigorously until everything is spread out in it and you see a homogeneous whole.
Supplementary note to the presented recipes:
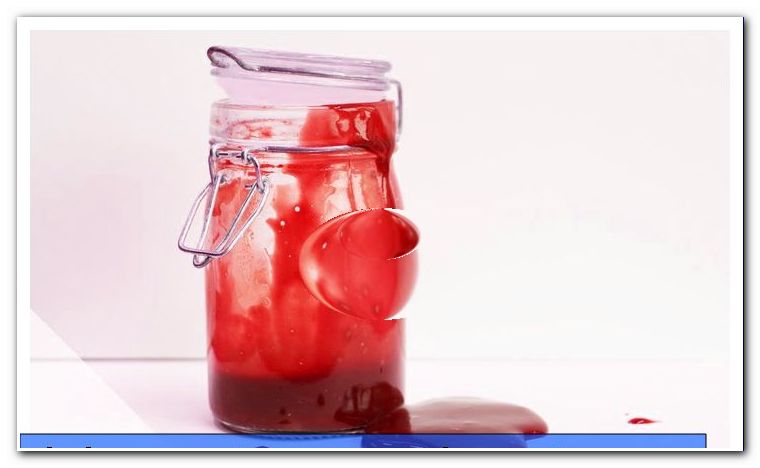
As you can see from the recipes, there is artificial blood from food. That is, it gets bad over time - just like normal food. For this reason, it is advisable to prepare the red liquid as close as possible before the actual use (our shelf life information for the recipes themselves - two weeks for the vegetable, three days for the food color variant - are only indicative). Especially when eaten or used around the mouth. Keep the blood short and cool. A synthetic blood smelling of compost attracts attention, but not necessarily positively justified.
Apply artificial blood
Now that the fake blood is ready and ready to use, the question naturally arises of how best to apply it to the people or props that it is supposed to "decorate". Below we present the most effective methods!
1st method: With a brush
With a brush, the artificial blood can be applied selectively, for example on the face, when bloody noses and lips or other wounds and scars are to be made up. In addition, the utensil is suitable for creatively presenting bloody tears, throat cuts and the like. It is best to use very thick blood for such detailed work. It does not go so fast and helps to avoid having to constantly add fake blood. In other words: with thick blood you achieve the most beautiful effect with the least amount of effort.
2nd method: with the sponge
If the whole body of a person with artificial blood to be colored, it is advisable to take a sponge to the hand and apply the liquid with this evenly. Depending on the desired color intensity, choose thick or thin blood. The latter looks paler, while the viscous version usually comes along extremely powerful.
Tip: Conventional cleaning sponges for dishes or shower sponges are ideal for this application method.
3. Method: With the spray bottle
If you want to show someone or something smeared with blood, it is important to evenly distribute and quickly dry the blood. "> Attention: For this method, use low-viscosity fake blood. After use, add water to the tank of the bottle and spray until all traces of artificial blood have been removed If you do not follow these instructions, it may happen that you glue your plant humidifier and you have to buy a new one - money not a drama, but an easily avoidable extra strain.
Method 4: with the watering can or a bucket
Anyone who wants to stage huge pools of blood simply distributes the artificial blood with watering cans and / or buckets.
Removal of fake blood
Eventually your bloody event will be over. Everything is smeared red: from the contributors to the props to - private or public - ground. Of course, the whole thing wants to be removed as well. But how? We have helpful answers for you:
a) Artificial blood that is still on the skin is usually dry at the end of each action (unless you have applied it generously). So you can put on clothes without having to be afraid that the dried blood remains stains. If you go home after a party, theater performance, or other public activity, you should get involved if possible to avoid frightening the people you meet along the way.
b) The vegetable art blood is very easy to wash out. Only with white fabrics, it sometimes happens that a subtle grayish glow lingers - especially when the blood was applied directly to the respective substance. In the blood variant with food coloring there is no guarantee that it can be washed out so easily. If you have used the liquid on rather dark fabrics, however, problems should be avoided.
c) Logically, you also have to remove fake blood that you have spread on the floor. From the outset, think about the quickest way to get the necessary cleaning agents - especially water and scrubbers - after the event. If the event happens at your home, everything is probably at hand. Only in foreign blood spectacles you should worry more, because: If you leave a public floor with fake blood, it may happen that you have to pay for absolutely excessive cleaning costs. So you better clean yourself.
d) Any blood-smeared items should first be packed in a bag and cleaned at home.
Making fake blood yourself is anything but difficult or complicated in any way. With the right ingredients, some of which you probably already have at home and can otherwise buy cheap in supermarkets, the production succeeds quickly and easily. No matter which recipe you decide on in the end: With the artificial vegetable or dye blood that comes very close to the real elixir of life, you ensure a real eye-catcher at every suitable event!
Tips for quick readers
Vegetable blood:
- Mix beetroot or cherry juice with cornstarch
- Heat the mixture until it boils, stirring again and again
- Add orange juice or soy sauce for color nuances
- In case of strong liquid add more cornstarch, heat again
- Allow finished vegetable blood to cool
Dye blood:
- Mix instant flour and water in a saucepan and bring to a boil
- Simmer on a medium flame until half of the liquid has evaporated
- Allow mixture to cool open overnight
- Fill mix into a bottle and mix in food colors
- Screw in the lid and shake vigorously
More tips:
- Keep artificial blood as short as possible and always cool
- Apply with a brush, sponge, spray bottle, watering can or bucket
- Vegetable blood is usually better washable than dye blood
- For scary parties, horror movies, demonstrations and much more
- In-house production in the normal case cheaper than purchase finished Kunstbluts