Old window frames: cleaning, painting and sealing

- Clean window frame
- Step 1 - Dusting
- Step 2 - Light soiling
- Step 3 - Heavy pollution
- Seal window frame
- Step 1 - Removal of silicone
- Step 2 - Preparations
- Step 3 - Apply silicone
- Step 4 - Remove
- Swipe window frame
- Paint wooden window frame
- grind
- prime
- To brush
- Paint plastic window frame
- preparations
- grind
- prime
- To brush
- Paint aluminum windows
- preparations
- grind
- prime
- To brush
- Paint wooden window frame
Windows and especially old window frames are exposed daily to the weather. Whether rain, snow, sun or wind, the frame must defy all weather conditions. But he can not do this permanently without help and renewal of his resilience. Thus, it is important once a year to take the time and look after his windows, so as to experience no nasty surprises.
Whether wind, heat, cold or wet, the frame of a window is claimed every second of the year. If the color gets worse, especially with wooden windows, everyone gets the idea to do something for his window frames, but otherwise it looks different. To prevent leaks and rottenness of old window frames, an annual, thorough maintenance is needed. Everything necessary for this explains this DIY.
Clean window frame
List of materials:
- Bucket of water and detergent (best fit)
- microfiber cloths
- paper towels
- possibly chamois leather
- fine broom
- suitable cleaner for the material of the frame suitable cleaner
When cleaning window frames, the material of the frame must first of all be checked. By default, there are wood, aluminum and plastic windows. Not every material can handle the same cleaners. What helps with one material can cause great damage to another material!
Therefore applies to all materials:
- Regular cleaning is better than once a year, so the dirt can not get stuck. The dirt can be removed with less aggressive means.
- Use the correct cleaning utensils (chamois, microfibre cloths, etc.).
- First, always use gentle means to remove the dirt.
Step 1 - Dusting
Even when dusting can be done a lot wrong. Plastic window frames must never be cleaned with dry cloths. Cleaning with dry cloths can quickly cause dull spots and scratches. For rough dusting, a fine broom is used for aluminum and wooden windows. It is better to use a microfibre cloth or kitchen paper with water and very little detergent. For the elimination of dirt in small gaps and grooves, wet cotton swabs are best.
Step 2 - Light soiling
For light soiling on wood, the first choice is always water and detergent. This is not aggressive and tolerates the surface well. 
Aluminum frames are very sensitive to cleaners and can also be cleaned with detergent, but only very little washing-up liquid should be used. Better are special aluminum cleaners here.
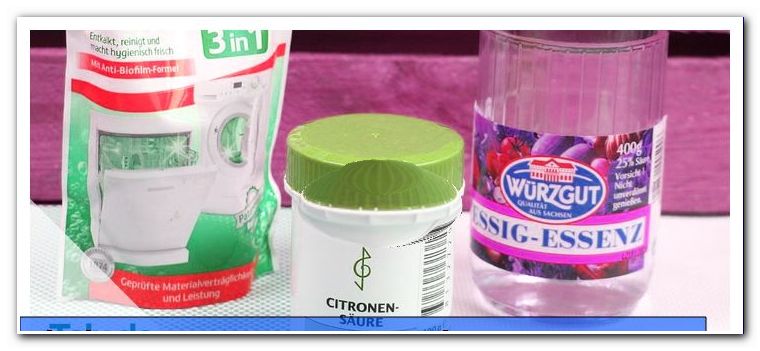
Plastic is very susceptible to dirt and takes it more heavily. However, these frames can tolerate more aggressive cleaners such as citric acid and ceran field cleaner.
Step 3 - Heavy pollution
For heavy soiling, you can also use stronger cleaners. However, these should be used with care and caution.
Solid stains on wood are difficult to remove and should be removed by applying detergent several times. For strongly seated discoloration, only the sanding and restoring of the frame will help in an emergency. As a tip, the fingernail trick is to call. Small impurities can be scraped off well with the fingernail. However, care should be taken that the pressure on the wood is not too great, so as not to damage it.
Aggressive dirt on aluminum frames can be removed with aluminum wheel rim cleaner for the car.
Plastic frames can be cleaned from dirt in aggressive dirt with special plastic scavengers for dashboards. Oven spray is also suitable for removal.
Important: Chlorine bleach, as well as scouring milk are not suitable for cleaning window frames, scratching and slackening the frame would be the result!
Seal window frame
List of materials:
- external silicone
- cutter
- silicone
- masking tape
- Detergent (best fit)
- spray bottle
- Silikonabzieher
- Bowl of dishwashing liquid
- kitchen towels
Window frames inherently have a major vulnerability. The place where the window reveals and the window frame meet. By default, this exterior silicone is used, which is injected into the gap between the frame and masonry. The silicone seals this area years against wind and weather, but ages silicone too. The result is cracks in the silicone. The silicone can no longer seal the gap, which in turn allows water to get into the masonry, which is detrimental to the building fabric. The second harmful point is a cold bridge. Cold air reaches into the masonry and thus ensures increased heating consumption. Thus, the annual control of the silicone gasket is important. If there are signs of aging, an immediate action is necessary!
Step 1 - Removal of silicone
First of all it is necessary to remove all old silicone. With the aid of a cutter, the silicone seals are cut out roughly on all sides. It is important to work with a sharp blade and to take your time at work. Once slipped off with the cutter, there are unsightly scratches on wooden and plastic frames, which are difficult to make unrecognizable. 
Once the rough work is done, the last traces of the silicone on the frame and the wall have to be removed. Especially for this there are silicone removers in every specialized trade and DIY store.
Especially the removal of the masonry is a time-consuming task, but necessary, because silicone does not adhere to silicone and would crack again after a short time. The work would have been in vain.
Once the silicone is removed, the edge of the frame is cleaned again with silicone remover for safety. Then everything is washed off again with water and detergent. In a further step, rinse with clean water. Drying is a prerequisite for the next step.
Important: Not every silicone remover is suitable for every surface!
Step 2 - Preparations
In order to get a visually perfect joint, it is necessary to make preparations on both sides of the joint. The crepe is glued to the window at a distance of about three to five millimeters from the edge of the frame, this is done around the entire frame. Make sure that the masking tape fits well and the corners are properly worked out. The same is done on the outside wall of the house. Since this is usually rough, a particularly careful work is necessary here, as well as a special control of the masking tape.

Step 3 - Apply silicone
In the next step, a sufficient amount of silicone is injected into the joint in one go. Care must be taken that enough silicone gets into the joint.
Tip: Better to apply a little too much silicone than too little. Excess material is wiped away. Applying once again is difficult and looks ugly, as often edges and lugs can arise.
Step 4 - Remove
If the silicone is in the joint, it is wetted with a spray bottle, in which there is water with a little detergent, the joint.
Some make use of a finger to draw, usually the index or middle finger, because they can better match the angle and the pressure on the silicone with her finger. Others, however, use a plastic silicone puller. 
Depending on what you take, either a finger or the silicone puller is then wetted with a water and detergent mixture. The tool will now begin to pull the joint to create a uniform silicone joint. It is important to always apply the same angle and pressure to the silicone, so that the joint becomes even. Around the silicone is now removed. Excess material is wiped in a kitchen towel. After each wipe, the fingers or silicone extractor must be cleaned and rewetted.
If you are satisfied with your work, the masking tape is carefully pulled off.
Swipe window frame
When painting a window frame, there is a lot to consider, so that the result can be seen. Take your time in the first place.
Paint wooden window frame
Wooden window frames are the easiest to paint. In contrast to aluminum or plastic window frames, wooden frames are easier to process. As with other frames, the first step is to thoroughly clean the frame.
grind
In the following step, the surface of the wood is freed from the old color and roughened. This sandpaper is used with a 240 grit. The window is sanded evenly to achieve a uniform sanding pattern.

In the following step, the dust, preferably with water and detergent, and a sponge must be removed.
prime
Before the glaze can be applied, a primer is needed. This ensures a firm hold of the paint on the ground. Different from manufacturer to manufacturer different layers of the primer may be necessary. Between the layers, it is important to sand and clean the frame. It is important to ensure that there is a sufficiently long drying time between the priming processes, which depends on the weather.
To brush
If the last primer layer applied, sanded and cleaned, the actual color layer can be applied. With a suitable sized brush, the glaze is applied thinly, it is always painted in the longitudinal direction. Make sure that no unsightly color noses are caused by too much color at one point. Always paint the brush completely before adding more paint with the brush. 
Once the paint has dried, sand the paint again and apply another coat of paint after cleaning.
Paint plastic window frame
preparations
Plastic windows are painted differently indoors and outdoors. Inside, water-based plastic paint is used. These are significantly poorer in toxins compared to synthetic resin paints. In the outdoor sector, on the other hand, chemicals-based coatings are used, as these have a higher resistance to weathering.
Before the actual work begins, it is imperative to carry out a thorough pre-cleaning of the frame. For this warm water with detergent should be used. If necessary, heavy soiling can be removed with alcoholic solutions. In addition, a masking of all not be painted window parts with Malerkrepp is advisable.
Important: Existing paint must be completely removed by sanding.
grind
In the next step, the surface of the costume window is roughened first. For this sandpaper with a 240 grit or finer is used. The window is ground evenly. Care should be taken to evenly grind movement to get a consistent sanding pattern.

After work, the dust must be removed, preferably with water and detergent, and a sponge.
prime
In the third step, the primer will be applied to the plastic. This primer is a watery, milky solution that bonds firmly to the plastic and allows the paint to get a firm grip on the ground.
Depending on the manufacturer, one or more primer layers must be applied. After each coat a sufficiently long drying time has to be ensured, which can vary in length depending on humidity and temperature. If a layer has dried, sanding is required, as well as thorough cleaning with water, detergent and a sponge.
To brush
Once the primer has dried and sanded again, as well as cleaned, it is now possible to paint the frame. The paint is carefully applied to the primer. Use a suitable sized brush, alternatively a paint roller. It is always stroked in the longitudinal direction. Make sure to paint thinly to avoid unsightly paint noses.
A second coat or sealer perfects the paint and provides a long-lasting weather protection. Make sure that paint and primer match and if possible from the same manufacturer. Otherwise, there is a possibility that the primer repels the paint.
Paint aluminum windows
preparations
Painting aluminum window frames is a complicated task. Problem is that the color adheres very poorly to the surface. The reason for this is that aluminum forms an oxide layer that does not adhere paints and varnishes. Consequently, the oxide layer must first be removed.
However, before starting work, it is important to thoroughly clean the frame, removing any dirt. In addition, a masking of all not to painting window parts with Malerkrepp is advisable. 
grind
The next step is to sand the frame thoroughly with 240 grit paper or fine sandpaper. Always perform the same grinding motion to achieve a consistent sanding pattern. Existing color must be completely removed in this step.
Once sharpened, the frame is thoroughly cleaned and any dust removed.
prime
In order to achieve better adhesion of the paint on the aluminum, 2-component primer (two-component primer), also called adhesion promoter is used. This is an aqueous, in some cases milky-looking liquid that bonds firmly to the surface of the aluminum and allows the paint to find a "firm hold" on the surface.

The frame is evenly thin, preferably with the window removed, painted with the primer. Depending on the manufacturer, one or more coats are needed. Between the paintings sufficiently long drying times are to be considered, which may be different depending on the weather conditions. At low temperatures and high humidity, the drying time is significantly slower than at low humidity and high temperatures. After each drying phase, the primer must be roughened again with sandpaper and the dust removed.
To brush
If the primer has dried out and sanded again, the color can now be applied to the frame. It should be noted that the paint and primer are from the same manufacturer, otherwise it may lead to material incompatibilities and the primer repels the color. Furthermore, care should be taken that the paint is approved for aluminum and outdoor areas.
Depending on the manufacturer, it is advisable to apply a seal after the paint has dried. This is a colorless protective coating which significantly increases the service life and weather protection.
In order to obtain a visually good coat, it is advisable to always paint in the longitudinal direction. The color should be applied thinly, so that no color noses can arise.


